Yin-Yang is one of the most common and understandable symbols of Eastern mythology. White and black, woman and man, good and evil... One cannot exist without the other. Such a philosophical gift can be given for a wedding anniversary, newlyweds or just a loved one. And so that it is always in sight, you can make a beautiful “Yin-Yang” tree from beads with your own hands.
What will you need for this?
- cut beads in white and black, 150 g each;
- thin wire for branches and thicker wire for the trunk;
- pliers;
- brush;
- black and white wool thread;
- plaster stand;
- some white and black paint.
How to do it?
- Cut 60 pieces of thin wire 45 cm long for the branches. Typically, a thickness of about 0.3 mm is suitable for weaving with beads.
- Take one such piece and put 9 black beads on it. At a distance of 8-9 cm from the edge, make a small loop out of them, twisting the ends of the wire together.

We begin weaving tree branches from beads
- Make 6 more loops on the long end of the wire in the same way. The distance between them should be about 1 cm.
- Now you need to fold the wire in half. One loop will be at the top, and connect the others in pairs and twist the wire.

We twist the wire and get a branch of our tree
- To make the branch look more natural, straighten the “leaves” and turn them in different directions around their axis. Raise it a little.
- Make 2 more of these branches. And then connect all 3 blanks into one larger branch.
- The white branch is made in exactly the same way. In total, you will need 10 branches of each color for one tree.

One tree will need at least 10 branches of each color
- Before assembling them all into one whole, you need to wrap each one with a thread of the corresponding color. Do this as tightly as possible so that the wire does not show through.
- Now you can start assembling. Tie a second one to one branch just below. On the other side, attach the third one in the same way. And between them place a fourth one.
- Then weave 3 more branches a little lower in the circle. This will be the second row of branches. And in the third row, add the remaining 3 branches one at a time.
- To make the tree trunk more durable, secure a thicker wire with masking tape and wrap it tightly with black thread. The dark part of the wood is ready.

We wrap the tree trunk with masking tape and then with black thread on top
- Now prepare the second white part in the same way. All that remains is to connect them together.

Connecting white and black tree trunks
- You can use any pot as a stand or make it yourself from plaster or alabaster.
- Pour a solution of plaster, water and PVA glue into any plastic container (of course, it is better if it is round). It should be flexible so that it is easier to remove later.
- Plant a “Yin-Yang” tree made of beads in it, hold it a little so that the stand grips. Leave until completely dry for a day.
- At the last stage, paint the wood in the desired colors. In our case, black and white paint. Just apply it with a brush to the trunk, branches and stand. For beauty, you can paint the stand itself in reverse. A white tree can grow from black “earth”, and a black tree from white.
- After the paint has dried, apply clear varnish. This will not only add shine to the finished work, but also extend its life. Once it has dried, the Yin-Yang tree is ready.
However, you should not get hung up on black and white; if you wish, you can make it in your favorite colors. It can be yellow-green or white-mahogany. In addition, by increasing or decreasing the number of branches, you can make the tree itself of different sizes.
What else can be done?
Of course, such a tree will be an excellent interior decoration. But yin-yang beads can be an excellent basis for a whole set of jewelry. Earrings, bracelets and pendants with this symbol look very original and bright. True, not everyone is able to weave an even “Yin-Yang” circle from beads. Unfortunately, the work plan doesn’t always help either.

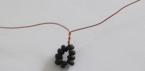
The Yin-Yang circle made of beads can be used for a keychain
The easiest way to do this kind of work is to use mosaic weaving. Weaving the Yin-Yang symbol from beads begins from the center. For the first row, simply cast on 5 beads. Then pull them into a tight ring and tie a knot. In this case, one end should be longer than the other. On the longer one, string one bead at a time, threading the needle through one of the previous row. In the third row you will need to add 2 pieces each, and in the fourth row - one at a time.
Thus, weave the entire circle according to the pattern. The main thing is not to forget in the sixth row to start weaving beads of a different color for small circles. This needs to be done as smoothly as possible. In total, the earrings will require fourteen rows made of mosaic. In the last row, fasten the hook, secure the finished product and hide the ends of the thread. At this point, the Yin-Yang earrings are ready, you can also make a pendant for them. Just use larger beads.
The yin-yang symbol is probably the most popular ancient Chinese symbol. According to Taoist philosophy, it means the unity of opposites: black and white, sun and moon, good and evil, man and woman, who do not exist without each other and together make up our world. If your idea is a yin-yang bead tree, the master class will help you implement it. Such a tree can be a wonderful philosophical gift for a loved one, newlyweds, or for a wedding anniversary.
The composition as a whole will consist of two trees - black and white, the trunks of which are intertwined.
Materials:
- black beads - 150g;
- white beads - 150 g;
- thin and thick wire;
- threads are black and white. Both wool and silk are suitable;
- brush and paints (black and white);
- pliers;
- plaster and a pot for the stand.
How to make a yin-yang tree from beads?
We cut thin wire: 60 pieces of 45 cm each. Wire with a diameter of 0.3 mm is well suited for weaving.
Take one piece and string 9 black beads onto it. We make a small loop out of them by twisting the wire.

In the same way we make 6 more loops at a distance of about 1 cm from each other.

We fold the wire as in the photo: 1 loop at the top and 3 on each side.

To make the branch look more alive, you can turn the leaves in different directions.

Using the same pattern, we weave 3 more of the same branches and combine them into one large one, twisting them together.


For the white branch we use the same beadwork; our yin-yang tree consists of two halves: black and white. For each of them you will need 10 large blanks.


We wrap each branch with threads of a different color, after which we can start collecting trees.

How to weave branches into a tree: Take a branch that will become the central one and wrap another one to its side. We wrap the next one below. There's another one on the side.


We wind another one between this base.

We wrap the next row in a circle below, after it - another one of the same. As a result, the tree should have 3 rows of branches.

Now we need to attach the trunk to our tree. For this we use thick wire. If its thickness is insufficient, the diameter can be increased using masking tape. We wrap the trunk with threads, as we previously did with branches.

We use the same principle to make the second tree.

We weave the trunks together.

We prepare a gypsum solution, pour it into a pre-prepared pot where we installed our tree.

We wait overnight for the plaster to harden well.
We draw a yin-yang symbol on the plaster, coat it with glue and sprinkle with beads. It is convenient to do this in two steps: first glue the white beads, then the black ones.

Ready! We made a beautiful yinyang tree from beads with our own hands.

How else can you use the symbol?
The yin-yang symbol is very often used by craftsmen in needlework and other forms of creativity. If we consider bead weaving, it can be a great idea for a set of earrings, necklace or pendant, bracelet, keychain...
To weave the yin-yang symbol, it is most convenient to use mosaic weaving, starting work from the center of the circle. Photo and video lessons will help you master mosaic weaving. In the first row, 5 beads are collected, pulled together into a tight ring and secured with a knot. One end is longer than the other. Place 1 bead on the long end, leading the needle through 1 of the previous rows. In the third row, 2 beads are added, and in the 3rd row, 1 bead is added.

Thus, the entire product is woven according to the pattern. In the 6th row you need to start weaving circles of the opposite color as carefully and evenly as possible. For earrings you will need 14 rows, in the last of which you need to fasten the earrings. And if you take larger beads, you can also weave a pendant into the set in the same way.
Jewelry and decorative elements made from beads are diverse and varied. Among other airy crafts, yin yang made from beads occupies one of the key places.
Preparing for work
Before starting work, you need to prepare the following items:
- white low, on a separate reel;
- black lows on a separate reel;
- neutral thin wire (for example, silver).
Progress
You need to start weaving by stepping back 10 cm from the edge. You need to make 15 - 17 loops, each made from 8 beads. All loops should have equal distance between each other. Then you need to retreat 10 cm from the last loop and cut the wire. You need to make sure that the number of prepared loops is odd.
Making branches
Having prepared the loops, they begin to assemble the workpiece. You need to start assembling from the central loop. In this case, the wire base is twisted. When the loops are exhausted, the wire must be twisted at a distance of 3 cm. The resulting branches are carefully straightened so that they take a parallel direction relative to each other. The master class shows how to make a yin yang tree from beads quite clearly in the photo.
This process will have to be repeated many times. There should be 70 white branches, and 100 black branches.

Collecting branches
Black branches need to be made somewhat more voluminous and larger than white ones. This is due to the fact that the final result will be the black branch covering the white one. The branches themselves must be secured so that they resemble the shape of a heart.
To make a black blank, you need to use wire that has a diameter of 1.2 mm, such wire must be cut 10 -15 cm. These blanks are wound using a black thread. A total of 5 blanks are attached. The weaving diagram conveys the details of how to create a tree from yin yang beads with detailed accuracy. The white branches are attached to the trunk with a white thread.
Forming a trunk
In order to make a barrel, you need a wire with a diameter of approximately 3.5 mm. It will require 2 fragments of 50 cm each. If you take aluminum wire, you will not be able to achieve a good result. It is better to use copper wire. It is much more stable. If there is no copper wire, you can, of course, take any, but it will have to be strengthened later.
From these fragments a frame is created for future branches. A loop is attached to the end of each branch. The branches are attached to the frame with a very strong thread. You need to start from the top and then go in a spiral. The resulting branches will have considerable weight, so in order for the craft to have a finished look, it will have to be strengthened additionally.

Let's plant the trunk
You can put the tree in any original shape. After installation, the container is filled with gypsum mortar, this makes it possible not to worry that the tree may fall. To fill, gypsum is dissolved to the consistency of liquid sour cream. You need to take your time and wait a long time before removing the tree and stand from the mold.
To make the trunk look more picturesque, it is decorated with a mixture of glue, plaster and water. A solution of a thinner consistency is used for the branches, and a thicker one for the trunk. The lower part of the trunk is thickened by applying a thick solution there. To create a semblance of bark, you need to make slits with a knife through the mixture, which has not yet hardened. The wood is then left to harden.
To place the barrel in the stand, you must insert the tubes into the solution during casting. After the solution hardens, the tubes are pulled out and a yin yang tree made of beads is planted in the resulting hole. If the holes were not made in advance, they can be prepared after the base has hardened. To do this, use a drill or awl. The hole must be made deep, but it must be taken into account that an excessively deep entrance can destroy the stand.
Painting the composition
“For coloring you can use the most ordinary gouache. First, paint the top branch with black paint. Painting is carried out to the place where the branches intersect. Then the white branch zone begins, which, together with the trunk, is painted with white paint. After the initial stage of staining, everything is dried. Then the “birch” principle is used in painting; you will need a hard brush, with which horizontal stripes of black are applied. The roots are painted with black paint, and the bottom part of the stand also needs to be painted.”
If you believe ancient Chinese philosophy, it is believed that everything in our world has two opposite principles - Yin and Yang. If you also want to touch this opposite, then We invite you to weave Yin Yang from beads, black and white wood. This is a classic version of wood with which you can feel ancient wisdom.

 To weave yin yang, you will need a small list of materials that you must prepare. They can be freely purchased at any specialized store:
- thin and thick wire;
- black and white beads;
- similar colors of thread;
- acrylic paint with brush;
- gypsum solution and PVA glue.
Yin yang should consist of many small branches that are combined into more bulky branches. So, let's immediately start weaving black and white elements. Place beads on the wire, and then twist the loops as shown in the photo. Weave in an odd number, and the distance between each workpiece should be from one to two centimeters.


Then we begin to form a branch from the central buttonhole. When you have attached all the elements, twist the wire down another three centimeters. If you want your tree to have a lush crown, you need to make seventy similar branches from white beads and one hundred pieces from black beads with your own hands.


Next, we begin to combine small specimens into one large one. To do this, take a thick base material and tightly wrap your workpieces to it with a thread of a similar color. For one large structure you will need five small branches.
 After this stage of the master class is completed, we move on to the formation of a stable frame. Bend the thick base material into a semicircle shape. And after that make the first buttonhole. Next, twist the wire near the base, and bend the second edge into the larger buttonhole. As a result, a frame should be formed that somewhat resembles a heart.


In the photo you can see how all the other branches are attached. If the frame is not completely stable, you can strengthen it, for example, with a wooden batten. But the yin yang tree is not finished yet. We need to install it in a pre-prepared container. To do this, dilute the plaster with water, pour it into a pot and insert the structure there.


The trunk can also be treated with plaster so that its shape takes on its natural shape. Using a knife, add relief to the bark by making gentle movements with your hand.
 To complete the master class, paint over the convex parts of the trunk with black paint. The decor at the base of the yin yang can be made to suit your taste. These can be pebbles or black and white beads glued in a circle. Or maybe your imagination will suggest other design options. The finished craft will be a pleasant and unusual gift that can be presented for any event. And the main thing is that the product is made with your own hands and with soul. Another weaving option for beginners can be seen in the video that will be in this article.
The most popular ancient Chinese symbol on the planet is the Yin-Yang symbol. According to the philosophy of Taoism, it means the unity of opposites: black and white, sun and moon, good and evil, men and women, who cannot exist without each other and together make up the world. Master Class " DIY Yin-Yang tree made of beads"Very understandable, but at the same time simple, even a beginner can cope with the tasks.
This tree can be a wonderful gift for parents on a wedding anniversary, newlyweds, or just a loved one. The finished product will be a wonderful addition to the interior of your home or office. You will learn how to make such a miracle from our material.
What is the Yin-Yang tree made of:
- black beads - 150 g;
- white beads - 150 g;
- bead wire - 3 coils;
- thick aluminum wire - 1 meter;
- stand mold;
- black and white floss threads - 20 grams each;
- PVA glue;
- paints in white and black shades;
- gypsum;
- tassels.
How to weave twigs. Master class: Yin-Yang tree made of beads.
In this part of the article you can learn how to weave branches for a future tree. First you need to prepare spools of beads.
To make the tree look more realistic and the branches appear airy, it is better to use thin wire of a neutral shade.
Make a similar indent from the outer loop and carefully cut the wire. When you finish working on the loops, you can begin assembling the blank for Yin-Yang. The photo shows that you need to start from the central element. Twist the wire, and after the last two loops, scroll it about 3-4 cm.
To make the tree look more neat, you need to straighten the branches. Next you need to make 70 white and 100 black blanks.
Making flowers and leaves.
If you want the Yin-Yang tree made of beads to become more magnificent and elegant, weaving flowers will make it bloom. First you need to make a black flower. To do this, you need to place eight white beads on the wire and twist the loop two or three turns at the base.
Take 16 black beads, circle them around the white loop and twist at the base. Then again collect eight white beads and twist 2 turns. Circle black beads (15-16 pieces) around the white loop.
Make three more petals in the same way, then connect all the elements and place a bead in the center. Wrap the wire with floral tape. You need to take 7 beads onto the wire and make loops. Next, make several pieces, attach to the flower and secure with floral tape. Also make leaves for the white flower.
In the classic version, black branches cover white branches. Both Yin-Yang branches are arranged in the shape of a heart. How to turn blanks into finished products? First, make blanks for the black branches. Then cut a piece of wire no more than 20 centimeters long and 1.2 millimeters in diameter. Wrap the black blanks using black thread (the white branches are attached to the trunk frame).
Assembling and planting the trunk of the Yin-Yang tree.
In order to assemble a tree, you must perform the following steps:
- Take two wire pieces 45-50 cm long, with a diameter of no more than 3.5 mm.
- Then form a frame of branches, at the end of which make a small loop.
- Use a very strong thread to fasten the branch to the frame.
Start screwing from the top of the head, placing the branches in a “spiral” relationship to the tree trunk. To prevent the wood from deforming, strengthen the frame with a piece of wire.
Attach the trunk of the tree using a loop to a pre-prepared form. Then prepare a gypsum mixture with a creamy consistency. Dry thoroughly and remove the mold.
The final stages of weaving a Yin-Yang tree.
Prepare a mixture of PVA glue, plaster and water. Carefully coat each branch and the bottom of the trunk. Next you need to give the trunk some texture. To do this, you need to cut through the bark on the hardening gypsum-adhesive mixture. Allow the product to harden. Make several holes to place the decor using an awl.