All children love holidays, but what would a New Year's carnival or Halloween be without this? fairy tale character like Baba Yaga? In addition, in order to make Baba Yaga’s outfit, you don’t need a lot of time and money, since it can be made from scrap materials. Let's see how to sew a costume for this fabulous figure.
Features of the outfit and sewing technology
Naturally, Baba Yaga is a bright and colorful character at any holiday. She is always the center of attention, despite her negative qualities. After all, she either helps good heroes find the right path, or, on the contrary, kidnaps the Snow Maiden, and with her the holiday itself. At the witch's like any other character, there are features of your outfit, thanks to which you can identify the classic hero of the fairy tale about Baba Yaga. They are:
- broom;
- hook-shaped nose;
- a scarf on the head, tied in a special way;
- floor-length skirt with patches.
 Others Yaga attributes depend on the specifics of the event and are a space for imagination. This could be a fringed vest or sweater, tousled hair, high socks or striped leg warmers. Since the grandmother wears rags, you can sew a children’s Baba Yaga costume yourself from scrap materials.
A distinctive feature of the character is a disgusting long nose, which can be purchased at a specialized store or made with your own hands using the papier-mâché technique in this way:
- Make a nose out of plasticine in the shape of a medium-width hook.
- Cut or tear thin paper or newspaper into small pieces.
- Coat the plasticine mold with PVA glue.
- Cover your nose tightly and evenly with pieces of paper and let it dry.
- Paint the uniform in flesh color. To do this you need to mix red, yellow and white.
- Make holes on the sides at the base of the nose and thread a thin elastic band. That's it, the nose is ready to wear.
Master class on making clothes for Baba Yaga from the fairy tale “Morozko”
In order to sew a costume like Babushka Yaga from the fairy tale “Morozko”, you need to follow these steps step by step:

To artificially age a suit, you can stain it with paint and sew on patches from pieces of colored material.
Adult and children's costumes
 A modern Baba Yaga costume for adults can be quickly and easily made for the New Year from rags and household items. A dark turtleneck can be used as a shirt, and a skirt pattern can be made from a piece of fabric, sewn in two places at the top and inserted into the waistband. Or buy a skirt at second hand two sizes larger than yours.
This outfit will go well with tights with arrows and holes. You can wear flat shoes on your feet. Comb and fix the hair on your head with hairspray. Do bright makeup and manicure: beautifully line your eyes, paint your lips and paint your nails with red or black varnish. Wear a cone-shaped hat. It can be made from two parts of cardboard: a ring and a cone.
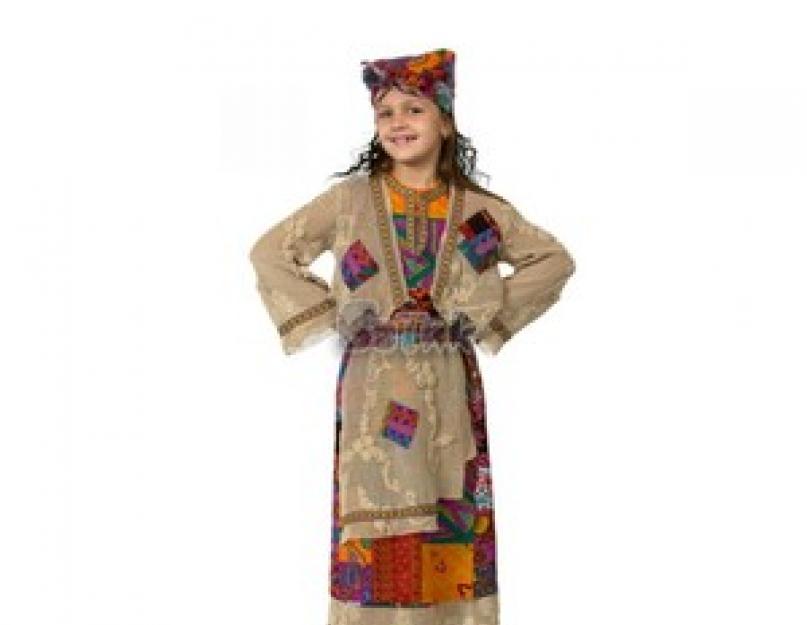
You can sew a beautiful and original outfit for your child. You need to find dark fabric, cut out and cut out two identical halves of the dress: front and back. The length of the product should not be higher than the knees, and the long sleeves should be spacious so that the child can easily put the decoration on over his head. Sew the details and decorate the dress with bright patches.
For the vest, take thick fabric and cut out 3 parts from it: the back and the two front ones - the same size. Sew all the parts together, leaving room for the arms. To add originality to your outfit, you can complement it with beads made from dry rose hips and mushrooms. You can also make an apron with a semicircular pattern.
All that remains is to make the main part- a broom that will complete the look. You can take a ready-made one, or you can make it yourself. Necessary materials:

Tie sticks into a bun and twist it with wire. Trim the sticks evenly from the fastening side. Take a long stick and insert it into the bun. That's all, the Granny-Hedgehog costume for the girl is ready.
Thus, in order to make new Year costume Baba Yaga, there is no need to spend money on an expensive outfit. After all, with a little imagination, you can easily make original and original houses from scrap materials. bright image for yourself or for a doll toy.
Attention, TODAY only!
Elena Galchinskaya
Review - competition suits"Inspiration" individual work
municipal preschool educational institution "Olkhovsky kindergarten" Olkhovsky municipal district of Volgograd region
Review - competition suits"Inspiration"
(individual work).
Baba Yaga costume for adults.
Developed: teacher Galchinskaya E. N.
MDOU "Olkhovsky kindergarten"
With. Olkhovka 2018
Costume« Baba Yaga»
Target:
replenish costume department kindergarten with models and accessories for holidays and leisure activities.
Nomination: costume for adults(individual work).
Material: silk, satin, corduroy, felt, burlap, lace, yarn, chiffon.
Equipment suit:
Wig - 1 piece
Knitted hat - 1 piece
Chiffon headscarf - 1 piece
Hump - 1 piece
Blouse - 1 piece
Beads - 1 piece
Apron-1 piece
Skirt - 1 piece
Jacket-1 piece
Bag-1pc
Bast shoes - 1 piece
Performance technique: sewing, applique, crocheting.
Equipment: laptop with audio file, steering wheel with sign "U", a tub decorated with fly agaric and lizard toys, a ladle,
Relevance.
Fairy tales are a wonderful creation of art. In almost all fairy tales one of the heroes is Baba Yaga. We have known this representative of evil spirits since early childhood! She first appears to us in Russian fairy tales, such How: "Swan geese", “Sister Alyonushka and brother Ivanushka.
In different works, she is either kind, helping people, or evil and cruel, stealing children and even trying to eat them. Woman-Yaga can be both a negative character and a positive one. For example, she steals brother Ivanushka from sister Alyonushka, and drowns Alyonushka herself in a pond, placing a heavy stone on her chest. But he feeds Ivan the Tsarevich, gives him water, soars in the bathhouse, and puts him to bed. Moreover, it instructs the mind and gives a magic ball for the journey.
There is something about this dashing creature that frightens, attracts and attracts at the same time.
Favorite character Woman Yaga appears in kindergarten. We meet her at matinees, performances, and entertainment. At the same time, it is very important that the character looks bright, aesthetically pleasing and beautiful, because children perceive the world with bright colors.
Based on this rule, I designed costume various fabrics , inserts and appliqués. This made him feel festive and brightness.
Suit protection progress:
Woman– Yaga runs in to the sound of a car, holding the steering wheel in her hands.
I am Yagushka, I live on the edge of the forest,
I came for a reason, to show suit it's time.
My the suit is not so good, all in patches is not pretty.
There is no beautiful painting in it, but do not think in vain.
I sewed it with love and cast spells at night.
She cast spells and whispered, and knitted, and weaved,
She wove it with witchcraft and cast spells.
I cooked everything in a tub, fly agarics, trinkets.
Whirlwinds, tornadoes and fires, I added everything here.
I stirred everything with a spoon and fried it a little.
Oh, I was very tired, I dozed off a little.
And when I woke up miraculously, I threw up my hands.
It turned out so beautiful, I came here right away.
I promise to be nice on holiday where the kids are!
Woman-Yaga bows to the jury members and leaves.
Publications on the topic:
 How can we make the streets and roads safe for our children? Of course, tell them about the rules traffic, road.
Summer entertainment "Baba Yaga" Municipal budgetary preschool educational institution “Kindergarten No. 7 “Semitsvetik” Entertainment scenario for older children.
Summer holiday "Poor Baba Yaga" Goal: - consolidate children's knowledge about edible and inedible mushrooms, medicinal plants and their benefits; -develop dexterity, mobility.
 We are making a "Queen Autumn" costume for a children's party. Purpose: to show how to quickly and easily prepare a costume for a matinee in kindergarten.
 We are sewing a medical robe for a doll (this particular master class is for an ordinary doll, but using this pattern it is possible to sew a product for any one.
 Master class from natural materials"Baba Yaga" For this craft we used: 1. Pine and spruce cone, maple seeds, rowan, thin.
New Year's holiday for junior and middle groups “Snow Woman and Baba Yaga Without Santa Claus” 2018 This year, the Ministry of Education of our region issued an order prohibiting the recruitment of new year holidays professional.
Top. The jacket is light (light yellow, light gray, light pink), but not white. The sleeves are long and fringed. You can simply tear the fabric at the bottom of the sleeves or specially cut it. The method depends on the type of fabric: if you cut thin knitwear into noodles, it will twist itself into tubes (Fig. 1). One or both sleeves may have patches sewn on the arms over the edge with threads of a contrasting color.
sleeveless shirt- from burlap or other similar fabric. There are holes made here and there, the lower edge is uneven (Fig. 2 on p. 37). If the sleeveless vest is specially sewn, then there is no need to hem the edges, but on the contrary, they can be “ruffled.” The sleeveless vest is fastened with a large button. You can take a coat button and make it out of cardboard or a flat plastic cap from a bottle or jar. Holes in such a button can be easily made using a soldering iron or a knitting needle heated over a fire.
Bottom. A skirt made of chintz, satin, fine wool, etc. A skirt made of a rather dark fabric in small drawing(small rare flowers, small checkered, striped) or plain. The skirt is elastic, straight, not very wide. The apron is plain, with multi-colored patches sewn in the same way as the patches on the sleeves.
On foot. Dark-colored tights or knee-high socks and cut-off felt boots or short boots, the top of which can also be cut off (unless, of course, they are no longer needed).
On the head. A scarf tied at the back of the head and pulled low over the forehead. The scarf can be smooth, light, with a small dark pattern on a light background, or vice versa. You can let your hair down and apply a little hair gel to create sticky strands, or you can make a wig and wear it under a headscarf. For the wig, use some unnatural color (purple, green, blue) or make it gray. The wig should not be neat, on the contrary, disheveled and disheveled. The length of the strands is not the same (for making a wig, see the corresponding chapter).
Great hooked nose(Fig. 3) is put on with a hat elastic. The nose can be made from papier-mâché, foam rubber, or sewn from fabric and stuffed with cotton wool, foam rubber, padding polyester, etc. The easiest way to make a nose is from old flesh-colored tights or golf socks, as they stretch well. Cut a piece of tights (approximately 8 cm, Fig. 3), fold in half, then again to make a rectangle 8 x 3 cm. Pull one short side with thread, and sew the long side (Fig. 36). Then turn out the resulting cap, fill it with cotton wool or padding polyester, trying to avoid lumps (Fig. Zv).
Give the cap the shape of a hooked nose: the base should be wider and the tip curved down. In this case, the seam should be on the bottom. Bend the edges of the cap inward to the required size of the nose (Fig. 3g). Sew an elastic band to put on the head, use a marker to mark freckles and mark the nostrils (wings of the nose).
Makeup. Draw in eyebrows and freckles with makeup or a cosmetic pencil, and line the eyes a little.
Props. On the neck is a necklace of “animal teeth” (Fig. 4), which can be made from black bread crumb (dry and slightly tint), salt dough, paper pulp (see the chapter “Papier-mâché”). The “teeth” are painted ivory, ocher or brown.
On hands- short gloves dark color (may have cut off fingers). You can take a real broom, or you can make a fake one. To do this, you need to take a branch (it is better if it is relatively straight, but with knots). Saw off the knots and sand the sections. Make the broom itself from thick paper or thin cardboard, cutting it into narrow strips. The length of such rods should not be the same. The total length of the broom itself is 30-50 cm (depending on the child’s height), and its color can be brown, green, black, and even red. Tie the broom to the stick using thin wire or ropes.


Hello, friends!
Recently, when I was sorting through photographs, a folder with the title “Baba Yaga” caught my eye and I remembered that I had not yet shown here a work that was very unusual for me. Before last New Year, in kindergarten I was asked to sew a Baba Yaga costume for a matinee. To make it more convincing that it was really needed, they showed me old suit, or rather what is left of it. Only with a very good imagination can you imagine how you can adequately cover your legs with those scraps of skirt. The suit had no top at all.
As I already mentioned, I really like to do something new, something that I have never done before. On the one hand, this is a huge responsibility, and on the other, a complete flight of imagination and freedom in creativity. It was precisely this freedom, as well as a piece of burlap, old trousers and a heap of braid that was provided to me. A big story about what came of it, photos of the process and from the matinee under the cut.
And here the fun part began - figuring out what the costume would look like. Attempts to find at least some sample on the World Wide Web were unsuccessful. The most decent costume was from Georgy Millyar, but I didn’t undertake to repeat it, because it’s easy to just make rags from burlap, but to ensure that what is torn does not fall apart even before the matinee and has served in kindergarten for many years already more difficult.

Then, looking at this photograph, I asked myself: “Who is Baba Yaga?” And again I went to ask Google questions. The mystical component did not interest me at all. It was necessary to understand who she was and where she lived. After reading many articles, I formed the opinion that Baba Yaga is an elderly woman who lives in the forest. She's carrying her to term old clothes, which is why there are a lot of patches on it. And her character is harmful due to obvious health problems - she is all crooked with a hump on her back.
And here my costume began to emerge: there should be a long skirt, a shirt loose fit, apron and vest. But the materials that were given to me in the garden were clearly not enough. And then home supplies of Soviet fabrics helped. I chose green fabric for the skirt - I really associated it with the forest, and bright chintz with flowers for the shirt. I decided to make an apron and vest from burlap.
There was nothing complicated with the skirt and vest and there are no step-by-step photos. I made the simplest skirt with an elastic waistband and a ruffle at the bottom. I made the shirt as wide as possible to make it look voluminous, because elderly woman won't wear a tight top. I added elastic bands to the neckline and bottom of the sleeves for a better fit. In addition, this version of the shirt will fit any figure.
The most interesting thing was working with the vest. I cut out the simplest version of the vest. I had to rack my brains over how to process the edges. Simply laying it down and flashing it is not an option. I won’t even talk about the fact that a lot of garbage and threads fall from the burlap. This is where the old trousers, which they gave me to be torn to pieces, and the braid came into play. I cut strips, pulled out threads to make it look more shaggy, pinned it all to the edges of the vest and finished the edges that way. And the lateral and shoulder seams I sewed it through braid, because there is no other way to sew burlap.

The only request from the future Baba Yaga was the presence of fly agarics on the costume. I decided that they belong on a vest. I made a button from polymer clay. But unfortunately, at that time I didn’t have any white clay in my supplies, so I made the leg out of light brown plastic and then painted the finished fly agaric with white acrylic and varnished it.

I placed two more fly agarics on the back. I drew two cartoon mushrooms and made a sew-on applique from the most ordinary chintz.


An apron is simply a rectangle of burlap sewn to a wide band. There is nothing complicated in it, so there is no separate photo either.

Well, we can say that the costume is ready. However, I decided that I also needed to sew burlap patches on the elbows of the shirt and on the apron and colored fabrics. And in order for the skirt not to look very new and to be connected with the rest of the costume, I sewed a strip of burlap along the bottom and the same shaggy stripe as on the vest. I was pleased with the result. The photo shows the fully finished costume before taking it to the garden.
This unusual and unique carnival outfit is perfect for themed party for the New Year. It's time to move away from the standard images of snowflakes and princesses, because such a costume will be remembered as children's party, and at a house party.
Recommendations for creating a Baba Yaga costume 
You don’t need much to make; you should look for old things at home. Blouses, blouses, long skirts and grandma's colored scarves. Baba Yaga dressed in torn and dirty clothes, so to imitate antiquity and moth-eaten holes, you need to make them with scissors or sew on tacky overlays.
Rip the hem of the skirt unevenly and cut off part of the bottom for asymmetry. If you find an unnecessary one at home, it can be used for the vest of our costume or made into an imitation of a cat, which can then be placed on the shoulder of the same vest, attached with threads and needles.
Important! Instead of a collar, you can use a ready-made animal toy.
Accessories are very important in this outfit. For the hump, a regular ball of fabric is used, placed under clothing on the back. Take a broom in your hands, buy a gray wig in a store or sew it from gray wool, tie a colorful scarf on top. It can be tied under the chin or at the back.
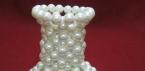
Although Baba Yaga was not a beauty, she was a woman and loved jewelry. Beads and earrings in the shape of skulls are suitable here; they will perfectly complement the outfit. If you want to make them yourself, you will need polymer clay, which after complete hardening must be covered with white paint. Ordinary cardboard is also suitable for decorations. Cut out the bead blanks, put them on a thread and sew them on top.
Important! Shoes – trampled slippers, felt boots. They can be decorated by sewing colored patches.
How to make a granny-hedgehog costume for a little girl 
For carnival costume you will need:
- colored overlays;
- sackcloth;
- dark sweater;
- striped leg warmers;
- rubber;
- slippers, felt boots or galoshes;
- belt;
- patterned scarf;
- gray socks;
- small pillow;
- dried mushrooms;
- plasticine, glue.
First Master Class:
- First, make a dress from wool burlap. Cut a hole in the bottom of the bag for the head, and on the sides for the arms. Collect and sew the material on one shoulder.
- Cut holes for toes in gray socks.
- Make something like a backpack from an ordinary small pillow, sewing an elastic band to the edges.
- Make fly agarics from plasticine; you can also make them from newspaper (papier Mache), then covering them with paint.
- Sew the patches obtained from fly agarics to the burlap dress;
- Now we have to assemble the costume.
- First you need to put on a sweater, put a backpack made of a small pillow on your back, and put it on your hands with an elastic band.
- Throw a dress decorated with mushrooms over it and secure it with any belt.
- On your feet, wear cheerful striped leggings and felt boots or slippers.
- On your hands - gloves made from gray socks.
- Tie a colored scarf on your head and wear a necklace or beads around your neck.
Important! It is better to make beads for a costume from dried mushrooms.
Second master class:
- Take a regular jacket and sew fringe on the edges of the sleeves. Sew patches of colored fabric along the entire length of the sleeves. Use thick wool threads to contrast the stripes.
- Make two holes on the finished vest. A homemade vest can be sewn from burlap. Sew a large button to one hole and a loop to the other.
- Also sew several patches onto the maxi skirt, and put a white or colored round apron on top of it.
- Colored striped leg warmers are suitable for your feet, and overshoes or terry slippers will fit perfectly on top.
- Tie a woolen scarf and give your hair an unkempt and disheveled look.
- Wear an artificial nose.
- Use mascara to draw huge black eyebrows; with a brown pencil you can draw imitation of wrinkles and bright freckles.
Instructions for creating a Baba Yaga outfit for an adult with your own hands 
There are two outfit options for an adult: simple and unusual.
First, let's look at a simple outfit. It doesn’t have to be sewn, an old and unnecessary one will do men's shirt and a maxi skirt. You can simply decorate them with patches and cut the hem of the skirt. The scarf can be tied like a bandana or tied under the chin. I get wet and put on large round beads of different sizes. Throw a wool shawl over it.
For an original costume, the necklace should be made from dried mushrooms or berries, such as rowan or hawthorn. Just put each berry on a thread and a needle and connect the ends.
An apron for a fairy-tale old lady's outfit will look great made from a round piece of colored fabric.
For the costume you definitely need the big and crooked nose of an old woman. You can make it from papier-mâché, for more convenient attachment, in addition to the nose, it is better to make the eyebrow ridges, and stick black and bushy eyebrows on them. Make doors in the temple area of the mask and thread an elastic band. To ensure that the mask stays in place and does not fall off, it is better to wear round old glasses without glasses over it.
Step-by-step master class on making a nose:
- Make a hooked nose from plasticine.
- Tear the newspaper into pieces no larger than 3 cm, you just need to tear it, so the pieces will lie flat.
- Apply overlapping, bubble-free scraps of newspaper moistened with water to the cast. Coat the second and subsequent layers with PVA glue.
- Dry the product without removing it from the plasticine. Once everything is dry, carefully remove the nose from the workpiece.
This is how, in just an hour, you will get an original and unusual, and most importantly, easy-to-make Baba Yaga outfit for the holiday. All you have to do is study the recommendations and photos to get a great suit.