How to make a real Balloon from papier-mâché with his own hands so that he can then fly? What is required for such a craft, how complicated is the process? In reality, most products of this kind do not require a long time and special knowledge.
Thanks to detailed master class any beginner can do it. But the finished craft will amaze everyone around. You can make bright multi-colored balls, provide them with baskets or color them to make laughing faces. Whatever, you are only limited by your imagination.
Step by step master class
To make a papier-mâché balloon on a balloon, you will need the following materials:
- a stack of unwanted newspapers;
- liquid paste;
- ordinary rubber ball;
- a few brushes.
Detailed instructions:
- Prepare a paste by diluting it in some unnecessary container of a decent size.
- Tear newspaper sheets into strips 2.5 cm wide each.
- Inflate the balloon, making sure that it does not exceed the dimensions of the finished craft.
- Carefully glue the finished ball paper strips pre-moistened in a paste.
- Important: after wetting the paper, immediately remove any excess liquid by running your fingers. This should be done in advance, before gluing.
- When gluing the strips, carefully straighten the folds with your fingertips. It is more convenient to do this with a brush. Act in stages, then the toy ball will turn out beautiful and smooth.
- When finished, leave the product to dry. Now carefully pierce the ball inside the newspaper strips and take it out through the small remaining hole at the bottom (this must be left in advance, even before pasting the newspaper).


If you need a ball white color, just paint the dried blank with the paint of the desired color.
Globe or moon made of papier-mâché
How to make a ball - a planet from papier-mâché? I want to create something special. For example, the planet Earth or the Moon. Here the basic principle of making a ball will remain unchanged.

Step-by-step instruction:
- Make a newspaper ball, trying to make it as smooth as possible (no wrinkles) and medium in size. Inflate a regular rubber balloon, then gradually glue strips of newspaper soaked in glue over it. Wait until the product is dry, then blow off the balloon. The preparatory part is over.
- Now, for this example, you will need a real globe. It is more convenient than flat pictures. To make the globe look as realistic as possible, it is necessary to redraw the outlines of the continents, individual islands and oceans of the Earth onto a finished paper ball. To do this, arm yourself with acrylic paints.
- Is it convenient to color the newspaper or is it worth additionally pasting the balloon on top with white paper? You can first paint with white paint and then apply the outlines of the Earth to it. Or paste over with A4 paper, cutting it also into strips. The technology seems more complicated, but in practice everyone copes, even beginners.


In this way, you can create any planet from the solar system and then hang them together, creating a composition. It is important to keep the dimensions, remembering that Jupiter is large, Mars is small, and the Earth is medium.
Balloon with a basket - master class
Here you can choose the manufacturing technique.
Option number 1. beautiful ball. If you want to create a craft quickly, then look at a beautiful colored small ball. Preferably round in shape. Weave to it from a dense thread or take a ready-made mesh. See that the ball fits comfortably inside, and the edges of the net remain free. Trim carefully if necessary.
Create a shopping cart. You can cut it from the usual plastic cup and paste on the outside. Or glued from a sheet of cardboard. If you have a ready basket, even better. Tie it using the free ends of the thread to the ball. Ready.

Option number 2. Volumetric balloon with a fabric basket. A great New Year's surprise that a child can make if prompted.
Would need:
- unnecessary newspapers;
- ordinary rubber ball;
- diluted paste;
- brush;
- pieces of multi-colored fabric (preferably one type);
- cardboard;
- skein of rope or braid.
Step by step instructions:


Such a papier-mache balloon will turn out beautiful, large and can then be hung from the ceiling.
- Making a paper (newspaper) ball. Inflate the balloon following the instructions described above, then glue it successively with thin newspaper strips, dipping them in a paste. Do not seal the space below, around the tail. Leave a hole.
- While the blank dries, you can make a basket. To do this, take the cardboard and glue the basket of small sizes step by step, guided by the ball.
- Carefully poke 4 small, even holes in the top of the finished basket. See that they are symmetrical.
- Decoupage ball. It is dry, now deflate and remove the rubber base (inflated balloon). Tape it with strips of fabric / colored paper (which is preferable). From above, carefully make 2 holes, placing them close. The papier-mâché ball is ready.
- Measure out 2 pieces of rope. Take one, thread the tip through one of those holes at the top of the ball, then pull it out through the other. Center so that two identical ends hang down. Tie them, fastening in two opposite holes located in the basket. Do the same with the second remaining rope. Tie the ends alternately to two of the four holes (see picture).
- At the top of the children's toy, you can make an additional loop through which it can then be hung from the ceiling.
A small doll or a man with Lego, ready to fly, will complete the work.
Balloon - smeshariki from papier mache
It's easy to do. To create a cute smeshariki you will need:
- dye;
- several brushes;
- a sheet of cardboard;
- scissors;
- finished picture.

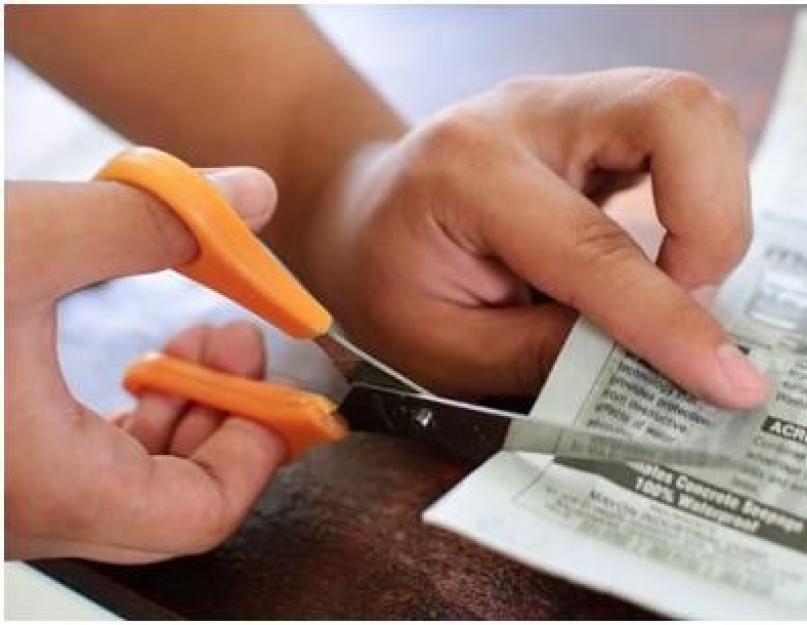
The first step is to make an ordinary paper ball, pasted over with newspaper strips. Then, as it dries, decorate the product by painting it like a Smeshariki. Draw a smiling face in front, and attach the missing parts like ears, arms and legs separately.
Cut them out of a sheet of cardboard or “blind” using a napkin soaked in glue. Some take plasticine. paper ball dense enough, so you can mount a variety of parts without fear of its destruction.
How to make a balloon with your own hands?
Flying in a hot air balloon is an exciting activity with which you can diversify your weekends or holidays. There are companies that provide balloons for rent, so it is best to use their services. If you are interested in the process of making a balloon in theory, or if you want to make a miniature balloon, then our article will reveal to you all the intricacies of this process.
Consider the process of manufacturing each element of the balloon separately.
How to make a balloon dome with your own hands
The balloon dome is best sewn from durable nylon materials (polyester or polyamide). To prevent the fabric from passing air, on the outside of it  must be coated with polyurethane or silicone. The dome is sewn together from segments, the number and size of which depend on the size of the balloon. In this table on the site sdelai-sam.pp.ua you can find the sizes of segments for diameters from 1 to 3 meters. To make a ball of a larger diameter, calculate proportionally the dimensions and quantity of the corresponding segment.
The base of the dome - the inflation hole - must be protected with a heat-resistant fabric tape. At the top of the dome, it is necessary to provide a parachute valve through which heated air will be discharged to lower the ball. For greater strength of the dome, ribbons can be sewn vertically and horizontally. At the top, the ribbons are attached to the parachute valve ring, and at the bottom - to the suspension ropes.
balloon basket
The basket is made from a wooden vine, and its bottom is best made from marine  plywood, which perfectly tolerates moisture. The frame for the basket can be stainless steel cables that attach the basket to the dome. These cables are best wrapped in leather sheaths to protect them from damage.
Hot air balloon burner
This is the most important part of the balloon to be chosen with special attention. Liquefied propane is used as fuel for these burners. They are made of stainless steel with special protective covers.
Assembling the balloon
The most difficult thing is to make a parachute valve opening mechanism, however, in specialized sports clubs, for example, aeronavt.1gb.ru you can find recommendations on how to set up this mechanism. The assembly sequence is as follows:
- We fasten the steel cables to the lower rim of the dome and the basket with bolts.
- The burner is mounted on a rigid frame above the basket.
- Cords for controlling the parachute valve are attached to the cables.
- Inside the basket there are containers for storing maps, a fire extinguisher and provisions.
In general, even if there is nothing much to explore, a balloon, supplemented by a small TV camera, will allow you to look at your native places, at your home and, possibly, at yourself from a bird's eye view. And this opportunity is not available to everyone. And there is only one reason - it is not so easy to raise a TV camera to a height of 100 m. Even if it is miniature and weighs only 30 g.
 In order to realize their plans, we advise young modellers to first make a simple and, perhaps, the lightest balloon on their own. The material for its shell will be tissue paper. Start by preparing a single element flat pattern. We will perform it on a grid with a cell size of 5x5 mm. Glue two sheets of thick drawing paper along the narrow edge. Apply a life-size grid to it, then carefully repeat the contours of the template. In this work, be sure to use large patterns. After making sure that the work is done with the proper quality, attach a curve parallel to it at a distance of 10 mm to one of the sides. This allowance is needed in order to glue the parts together.
Now you can finally cut out the template and later use it to replicate any number of blanks.
 From tissue paper, prepare 12 identical parts at once. Using PVA glue or bustilat, very carefully, slowly, assemble the ball. This work is very painstaking, requires utmost attention and clean hands. Be careful not to get drops of glue on the exposed parts of the shell. To strengthen the assembly, stick a round paper disk with a diameter of 100 mm on the top of the ball. With the lower neck of the ball will have to tinker more.
Hello to everyone who is still reading my diary))) Today I am in a hurry to you with a wonderful idea for a children's room or for an attic in a country house, if it is decorated in a marine or other suitable style. I suggest you make your own hands a balloon from a beach ball! Check out the idea, cool) and a master class, and a video clip is available.

A small useful digression for all builders. Take a look at the page http://flexin.com.ua/19-kompensator, here you can purchase expansion joints - rubber, fabric, steel and PTFE expansion joints, represented by iron flanges with steel bolts and stiffening rings. These structural elements are used to compensate for thermal expansion, movements caused by an earthquake or ground settlement, and are used to relieve vibration loads. different materials. They are typically used as a tool to provide flexibility to pipelines exposed to high pressures, extreme temperatures and head loads. Read more on the Flexin-Ukraine website.
So, how to make a balloon with your own hands. For work, we need the following materials:
- beach ball for water games - medium size;
- thick rope;
- hot glue gun;
- adhesive tape or insulating tape;
- plastic flower pot or bucket;
- acrylic paint of red color.
Having prepared all the above materials, we get to work. Inflate a beach ball.


Now we take a plastic flower pot and wrap it with a thick rope, fixing it with hot glue.

It remains for us to connect the pot with the ball with ropes.


We cut out circles from linen or cotton fabric, from which we make bags.
About flying in a hot air balloon and how to make it yourself.Below is a description of a balloon that you can make with your own hands. And now I want to talk with you not about those balloons that children need to launch, but about those real ones that you can fly on.
Previously, such flights were unrealistic, we could only dream of such a thing. It's great that now you can bring this fantasy to life and make an unforgettable romantic flight! Such flights are very original and safe, and most importantly, they can be made all year round, both in winter and in summer. If you organize your holiday, then such an event will bring a lot of pleasure to your guests. This holiday will be remembered for a lifetime. If you are interested in such an idea, you can contact the Aeronaut ballooning club, which offers. The club's pilots have repeatedly won the main competitions in Russia, and this club is considered the best and most professional.
In addition to romantic rises in the air, if you love and appreciate extreme sports, the club has a special tempting offer for you - a balloon flight in the only basket in Russia with a transparent bottom. And one more news of the company, now everyone can take a flight in a hot air balloon under the new MONO program. Flights under the "MONO" program are carried out in the Dmitrov airfield, on weekends. Flight duration is from 40 to 60 minutes. There can be up to 8 people in the balloon basket! You have a great opportunity to spend an hour in the air with your family and friends.
And one more thing that interested me. Here is a unique gift idea for any occasion, this is an acquisition. The gift will be the most original and unusual, the certificate can be made in the form of a balloon with the inscription "Happy Birthday". For flights here is a great choice for your imagination. You can choose the flight "Picnic", "Joke" and others. And you can choose (this is for young romantics) the flight "Proposal". A very romantic way to make a marriage proposal to your beloved. EH!
And now, after you fly, I propose to hand over the balloon with your own hands.
Buy 24 sheets of silk paper from the stationery store. Each piece of balloon will require a paper sheet 210 cm long. Therefore, to get this length, you will have to glue several sheets of paper into one.
From newsprint (also glued) make a pattern and cut out the balloon slices on it. A pattern with dimensions is shown in the figure (Fig. a). Dimensions are in millimeters. After cutting out all the slices (there will be eight of them!), Glue them together, and you will get a ball (fig. b). In the process of gluing the balloon slices, a paper lump is formed on its top. He will interfere with you. Therefore, carefully cut it off, but so that a circle with a diameter of about 10 cm forms on the top of the ball. Cover its surface with a strip of paper (Fig. c).
At the bottom, the ball passes into a cylinder, to which a rocker for a cup of cotton is attached. The cylinder must be solid. To do this, several sheets of old drawing paper are taken, which are glued together several sheets over its entire length, which is approximately 140 cm. The diameter of the cylinder should be 47 cm. paper burned (Fig. e). Then make a circle from a wire about 1 mm thick. On both sides, attach another piece of wire to it. This will be the axis. Insert the circle into a paper cylinder, but first attach one more, second axis perpendicular to the axis, on which put on the lid from the shoe cream jar. Poke holes in the lid with an awl, and as high as possible, i.e., at its very edge, so that its center of gravity is as low as possible under the suspension (Fig. d). Thus, you will get a Cardan suspension, the essence of which is that when the ball is tilted under the influence of the wind, the cup will always remain in a horizontal position. It is very important to ensure that both in the paper cylinder and in the lid of the shoe wax box, the wire rotates completely freely.
To avoid fire, the ball should be launched outdoors. Put a cotton swab soaked in alcohol on the lid and set it on fire. Warm air fills the balloon, stretches the paper and slowly lifts it up. If the segments of the balloon are not glued well, warm air will come out of it, the balloon will not rise. Therefore, you need to carefully check whether its slices are well glued together.