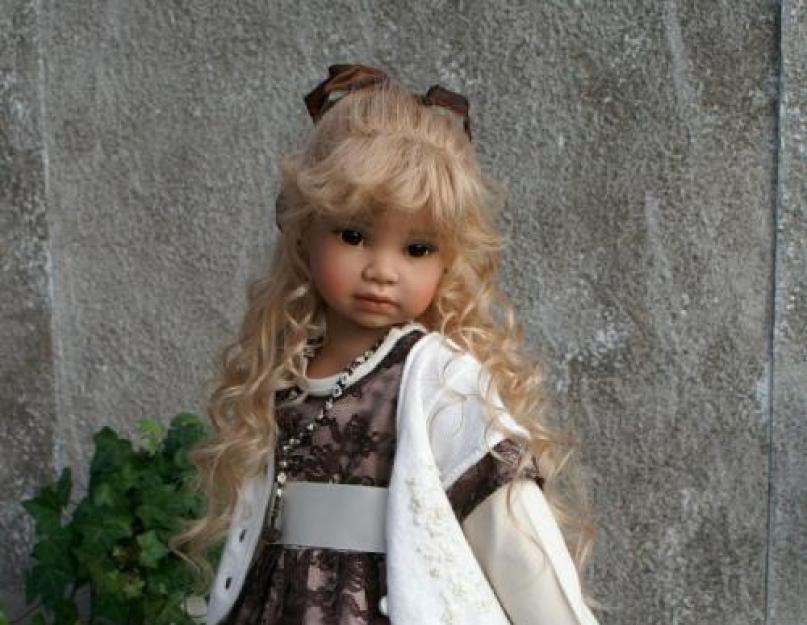
First of all, I’ll say right away: if you want your curly doll’s hair to look as natural as possible, then make a wig from llama wool. My first doll has exactly this hair. Firstly, the material is the most natural, and secondly, the curls do not look specially curled - the spirals narrow in diameter towards the ends of the curl, which gives an awesome natural look to the hairstyle (
).
But if you don’t have llama fur on hand, or the doll, on the contrary, needs a wig “pomaded” with curlers, we curl the curls ourselves.


ANGELA SUTTER doll
Mohair (and other natural materials)
Mohair - natural material, and therefore it is most convenient to curl into curls (unlike synthetics). Ordinary cocktail straws will help us a lot here. To curl, cut the tubes into pieces ~1 cm long (depending on the length of the doll’s hair, we make more or less), dip the strands in water and wrap them around the resulting curlers. You can secure it with paper clips, small hairpins - anything, but not too tightly so that there are no marks or dents left on the hair. After the curls dry, remove them from the curlers - just like in life =)
Over time, mohair can straighten out if you don't curl it well enough. I would not use hairspray - it will leave marks on the miniature hairstyle and will collect dust. It is better to perform the wetting-drying procedure several times.
Do not forget that human products for permanent (chemical) waving are quite suitable - for this, follow the instructions from the instructions for using the product. For the action of such agents, heat from the human body is required, i.e. heads =) therefore, when you apply the product to your curls, put them in little bags and dip them in warm water (it is advisable to maintain the water temperature for the entire duration of the product, as indicated in the instructions).
Synthetics
With synthetics, we do this: we wrap dry strands around iron or wooden curlers (they can be ice cream sticks, nails of different diameters, etc.) and dip them in hot water. Be careful, because from a long stay in boiling water, synthetics can go into waves or even burn/melt (like nylon tights;)) So keep the curlers with the curls wound in boiling water for no more than a few seconds. After this, we dry our hair - preferably with a hot blow dryer.
If it is undesirable to wet your hair, then put it (already on curlers) in plastic bags and thoroughly squeeze out the air from there and seal it. Naturally, such bags can be kept in boiling water longer. By the way, this technique is also good for natural hair.
You can use an alternative method (which our great-grandmothers used for their own curls) - wrapping hair on hot nails o_O I haven’t tried it, but in theory it should work. It's better to try on a small piece.. =)
You can find some cone-shaped sticks as curlers - then the diameter of the curl along the length will narrow and, accordingly, have a more natural appearance.
Attention! A hair curler is used!
A little warning. Please be careful when performing all the manipulations described below with the doll. Not all hair curlers work the same, so start with the lowest temperature and keep the curl curled until you feel you can't hold it any longer, otherwise the doll's hair won't withstand the temperature and may melt. Also, when using a hot iron, there is always a high risk of getting burned.
This was a small retreat, but now - forward! :)
Step 1. You will need a hair curling iron with a choice of temperature and, preferably, it has low temperature settings. I use a Vidal Sasson 3/4" curling iron. It has high and medium temperature conditions. I usually use medium and it works great. So, I heat the curling iron for 5-7 minutes, then I check whether the resulting temperature is suitable for the doll’s hair - I separate a strand of hair from the back and carefully wind it onto the curling iron. If everything is in order and the hair doesn’t even think about melting, I boldly continue. If your hair melts, even just a little bit, don’t continue! Wait for the curling iron to cool slightly.
Step 2. Next, when we have set a temperature that is safe for the doll’s hair, we need to make a parting exactly in the middle of the doll’s head, thus dividing the hair into two parts. We pin one part of the hair with a hairpin so that it does not interfere with us, and we will begin to work with the second. We separate a small strand from this “working” side, which we will wind. I usually curl it in the opposite direction from my face. So, we place the curling iron over the strand, clamp the hair in the middle of the length of the strand and twist it in the required direction. Then slightly loosen the heat and straighten the strand so that it is all distributed along the length of the curling iron. Hold the strand for 10-15 seconds. And ta-dam! Here they are - curls :)
Step 3. And the second method :) Personally, I prefer this method more. Instead of placing the curling iron above the strand, I do the opposite - I place the curling iron under the strand, from below. Next, I do everything exactly the same - I pinch the strand and twist it away from the face. To understand the location of the curling iron, look at photo 3 in step 2 and photo 1 in step 3. The difference should be clear. :) This method is a little more complicated than the previous one, but as a result we get very modern hairstyle. With a curling iron on top of the strand, you will get a hairstyle in the style. We twist the hair along the entire parting in the chosen way, and do the same on the other half of the hair. Don't forget that all strands should be twisted in one direction. So that it doesn’t turn out that on one side your strands are twisted away from your face, and on the other - towards your face (or vice versa, depending on which direction you decide to curl your hair).
Step 4. Once you have curled all your hair, you can start styling it. In photo 1 - hair is curled and without styling; in photo 2 - strands from one parting are collected and twisted together. Photos 3 and 4 show combed hair. I usually do just that, it gives light hair and air waviness. This is the method you can see in my photos.
Don't be afraid to experiment and try all the ways you can curl and style your hair. remember, that different types Doll hair is curled differently and the curls will always look a little different. Happy creativity!
This content is posted with non-profit purposes.
If you are the author of this content and you don’t want
it to be used on this site,email us: [email protected]
2011 2018, . All rights reserved.
First of all, I’ll say right away: if you want your curly doll’s hair to look as natural as possible, then make a wig from llama wool. My first doll has exactly this hair. Firstly, the material is the most natural, and secondly, the curls do not look specially curled - the spirals narrow in diameter towards the ends of the curl, which gives an awesome natural look to the hairstyle (see for yourself).
But if you don’t have llama fur on hand, or the doll, on the contrary, needs a wig “pomaded” with curlers, we curl the curls ourselves.
Mohair (and other natural materials)
Mohair is a natural material, and therefore it is most convenient to curl into curls (unlike synthetics). Ordinary cocktail straws will help us a lot here. To curl, cut the tubes into pieces ~1 cm long (depending on the length of the doll’s hair, we make more or less), dip the strands in water and wrap them around the resulting curlers. You can secure it with paper clips, small hairpins - anything, but not too tightly so that there are no marks or dents left on the hair. After the curls dry, remove them from the curlers - just like in life =)
Over time, mohair can straighten out if you don't curl it well enough. I would not use hairspray - it will leave marks on the miniature hairstyle and will collect dust. It is better to perform the wetting-drying procedure several times.
Do not forget that human products for permanent (chemical) waving are quite suitable - for this, follow the instructions from the instructions for using the product. For the action of such agents, heat from the human body is required, i.e. heads =) therefore, when you apply the product to your curls, put them in little bags and dip them in warm water (it is advisable to maintain the water temperature for the entire duration of the product, as indicated in the instructions).
Synthetics
With synthetics, we do this: we wrap dry strands around iron or wooden curlers (they can be ice cream sticks, nails of different diameters, etc.) and dip them in hot water. Be careful, because from a long stay in boiling water, synthetics can go into waves or even burn/melt (like nylon tights;)) So keep the curlers with the curls wound in boiling water for no more than a few seconds. After this, we dry our hair - preferably with a hot blow dryer.
If it is undesirable to wet your hair, then put it (already on curlers) in plastic bags and thoroughly squeeze out the air from there and seal it. Naturally, such bags can be kept in boiling water longer. By the way, this technique is also good for natural hair.
You can use an alternative method (which our great-grandmothers used for their own curls) - wrapping hair around hot nails o_O I haven’t tried it, but in theory it should work. It's better to try on a small piece.. =)
You can find some cone-shaped sticks as curlers - then the diameter of the curl along the length will narrow and, accordingly, have a more natural appearance.
In this master class I will tell you how to curl your hair into beautiful curls. For this we will need: aluminum foil, scissors, cocktail straws and sewing pins. Not shown in the photo, but hot water will also be needed.
Before curling, wet the doll's hair. This will make them easier to curl.
Cut the foil into small squares or rectangles. Well, whatever suits you.
To separate the strands, use a regular comb.
We make 2 cuts on the tube on 2 parallel sides. It is better to make such cuts immediately on the tube, immediately before twisting the hair.
Separate one strand. Preferably not too thick.
Wrap the end of the strand completely in foil.
Insert the tip, wrapped in foil, into the slots on the tube.
We twist the strand. Who prefers which direction?
We pierce the tube with foil with a sewing pin. You can pierce directly into the head, but try to get into the holes where the hair goes through. My pin didn't go all the way into my head because it had glue in it.
It is best to start curling from the top of the head.
Curl one side first.
And then another.
Next you will need hot water. Make sure the water is not too hot. Otherwise, you will ruin the doll, and in some situations the glue may melt and leak out of the head. It is better to take a cup with a wide neck.
Dip your head in water for 5-7 minutes. It is advisable to wet only your hair.
Next, remove the hair from the water. Lightly dry with a towel. Unwind the curlers. Leave to dry. It is better not to dry your hair with a hairdryer. Just leave it, maybe a little more for an hour, to dry, placing it on a shelf.
Ready. I did my doll's hair in retro style. If you want to keep your curls for a long time, you can coat them with hairspray.
2011 2018, . All rights reserved.
One of the ways to curl a doll's hair
Since this master class involves working with boiling water, you will definitely need the help of your parents (grandparents). Also keep in mind that for some dolls it is better not to let their hair down, since it will no longer be possible to create the original image. But if you are sure that you want to curl the doll’s hair and you are allowed to do this, then we offer this lesson to your attention.
We will need - very hot water (boiling water), straws of juice and similar drinks from disposable boxes, elastic thread, hair gel (needed to give definition to curls).
We cut each tube into 4 equal parts, insert an elastic thread into each piece and tie a knot. The elastic should not be too tight.
We twist the hair into tubes and secure with an elastic band.

Back view.

Pour very hot water, almost boiling water, into a bowl and insert part of the head with hair. IMPORTANT - if the doll has OOAK, boiling water should not get on the face, otherwise the paint will deteriorate, there is no need to dry the hair - it should dry itself. When drying with a hairdryer, you can burn the doll's hair and face with hot air, i.e. she will be spoiled. So just wait or place the doll next to the fan.
Keep in boiling water for about 10 minutes, dry naturally.

Carefully remove our curlers. If the hair is completely dry, comb it carefully. You can apply just a little bit of hair gel to your hair to give it shape and remove mussiness.