On the eve of Easter on the Internet I kept coming across beautiful pictures Easter eggs decorated using the decoupage technique... I’ll say right away that I have no experience in decoupage at all, but my daughter and I still decided to try. My daughter is 6 years old.
In our village store, the most elegant napkins turned out to be quite simple in appearance and cheap in price, and not even three-layer, but two-layer. This did not stop us and we got down to business... Join us!
Once decorated, eggs are edible because no chemical paints, glue or varnish are used in their decoration. The ornament is glued using flour paste.
So, a master class on decoupaging Easter eggs with napkins (a guide for beginners).
Prepare the ingredients according to the list.
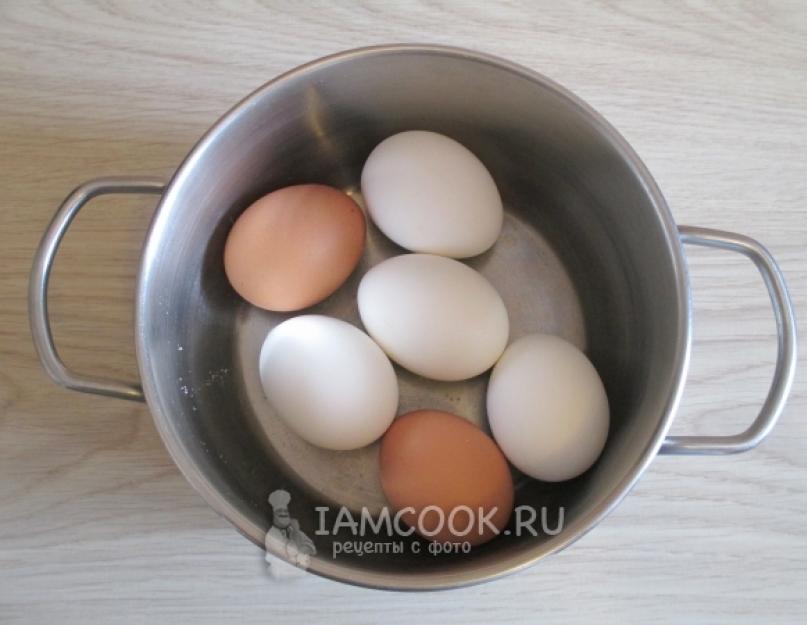
Eggs need to be hard-boiled as usual. Take eggs without cracks, preferably white. Salt the water generously so that the protein does not leak out during the cooking process if there are microcracks on the surface.

While the eggs are cooling, prepare the remaining materials. For glue, that is, paste, mix flour (rice here) or starch (corn or potato) with water.

Place this mixture in the microwave for 15-20 seconds at MAX. Then stir. Place again for 15-20 seconds and stir again. Place for the last time for 10 seconds, stir - and the adhesive mass is ready.

Tint part of the paste with suitable food coloring. We added a pinch of golden powder...

Remove the bottom layers from the napkins. Some napkins have three, some have two.

Using scissors, cut the designs into pieces of different sizes.

We first laid out the expected location of the fragments, so that we could then logically place them on the surface of the eggs. But then I inhaled, exhaled and everything fell apart, so we decided to glue it at random...

Pour water into a bowl or glass. Apply a brush dipped in water - moisten the surface of the egg, because at first the fragments of the design will simply stick to the water. It is also very convenient to straighten the pattern on the egg with the same damp brush.

The egg can be held in your hand, placed on a suitable stand or on a glass.

When the entire egg is covered with pieces of napkins with a pattern, let it dry for a few minutes, and then apply a transparent or colored paste with a brush using neat strokes.

You need to let the paste dry and the elegant Easter eggs are ready!

The history of celebrating Easter goes back hundreds of years. But colored chicken eggs have always been an indispensable attribute. Traditionally, they are colored with onion skins or food coloring. Can you create decorative Easter crafts with your own hands, for example, eggs braided with beads or lace. Today “Cross” will talk about how to make beautiful Easter eggs using the Decoupage technique.
YOU WILL NEED IT
If the Decoupage technique is not yet familiar to you, then first read the article, which contains a lot useful information decoupage for beginners.
So, to decorate an Easter egg with your own hands, we will need:
- boiled chicken eggs (preferably white);
To prevent eggs from cracking during cooking, try the following. First of all, the eggs must be warmed until room temperature. It is better to cook over low heat with the addition of 1 tablespoon of salt.
- napkin for decoupage with small (preferably floral) scenes;
- brush;
- beaten egg white;
- water.

IN in this case whipped egg white acts as an analogue of glue for decoupage. The protein is absolutely harmless and such an egg can be eaten. Another natural analogue of glue can be paste made from potato starch. To do this you need to take 2 tsp. starch and about 50 ml of water. Stir and heat for a couple of minutes, stirring all the time.
Separate the top layer with the pattern from the napkin. For decoupage you will need exactly this. Cut it out
(or better yet, tear out) floral motifs.


We begin to distribute the flowers over the surface of the egg. Smooth them with a brush moistened with water.

After all the motifs are distributed, apply beaten egg white on top. Leave to dry.

Our Easter eggs decorated using decoupage technique are ready.


Original master class
Be careful if you are going to bless such eggs! If exposed to water, the protein may become sticky and appearance will spoil. To prevent this from happening, you can dip the eggs in melted paraffin - it will act as a varnish.
Of course, you can decoupage not only boiled eggs, but also wooden blanks (in this case, the blank will need to be painted with white acrylic paint), as well as empty egg shells.
To get an empty shell, take a raw egg and, using an awl, carefully make two holes in it: about 5 mm in diameter at the bottom, 1–2 mm at the top. The contents of the egg will easily spill out. After this, the shells must be thoroughly washed and dried.

This shell turns out to be quite fragile. Do you want to give it some firmness? Olga Khotskaya shares her secret: eggs can be filled from the inside with polyurethane foam, so they turn out to be light but very durable.

Fill the egg shell with foam through the hole. Leave until completely dry.

Cut off excess foam with a knife. Do not forget: it is better to carry out such work with gloves!
In addition to the egg blanks described above, recall that the blank can be made from plaster.
In the video master class you will see how to perform decoupage on a foam piece.
How to make your own unique Easter eggs using decoupage technique + lots of ideas, tips and tricksEven if you don't know how to draw, decoupage will allow you to create real works of art! Flower pots, dishes, bottles, candles, kitchen utensils, furniture - change the whole world! Any surface lends itself to miraculous transformations.

This unusual way of decorating can that be a new exciting hobby, a way of relaxation and an opportunity to please loved ones exclusive gifts own production.Eggs decorated with napkins using the d techniqueEcoupage is not difficult to do.

Here I have collected the most clear master classes for beginning decoupage artists and simply for those housewives who want to give their family and friends real surprise masterpieces on Easter Day.This work will be especially exciting for children.


Pictures in vintage style can be copied


Decoupage with gelatin glue


1. Boil eggs hard.
2. Prepare gelatin glue. To do this, pour gelatin with water in the proportions indicated on the specific gelatin package and soak. Strain it through a strainer and remove excess liquid. Heat the gelatin and wait until the granules dissolve.
3. Choose napkins with beautiful colored designs. White eggs look better as a background, although it all depends on the color of the napkin.
4. Separate the top layer of the napkin and cut out the fragment you like.
5. Attach the picture to the shell. Apply gelatin glue over the design from the center to the edges.
You can use a printer to print any pictures that you liked using my links, and if you have napkins or decoupage cards.

You can watch how to do all this in video lessons.
Decoupage Easter eggs with glue on starch
boiled white eggs
starch
water
tassel
napkins with small patterns
food coloring (silver and gold)

Remove the two bottom layers of the napkins and make blanks for ornaments and designs. Make small flower scraps by hand.

Distribute the selected elements on the surface of the eggs. Do this with a brush and plain water. Try to smooth out every wrinkle.

Make a paste from starch. Take 50 ml of water for 2 teaspoons of corn or potato starch and heat in the microwave for about 20 seconds. Then stir, set again for 20 seconds, stir again, another 10 seconds in the microwave, stir again, cook again for 10 seconds and stir one last time. The paste is ready!
Now all that remains is to coat the napkin ornament applied with a brush with water with paste and leave everything to dry. Instead of starch, you can use pre-whipped egg white.

After the Easter eggs with ornaments have dried, that is, after 15 minutes, cover them with the last, decorative layer. To do this, add food coloring to a small amount of paste.
Dry decorated eggs on a wire rack. Beautiful, isn't it?

Decoupage wooden eggs for gifts and souvenirs - from here
We will need: wooden blanks, paper napkins with a pattern (in specialized stores for creative hobbies there is sometimes a whole section with such napkins and other materials for decoupage), acrylic primer, colored acrylic paints, decoupage glue (or PVA), transparent acrylic varnish, scissors, brushes, pieces kitchen sponge

1. Let's prepare our blanks for further decoration using acrylic primer.

2. After the primer has dried, apply acrylic paint using a piece of ordinary kitchen sponge. suitable shade. You can apply the paint with a brush, but a sponge helps get a more even coating. If you need to speed up the drying of the paint, you can use a hairdryer.

3. Choose floral motif from paper napkins, preferably with motifs on a white background. We cut out with small (nail) scissors or carefully tear off the motifs, partially leaving a white background. Separate the top layer with the pattern from the rest.

4. To paste an image, you can choose one of the following methods:
- first apply glue to the base, attach the picture and smooth it;
- attach the picture to the base and apply glue on top.
Glue for decoupage can be replaced with PVA glue, diluted to the consistency of liquid sour cream. To glue motifs, it is better to use a thin brush with natural or synthetic soft bristles. After gluing each element, let the glue dry. After all the parts of the flower arrangement are glued into place, we need to secure our work.

5. Cover the eggs with transparent acrylic varnish using a soft medium size brush...

And wait for it to dry completely.

All that remains is to assemble the composition: fill the basket with sisal, place the decoupled eggs inside, and decorate with flowers and ladybugs.
Our decoration for Easter is ready!

Beautiful Easter gifts to you all. Always yours, Irina.
And finally, a few more ideas.
1.
2.
3.
4.
5.
6.
7.
8.
9.
10.
11.
12.
13.
14.
15.
16.
You can decorate Easter eggs in different ways, but one of the fastest and most effective is decoupage.
Decoupage is an appliqué technique where fragments of a design or ornament are glued onto an object and covered with varnish for preservation. Even special decoupage napkins are sold, so decoupage of Easter eggs is available to everyone who wants to make the Easter table brighter and more joyful. There are quite a few options for decorating eggs in this way. You can use both boiled eggs, which can be eaten without any fear, as well as decorative blanks or empty eggshells.
If you decide to use eggs decorated in decoupage style for food, instead of glue, use ordinary egg white, which has binding properties. Starch-based paste is also a good alternative to glue. In no case should you use artificial dyes to color the shell, because it tends to let in elements that are not at all beneficial for our body.

You can use a wide variety of napkins for the decoupage technique - from simple single-layer ones to special ones. Fragments of napkins can be carefully cut out with thin scissors; this is especially important for moments when the tone of the napkin is much darker than the white shell. Sometimes the tearing technique is used, when fragments of napkins are torn by hand, while slightly “shaggy” edges allow one to achieve a semblance of shading. Floral, spring motifs, leaves, birds, etc. will look good on Easter eggs. For kids, you can make eggs with children's drawings, and decoupage of Easter eggs in the Gzhel style will add a special chic to your festive table. In short, there is room for imagination and creativity to run wild.
Decoupage Easter eggs using egg whites
You will need:
white boiled eggs,
white of 1 raw egg,
colored napkins (both single-layer and three-layer are suitable. In the latter case, you should separate the layers and use only the top layer),
scissors (it’s better to take nail scissors to make it easier to cut out small elements),
flat brush,
toothpicks.

Manufacturing:
To begin with, here are a few secrets that you need to know in order to do everything correctly and beautifully. The egg white that you decide to use instead of glue should not be whipped into a foam; bubbles will remain on the egg, and the work will look sloppy. Simply stir the egg white with a fork to break up its structure without foaming. Now take a napkin: carefully separate the bottom layer, you will need the top layer with the pattern. This is the case if you use multi-layer napkins. However, this is not important; simple, single-layer napkins are quite suitable. It’s better to think over the composition in advance: attach the cuttings to the egg and see if you have enough blanks and whether this or that fragment will fit. Please note that the larger the design you cut out, the more difficult it will be to glue it evenly, because the eggs have a complex shape. Brush the entire egg with white using a brush. Be careful, the eggs become slippery and easy to break. Attach the cut out element of the napkin to the egg coated with egg white and glue it using your hands and brush. Cover the glued fragment with egg white on top, carefully applying the adhesive mass from the middle of the napkin applied to the surface of the egg to the edges. Having glued one element, move on to the next, also leveling it and securing it on top with a new layer of “glue”. Try not to leave any air bubbles under the napkin. When working on the following elements, try not to touch those already glued; they are very easy to move or wrinkle. When all the elements are glued, carefully go over the entire egg with the brush again. After this, carefully place it on two toothpicks so that they minimally touch the design. Allow the egg to dry and then coat the whole egg white again to set it in place. And put it on toothpicks again until it dries completely. Do the same with the other eggs, then let them dry thoroughly.

Decoupage Easter eggs using starch paste
To work you will need:
white boiled eggs,
napkins,
scissors,
tassel,
a paste made from starch or flour.
Manufacturing:
Cook the paste in the following way: ½ tsp. stir starch or flour into 2 tbsp. cold water and pour into a saucepan with half a glass of boiling water. Stirring, bring the mixture to a boil, then remove from heat and cool. Such a paste can be stored, maintaining its adhesive properties, for about a day. Remembering that the egg has a complex shape, cut out the napkin with “darts”; this may cause the design to be slightly deformed. Using a brush, carefully apply the paste onto the napkin and onto the egg. Then wrap the egg with the resulting napkin blank. While the glue is still wet, cover the top and bottom of the egg with fragments of a napkin using a brush. Finished product Cover again with a layer of paste. Eggs can also be decorated with gold or silver. Just add a little food coloring into the paste and cover the egg with a thin layer. Now that everything is ready, the eggs should dry. Place them in a single layer in a fine sieve or on a wire rack and place in a warm, ventilated place. Remember that dried eggs are afraid of moisture, since the paste immediately begins to swell after water hits the egg.

Decoupage Easter eggs using gelatin
You will need everything the same as in the previous case, just use gelatin instead of starch or flour. Boil the eggs hard. While they are cooking, prepare gelatin glue. To do this, pour gelatin with water in the proportions indicated on the package and soak. Then strain through a strainer, heat the gelatin remaining in the strainer and wait until the granules dissolve. Take the selected napkins, separate the top layer if they are multi-layered, and cut out the piece you like. Such painstaking work must be done very carefully so as not to tear the source material. Attach the picture to the shell, apply gelatin glue over the picture from the center to the edges. Place the finished eggs on a wire rack and let them dry thoroughly.
Decoupage Easter eggs using sugar syrup
For this you will need:
boiled eggs,
paper napkins,
scissors,
tassel,
sugar, water.
Manufacturing:
First, prepare a thick sugar syrup that you will use instead of glue: 2 tsp. sugar pour 2 tbsp. boiling water, stir and wait until the sugar is completely dissolved. Then take the napkins you like, cut out small fragments, it is better to immediately cut large fragments along the edges, forming “darts”. Use a brush to apply the adhesive solution to the shell. boiled egg, then attach a piece of napkin and carefully straighten it with a brush or your hands. Wait until the sugar syrup on the craft dries and repeat on the other side of the egg or do the same procedure with other eggs using napkins with different designs.
The drying process of eggs should occur naturally. Do not use a hair dryer or place eggs near heating devices, as this may cause unwanted cracks to appear on the surface of the design, and the egg itself may quickly become rotten.

Decoupage wooden egg
If your goal is to decorate not a real egg, but, say, a wooden blank, then for this you will need:
wooden egg,
sandpaper (coarse and fine),
acrylic primer,
wide flat brush,
decoupage glue,
acrylic paint,
acrylic varnish.
Manufacturing:
At first, the surface of a wooden workpiece is not always even and smooth, so before you start working, go over the surface of the egg with sandpaper (first coarse, then fine). Prime the egg with acrylic primer or a 1:1:1 mixture of white acrylic paint, PVA glue and water and dry. After priming, apply several layers of white acrylic to the wooden piece and let it dry thoroughly. Cut out the necessary motifs from a napkin. After this, separate the top thin napkin layer from the resulting fragments. Divide the fragments that are too large into small ones so that the napkin lies more evenly on the egg. Next, apply a thin layer of glue to the egg with a brush, and then carefully take the fragments, apply them to the egg and glue, smoothing from the center. If you don't have special glue for decoupage, just dilute regular PVA glue a little with water. Now take acrylic paint dark shade and paint over the voids between the fragments. Dry the egg and coat it with acrylic varnish.

You will need:
whole eggshell,
napkin with a pattern,
PVA glue,
acrylic paints,
acrylic varnish,
wooden skewer,
manicure scissors,
flat brush for decoupage.
Manufacturing:
Take a raw egg, make small holes at the bottom and top with a needle and blow out the contents. When all the liquid has drained from the egg, dry it a little. Before you begin, place the empty shell on a wooden skewer. Apply a coat of white paint with a brush and let dry. The shell can be left white or painted. Cut out the necessary fragments from a napkin. PVA glue, diluted boiled water in a ratio of 3:1, glue the fragments onto the workpiece. Apply glue using gentle smoothing movements from the middle to the edges of the design. After the glue has dried, apply two or three coats of glossy decoupage varnish to the Easter egg. Remember that each subsequent layer can be applied only after the previous one has completely dried. Remove the skewer from the shell, and so that the holes are not conspicuous, cover them with paint and a layer of varnish. The shell can be completely covered with a napkin. To do this, cut out a rectangle from a napkin that is the size of the egg. Fold the rectangle in half and make a fringe on both sides of the fold. Now apply glue to the egg and first glue the fold of the napkin, and then carefully glue the fringe, first on one side, then on the other. Trim off any excess paper to prevent it from puffing up and cover the entire egg with a layer of glue. For greater durability, it can also be coated with clear nail polish.
It's beautiful, fast and easy. You can and should decorate Easter eggs using the decoupage technique with children, because kids love to help adults!
Happiness to you and your family!
Larisa Shuftaykina
Easter began to be celebrated long before the emergence of the tradition of Christianity in Russia. Traditionally, the festive table was decorated with eggs. They are a symbol of life, procreation and an integral part of the ancient Slavic traditions. According to ancient legends, the Easter egg was painted or painted. Now new and modern decoration techniques have begun to appear. Decoupage Easter eggs is a spectacular way to make the holiday brighter.
Decoupage technique
Decoupage should be understood as traditional appliqué. Various details of an image or pattern are glued onto the object to be decorated, then the resulting design is coated with transparent varnish to preserve it. Napkins are sold in stores - this is the best material for decoupage. This technique is available to everyone who wants to make the holiday table brighter and more joyful. Easter eggs decorated like this will delight relatives and guests on this occasion. happy holiday. A master class will help you learn how to work in this technique.

Features of the use of technology
There are many options for decorating eggs for Easter using this technique. Both ready-made boiled eggs and decorative blanks and even empty shells are suitable for work. If you plan to eat the holiday symbol decorated using the decoupage technique in the future, then you should not use glue to glue fragments of the design. You can use regular egg white instead; it has excellent binding properties. Also great idea– use a paste made from starch.
If you need to color the shell, then it is better not to use any artificial dyes for this - the shell has pores and can let various and, by no means, useful elements inside.

Decoupage and napkins
There are a variety of napkins used for decoupaging eggs for Easter; you can use both simple single-layer and special ones.. The elements of the napkin and the image are cut out with scissors; it is best to use thin scissors for these purposes. The right choice scissors is especially important when you need to paste a dark image element onto a white shell.
Along with cutting, egg decoupage also involves tearing out - here various elements of the image are torn by hand, and the edges of these pieces give the effect of shading.
As for the choice of image, designs with bright floral and spring motifs look good. These may be the most different leaves, birds and everything else. For children, appropriate images are selected, and decoupage of Easter eggs in the Gzhel tradition will add special uniqueness and sophistication to the holiday table. To achieve the perfect result, you just need a little imagination.

On video: Master class on decoupage of Easter eggs
Working with egg whites
To decorate Easter eggs you will need:
- ready-made white chicken egg;
- one raw protein;
- napkins (single-layer or multi-layer, colored);
- scissors (manicure scissors are ideal for this task, they are convenient for cutting small elements);
- flat brush.

Before you start decoupaging the egg, you should know a few little secrets - with them the whole process will go right and everything will be very beautiful. It is not recommended to whip the protein that will be used instead of chemical glue. If you do beat the whites, then bubbles may remain on the shell, due to which the entire application will not have a very neat appearance. Stir the protein with a fork - this will prevent it from foaming, but will only disrupt its structure.
Now you can move on to the napkin: the bottom layer is separated if all the work will be done with the top one. This is true for multi-layer napkins. It is better to work out the image in advance - apply the cuttings to the shell and see if there is enough surface area and whether the image fits completely.

It is worth considering that what large sizes the selected drawing or individual element, the more difficult it is to work with it. Large elements are more difficult to glue smoothly due to round shape chicken product. Use a brush to smear the Easter egg; decoupage in this case requires extreme care.
The added layer of white can make the shell very slippery, increasing the risk of the egg breaking.
An element from a napkin is applied to the area lubricated with protein and glued on either with your hands or with a brush. The element is also coated with protein on top - apply a layer carefully from the middle of the napkin to the edges. While working, you should try not to touch the already glued parts of the drawing.
When the image is completely ready, coat the Easter eggs with white again. The decoupage on the surface must be dry, and after that it should be treated again with protein until completely dry. At this stage, our master class is completed, the whole process can be done on the remaining eggs.

Other binders
Easter eggs using the decoupage technique, they are also decorated using pictures and glue on starch or gelatin using sugar syrup. Gelatin glue is made simply: the powder is poured with water in the proportions specified by the manufacturer and soaked, then the composition is filtered and heated until the granules are completely dissolved. As for the application technique, it is no different from the technology with protein. This egg decoupage pattern can be confidently used with other adhesives.

Wooden eggs are also often decoupaged; this technique is somewhat different from decorating ordinary eggs with napkins.. First of all, the wooden surface is sanded and primed in several layers. Well, then an image is applied to the base with a napkin, which is fixed with PVA glue and acrylic paint. Decoupage Easter egg is beautiful, simple and exciting. Children will also really like this activity, because they love to show their creativity.
Ideas for decoupage of chicken and wooden Easter eggs (2 videos)
Ideas for decoupage eggs for Easter (36 photos)