Knitted handicrafts can be not only cute and beautiful toys for children, but also excellent souvenirs or gifts that will decorate, and maybe even beneficially complement the interior of your home. If you are just getting started with needlework, try crocheting small amigurumi-style dogs and soon you will want to fill the whole space with many of these adorable soft animals that are easy enough to make with your own hands.


Amigurumi - knitting for everyone
One of the techniques of the Japanese art of knitting small animals is called such a beautiful and interesting word - needlewomen knit bunnies, cats, dogs, bears, monkeys, owls, lambs and many other animals. Initially, such knitting was carried out on knitting needles and crocheted, but recently crocheted crafts are gaining more and more popularity.
As a rule, to knit amigurumi, ordinary colored yarn is taken and a very simple knitting method is used - in a spiral. The amigurumi dog, like any other knitted toy in this style, begins with knitting, the so-called amigurumi ring. If you look at the diagrams, you will see that it is usually designated there by the first row.


However, if you wish, you can start in a different way: just cast on two air loops and knit the number of single crochet stitches that you need in the second loop from the hook. However, keep in mind that the amigurumi ring has a very big advantage, since with this knitting method you will not have a hole in the middle.


In Japanese technique, unlike in European, circles, as a rule, do not need to be connected. It is better to crochet, which will be a couple of sizes smaller relative to the thickness of the selected yarn. This way you will be able to create a dense fabric in which there will be no openings or gaps, and this will help the safety of the padding material and give the toy a more aesthetic look.


The amigurumi dog is made in parts, which are then connected. Sometimes, to give live weight to the limbs, plastic pieces are used to stuff them, and the body itself is stuffed with fiber filler.

Master class Dachshund rainbow amigurumi crochet

Before starting directly to work, prepare everything you need:
- yarn of the desired colors (as a rule, you will need several of them);
- hook relative to the thickness of the yarn;
- filler (you can take cotton wool or synthetic winterizer);
- scissors, glue;
- a special needle for sewing soft toys or a needle with a large eye;
- blanks for the spout and peephole (it can be beads), other decorations, if you like.
Decide on the intended appearance of your future toy. An amigurumi puppy can be of any breed: Dachshund, Bulldog, Poodle, Dalmatian, Papillon, Shiba, Shiba Inu, or any other. Depending on what you choose, you will need to select the colors of the yarn.
Here are some examples for inspiration. Let's start with the dachshund.


- The dachshund amigurumi will look very beautiful if you take threads of bright rainbow colors to create it. You will also need a thin hook (# 1.5).
- First make the body of the dachshund. You need to start and finish in one color (let it be brown), and in the middle, place stripes of all the colors of the rainbow. After tying the torso, fill it with filler.
- Then grab your head. You need to start knitting it from the spout, that is, with black yarn. Then fill and tie as well.
- Now it's the turn of the neck and ears. And after that - the tail and paws.
- When everything is ready, sew all the parts together, glue the eyes (or sew on beads). You can make a dachshund and a nice little collar. To do this, you need to knit twenty air loops, connect them in a ring and knit twenty single crochet stitches. Then cut off the thread, choose some other color and with the thread of this color in the first row of the chain that you already have, knit another twenty sc on the back side. To finish off the collar, take a bead, thread it through the string, and secure.
- Your rainbow and cheerful dachshund is ready!


 Having chosen the desired scheme, be guided by it. First, tie the head and mark with dots the places where you will then glue or sew on the eyes. Having finished the head with the nose, move on to the ears and front legs, then - the body, hind legs and tail. After tying all the parts, fill them with filler and sew.
 Finally, you can decorate your dogs with some interesting details or accessories, giving them a special personality, charm and character.
Tail
, then we knit in a circle.
2 - 6 row. 6 CT
Do not stuff the tail. Sew on to the body.
Sew all the details according to the drawing. Sew on a plastic nose (or embroider) at the level of 2-3 rows of the muzzle in the center. Sew on the eyes.
For the ears, take a 4cm piece of cardboard and wrap the thread around it about 30 times. Remove the resulting hack from the cardboard blank and attach to the head.
A little dog
A small amigurumi dog knits very quickly, in just an hour your toy will be ready. Although the diagram has a lot of details, it is very simple and quite suitable for beginners. Dog - amigurumi will be the first, but most likely not the only dog in your collection of knitted toys. 
Materials:
Twisted yarn in light brown, dark brown, white and red (or color as desired).
Hook 3.75mm
Plastic eyes or buttons.
Black embroidery thread (about 30cm), needle
Stuffing for toys
Knitting pattern.
Head
1 row. 5 VP, we close it in a circle with a half-column, 1 VP for lifting, 8 ST
3 row. * 2 CT in the previous row, 1 CT *, repeat 8 times (24 CT)
4 - 9 row. 24 ST
10 row. * 2 CT together, 1ST *, repeat 8 times (16 CT)
Stuff your head.
11 row. * 2 CT together *, repeat 8 times (8 CT)
Finish with a half-column, secure leaving the long end of the amigurumi stitching thread.
Dog ears (2 parts)
Knit with dark brown yarn.
1 row. 4 VP, we close it in a circle with a half-column, 1 VP for lifting, 6 CT in a circle
2 row. * 2 CTs in the column of the previous row, 2 CTs *, repeat 2 times (8 CTs)
3 - 5 row. 8 CT
6 row. * 2 CT together, 2 CT *, repeat 2 times (6 CT)
Finish with a half-column, leaving the thread for sewing on the ears. To fill the ear, sew to the head.
 i>
i>
We knit with white yarn.
1 row. 4 VP, we close it in a circle with a half-column, 1 VP for lifting, 7 ST in a circle (7 ST)
2 row. In a circle 2 CTs in each column of the previous row (total 14 CTs)
We finish the row with a half-column, leave the thread for sewing.
Place the muzzle in the center of the face, pin and carefully sew.
Dog body
Knit with light brown yarn.
1 row. 5 VP, we close it in a circle with a half-column, 1 VP for lifting, 8 ST in a circle (8 ST)
2 row. * 2 CT in the column of the previous row, 1 CT *, repeat 3 times (12 CT)
3 - 6 row. 12 CT
Stuff the item with amigurumi.
7 row. * 2 CT together, 1 CT *, repeat 3 times (8 CT)
We end the row with a half-column, leaving a long thread.
If necessary, fill the part more tightly, pull the open hole with a needle and thread a little.
Paws (4 parts)
We knit with white yarn.
1 row. 4 VP, we close it in a circle with a half-column, 1 VP for lifting, 6 CT in a circle (6 CT)
2 row. 4 CT white yarn, 2 CT light brown yarn.
3 - 4 row. Knit in light brown 6 CT
We finish with a half-column, leaving the thread.
Don't stuff your paws!
Place in the right place and pin the paws to the dog's body so that it "sits" - move the hind legs forward a little, place the front legs between the hind legs. Sew the paws to the body. You can fasten the paws a little with white thread so that they do not creep.
Sew the body to the head.
Tail
Cast on 5 VP with white yarn, knit 4 CT, starting with the second VP from the hook. Fasten the thread, sew the tail to the dog's body.
Collar
We knit with red yarn.
Tie as many VPs as needed to wrap the dog around the neck 2 times and secure the ends. Sew the finished collar lightly to the body.
Embroider the nose and mouth on the muzzle in accordance with the pattern, sew on the eyes.
Do you need a reliable guardian for your valuables? Or even two watchmen? The amigurumi dog is always on the alert! The little amigurumi puppy learns from his dad, he is very serious and knows that a well-mannered dog never barks in vain. 
Dimensions:
Adult amigurumi dog - about 17.5cm
Amigurumi puppy - about 11.5cm
The sizes of the toys you knit may vary depending on your yarn.
Materials: Thick twisted yarn in black, orange and brown.
Hook 4.5 mm
Plastic eyes or buttons 9mm in diameter.
Black embroidery thread and needle
Amigurumi stuffing.

Nose
We knit with black yarn.
1 row. 2 VP, 8 CT in the second loop from the hook
2 row. In a circle, 2 CTs in each column of the previous row (total 16 CTs)
Circle for the eye
We knit with a brown thread.
1 row. 2 VP, 6 CT in the second loop from the hook
3 row. 5 ST, 4 ST in one column of the previous row, 6 ST.
Complete the row, leave the thread for sewing, set aside.
Head
Knitting the head according to the pattern starts from the tip of the nose.
We knit with orange yarn.
1 row. 2 VP, 6 CT in the second loop from the hook
2 row. In a circle 2 CTs in each column of the previous row (total 12 CTs)
6 row. * 4 CTs, 2 CTs per column of the previous row *, repeat 6 times (36 CTs)
7-16 row. 36 ST
17 row. * 4 CTs, 2 CTs together *, repeat 6 times (30 CTs)
Sew the nose to the head.
18 - 19 row. 30 ST
20 row. * 3 CTs, 2 CTs together *, repeat 6 times (24 CTs)
21 - 23 row. 24 ST
Sew one bead eye in the center of the brown eye circle, sew the eye together with the circle to the head. Sew the second eye to the head. Embroider the mouth.
24 row. * 2 CTs, 2 CTs together *, repeat 6 times (18 CTs)
26 row. * Skip one column, 1 CT *, repeat 6 times (6 CT)
Ears (2 parts)
We use brown.
3 - 11 row. 10 CT
Stuff and sew to the head.
Body
We knit in orange.
1 row. 2 VP, 6 CT in the second loop from the hook
2 row. In a circle 2 CTs in each column of the previous row (total 12 CTs)
3 row. * 1 CT, 2 CT in the column of the previous row *, repeat 6 times (18 CT)
4 row. * 2 CT, 2 CT in the column of the previous row *, repeat 6 times (24 CT)
5 row. * 3 CT, 2 CT per column of previous row *, repeat 6 times (30 CT)
6 - 15 row. 30 ST
16 row. * 3 CTs, 2 CTs together *, repeat 6 times (24 CTs)
17 row. 24 ST
Row 18. * 2 CTs, 2 CTs together *, repeat 6 times (18 CTs)
19 - 21 rows. 18 ST
Stuff and sew to the head.
Paws (4 parts)
We use orange color.
1 row. 2 VP, 5 CT in the second loop from the hook
2 row. In a circle 2 CTs in each column of the previous row (total 10 CTs)
3 - 9 row. 10 CT
Finish the row with a half-column, leaving the thread for sewing.
Stuff and sew to the body.
If you want to make part of the paw in a different color, then knit rows 1 to 4 with a different color.
Tail
We use brown.
1 row. 2 VP, 5 CT in the second loop from the hook
2-4 row. 5 ST
Finish the row with a half-column, leaving the thread for sewing.
Sew on to the body. You do not need to stuff the tail.

Nose
We knit with black yarn.
1 row. 2 VP, 5 CT in the second loop from the hook
2 row. In a circle 2 CTs in each column of the previous row (total 10 CTs)
Complete the row, leave a long thread to sew on and set aside.
Circle for the eye
We knit with an orange thread.
1 row. 2 VP, 5 CT in the second loop from the hook
2 row. In a circle 2 CTs in each column of the previous row (total 10 CTs)
Finish, leave thread to sew on, set aside.
Head
We knit with brown yarn.
1 row. 2 VP, 5 CT in the second loop from the hook
2 row. In a circle 2 CTs in each column of the previous row (total 10 CTs)
5 row. * 3 CTs, 2 CTs per column of the previous row *, repeat 5 times (25 CTs)
6 - 13 row. 25 ST
Sew one bead eye in the center of the circle for the eye, sew the eye together with the circle to the head. Sew the second eye to the head. Sew on the nose.
14 row. * 3 CTs, 2 CTs together *, repeat 5 times (20 CTs)
15 - 17 row. 20 CT
Row 18. * 2 CTs, 2 CTs together *, repeat 5 times (15 CTs)
Stuff your head all the way to the top.
19 row. * 1 CT, 2 CT together *, repeat 5 times (10 CT)
20 row. * Skip one column, 1 CT *, repeat 5 times (5 CT)
Complete the row, fasten the thread.
Ears (2 parts)
We use brown.
3 - 7 row. 8 CT
Finish the row with a half-column, leaving the thread for sewing.
Stuff and sew to the head.
Body
We knit in brown.
1 row. 2 VP, 5 CT in the second loop from the hook
2 row. In a circle 2 CTs in each column of the previous row (total 10 CTs)
3 row. * 1 CT, 2 CT in the column of the previous row *, repeat 5 times (15 CT)
4 row. * 2 CT, 2 CT per column of the previous row *, repeat 5 times (20 CT)
5 - 8 row. 20 CT
9 row. * 2 CTs, 2 CTs together *, repeat 6 times (15 CTs)
10-13 row. 18 ST
Complete the row, leaving the thread to be sewn on.
Stuff and sew to the head.
Paws (4 parts)
We use brown.
1 row. 2 VP, 4 CT in the second loop from the hook
2 row. In a circle, 2 CTs in each column of the previous row (total 8 CTs)
3 - 6 row. 8 CT
Finish the row with a half-column, leaving the thread for sewing.
Stuff and sew to the body.
Optionally, you can make one paw in a different color.
Tail
We knit in orange
1 row. 2 VP, 4 CT in the second loop from the hook
2 - 3 row. 4 ST
Finish the row with a half-column, leaving the thread for sewing.
Sew on to the body, no need to stuff.
Amigurumi is the art of crocheting toys. This type of creativity originated in Japan. Initially, these were small toys: amigurumi dogs, cats, bears, bunnies and so on. Later, craftswomen began to knit products of medium and large sizes. Now this art is spread all over the world. If you wish, you can find thousands of different descriptions and diagrams of amigurumi dogs, dolls and even clothes for them and interior items. Knitters also love to create toy food: cakes, ice creams, fruits and vegetables, fries, and more.
Knitting toys can also make good money. Many craftswomen knit products to order. Knitted toys look very unusual and original, so many people buy them. Anyone, even a beginner knitter, can try their hand at this business.
Almost everyone would like to have their own dog, if not a real one, then at least a toy one. We offer some schemes and descriptions of amigurumi dogs.
Abbreviations
For convenience, we will use the following abbreviations:
- stbn - single crochet;
- pc - increase;
- uk - decrease;
- vzp - air loop.
Dalmatian: description
After the release of the world famous film "101 Dalmatians", many fell in love with these beautiful animals. Let's try to knit such an amigurumi dog according to the master class presented below.
To do this, you need white and black yarn. Perfect for knitting a Dalmatian "Pekhorka": "Children's novelty" is a rather thin yarn - you need a hook 1.5-1.7 millimeters in size for it.
You also need scissors and a needle with a large eye in order to connect all the parts after knitting the amigurumi dog. For the eyes, you will need beads and floss threads to sew them on.

If you use the eyes on the mount, then the floss threads are not needed.

Do not forget also about holofiber - this is one of the best fillers for toys: it does not cause allergies and does not deteriorate when washed.

And now more about how to tie an amigurumi dog.
Head
Let's remember the legend and start knitting the dog's head:
- 6 single crochet in an amigurumi ring;
- 6 increments (12);
- (sc, pb) six times (18);
- (2 sc, pb) 6 times in a row (24);
- (3, pb) x 6 (30);
- (4, pb) x 6 (36);
- (5, pb) x 6 (42);
- (6, pb) x 6 (48);
- (7, pb) x 6 (54);
- (8, pb) x 6 (60);
- (9, pb) x6 (66);
- 10 rows in a row: 66 short columns, that is, without a crochet;
- (9 stbn, uk) x 6 (60);
- (8, yk) x 6 (54);
- (7, yk) x 6 (48);
- (6, yk) x 6 (42);
- (5, yk) x 6 (36);
- (4, yk) x 6 (30);
- (3, yk) x 6 (24).
Finished knitting the head. Now let's get down to the muzzle. We take a white thread:
- 6 adding. (12);
- (sc, pk) six times (18);
- (2 sc, pc) x 6 (24);
- (3 sc, pc) x 6 (30);
- 9, pc, 9, pc, 9, pc;
- 7 rows in a row: 33 single crochet.
Now we knit ears:
- two air loops and in the first of them 6 single crochet;
- 6 arr. (12);
- (sc, pc) x 6 (18);
- 8, pc, pc, 8 (20);
- 9, pc, pc, 9 (22);
- 10, pc, pc, 10 (24);
- 11, pc, pc, 11 (26);
- 12, pc, pc, 12 (28);
- 13, pc, pc, 13 (30);
- 4 rows in a row: 30 single crochet;
- 13, uk, uk, 13 (28);
- 12, uk, uk, 12 (26);
- 11, uk, uk, 11 (24);
- 10, uk, uk, 10 (22);
- 9, uk, uk, 9 (20);
- 8, uk, uk, 8 (18);
- 7, uk, uk, 7 (16);
- 16 single crochet.
Torso
We start by knitting the legs. Using black thread:
- 2 vzp, in the second from the hook 6 short columns;
- 6 pc (12);
- (sc, pc) with six repetitions (18);
- (2 sc, pc) x 6 (24);
- (3 sc, pc) x 6 (30);
- 3 rows in a row: 30;
- 9 stbn, uk, uk, uk, uk, uk, 11 stbn;
- 8 stbn, uk, uk, uk, uk, 8 stbn;
- 8 stbn, uk, uk, 8 stbn;.
Now we take a white thread:
- 19 rows in a row: 18.
In the same way, we crochet the second leg of the amigurumi dog.
- 42 single crochet;
- 14 sc; (sc, pk) six times; 16 sc (48);
- 12 rows in a row: 48;
- 14 stbn, decreasing, 14, uk, 14, uk (45);
- 2 rows in a row: 45;
- 13 stbn, uk, 13, uk, 13, uk (42);
- 2 rows in a row: 42;
- 12 stbn, uk, 12, uk, 12, uk (39);
- 2 rows in a row: 39;
- 11 stbn, uk, 11, uk, 11, uk (36);
- 2 rows in a row: 36;
- 10 stbn, uk, 10, uk, 10, uk (33);
- 2 rows in a row: 33;
- 9 stbn, uk, 9, uk, 9, uk (30);
- 2 rows in a row: 30;
- 8 stbn, uk, 8, uk, 8, uk (27);
- 2 rows in a row: 27;
- 7 stbn, uk, 7, uk, 7, uk (24);
- 2 rows in a row: 24.
Crocheting the torso of the amigurumi dog is finished. We leave the thread for sewing on the head.
Moving on to the front legs. First we use black thread:
- 6 short posts;
- 6 arr. (12);
- (sc, pc) x 6 (18);
- 18 short posts;
- 7 sc; 3 double crochet in one loop; 10 sc (21);
- 7 sc; decrease from 3 columns; 10 sc (18);
- 18 short posts;
- 4 stbn, uk, 4, uk, 4, uk (15);
- 3 stbn, uk, 3, uk, 3, uk (12).
Now the white thread:
- 23 rows in a row: 12.
We start knitting the tail:
- 6 basic columns in a "magic" ring;
- 3 rows in a row: 6;
- stbn, pc, 1, pc, 1, pc (9);
- 12 rows in a row: 9.
And only spots remain. It is very easy to knit them. We make an amigurumi ring, we knit six single crochet into it. Further, based on the desired spot size, we knit increments. For a small speck, you can stop at two rows (the second of which includes six increments). For a large speck, we continue to make increments: third row - (stbn, pb) six times; the fourth - (two stbn, pb) six times and so on.
Well, the amigurumi scheme is over. Now let's move on to the assembly. Details must be sewn to each other carefully. Before doing this, be sure to fill the parts tightly with holofiber.

Labrador puppy: description
We tied the Dalmatian, now let's move on to the scheme of the amigurumi of a dog of a different breed. To knit a Labrador puppy, you need beige, white or brown yarn of your choice. We will knit the entire toy from yarn of this color. I also need some black yarn for the nose.
Head
We start knitting from the puppy's head:
- 6 short posts in a "magic" ring;
- 6 pc (12);
- stbzn, pc; (2 st, pc) x 5; 2 stbzn (24);
- 5 rows in a row: 24;
- (3 st, pc) six times (30);
- 2 stbzn, pc; (4 st, pc) x 5; 2 stbzn (36);
- (5 stbzn, pc) x 5; 6 Art (41);
- (5 stbzn, pc) x 5; 6 Art (46);
- (7 stbzn, pc) x 5; 6 Art (51);
- (8 stbzn, pc) x 5; 6 Art (56);
- 8 stbzn, pc; (9 st, pc) four times; 7 stbzn (61);
- 9 stbzn, pc; (10 st, pc) four times; 7 stbzn (66);
- 9 stbzn, pc; (11 st, pc) four times; 8 stbzn (71);
- 4 rows in a row: 71;
- 9 stbzn, uk; (11 st, uk) four times; 8 stbzn (66);
- 4 rows in a row: 66;
- (9 stbzn, uk) x 6 (60);
- 4 stbzn, uk; (8 st, uk) x 5; 4 stbzn (54);
- (7 stbzn, uk) x 6 (48);
- 3 stbzn, uk; (6 st, uk) x 5; 3 stbzn (42);
- (5 stbzn, uk) x 6 (36);
- 2 stbzn, uk; (4 st, uk) x 5; 2 stbzn (30);
- (3 stbzn, uk) x 6 (24);
- 1 stbzn, uk; (2 st, uk) x 5; 1 stbzn (18);
- (st, uk) x 6 (12).
Torso
After the head, we move on to knitting the torso:
- 8 short posts in an amigurumi ring;
- 8 increments (16);
- (stbzn, pk) eight times (24);
- (2 st, pc) the same number of times (32);
- (3 st, pc) x 8 (40);
- 12 rows in a row: 40;
- (3 st, uk) x 8 (32);
- 8 rows in a row: 32;
- (2 st, uk) x 8 (24);
- (1 st, uk) 8 times (16).
- 3 increments (6);
- (stbzn, pk) three times (9);
- (2 stbzn, pc) three times (12);
- (3 stbzn, pc) three times (15);
- 14 rows in a row: 15;
- 7 stbzn, eight increments (21).
Then the ears:
- 6 short posts in the amigurumi ring;
- 6 tbsp. without nak .;
- 6 pc (12);
- 12 short posts;
- (stbzn, pk) six times (18);
- (2 stbzn, pc) with six repetitions (24);
- (3, pc) x 6 (30);
- (4, pc) each other 6 times (36);
- 14 rows in a row: 36;
- (4 stbzn, uk) 6 times in a row (30);
- we collect the eyelet in half and fix 2 stbzn, uk, 2, uk, 2, uk, 3 (15).
Now the nose:
- 3 single crochet in an amigurumi ring;
- 3 increments (6);
- (st, pc) three times (9).
Front legs:
- 6 pc (12);
- (stbzn, pk) six times (18);
- stbzn, pc; (2 st, pc) five times; 2 tbsp (24);
- 2 rows in a row: 24;
- 14 stbzn, uk, 2, uk, uk (21);
- 13 st, uk, 1, uk, 1, uk (18);
- 12 st, 3 ck (15);
- 16 rows in a row: 15.
Hind legs:
- 6 basic posts in the amigurumi ring;
- 6 pc (12);
- (stbzn, pc) with six reps (18);
- stbzn, pc; (2 st, pc) five times (24);
- 2 rows in a row: 24;
- 14 st, uk, 2, uk, 2, uk (21);
- 13 st, uk, 1, uk, 1, uk (18);
- 12 st, 3 ck (15);
- 14 rows in a row: 15.
We stuff everything in the knitting process, except for the ears and nose. We carefully connect the parts. As a result, we get a pretty cute puppy.

Dog keychain: description
We knitted a bigger dog, a smaller dog, and now we will knit the smallest one, which can easily fit in the palm of your hand and even in your pocket.
For knitting, you need beige and brown yarn.
Head
We use a beige thread for knitting:
- 6 pc (12);
- (stbzn, pk) six times (18);
- (2 stbzn, pc) the same number of times (24);
- (3, pc) x 6 (30);
- (4, pc) six repetitions (36);
- 7 rows in a row: 36;
- (4 stbzn, uk) six times (30);
- (3, uk) the same repetitions (24);
- (2, yk) the same amount (18);
- (1, yk) the same number (12).
The face is also knitted from beige yarn:
- 6 pillar. without nak. in the amiguru ring;
- 3 stbzn in one loop, 2, 3 sts in one loop, 2 (10);
- 3 pc, 2 stbzn, 3 pc, 2 (16);
- 2 rows in a row: 16.
Ears - for them we will choose brown threads:
- 6 pillar. without nak. in the amigurumi ring;
- 6 pc (12);
- 8 rows in a row: 12 single crochet;
- 4 stbzn, uk, 4, uk (10).
Torso
Beige thread used:
- 6 pillar. without nak. in a circle;
- 6 pc (12);
- (stbzn, pk) six times (18);
- 7 rows in a row: 18;
- (stbzn, uk) x 6 (12).
We also knit the back legs from beige yarn:
- 6 basic columns in an amigurumi ring;
- 2 stbzn, pk, 2, pk (8);
- 4 rows in a row: 8.
The front legs are the same color as the rear ones:
- 7 pillar. without nak. in a ring;
- 5 rows in a row: 7.
- 6 short posts in a "magic" ring;
- 2 stbzn, pk, 2, pk (8);
- 8 basic columns.
Knitting has come to an end. Now you need to connect all the parts, carefully stitching them together. Sew the muzzle to the head and embroider the nose on it with brown yarn. We place the eyes on both sides of the muzzle. The ears should not be sewn directly on the top of the head, otherwise they will seem too short, it is better to place them a little lower, on the sides. We attach the front and hind legs equally to the body.

That's all, the product is ready! The doggy keychain will perfectly decorate your keychain or purse. We wish you inspiration and pleasant knitting!
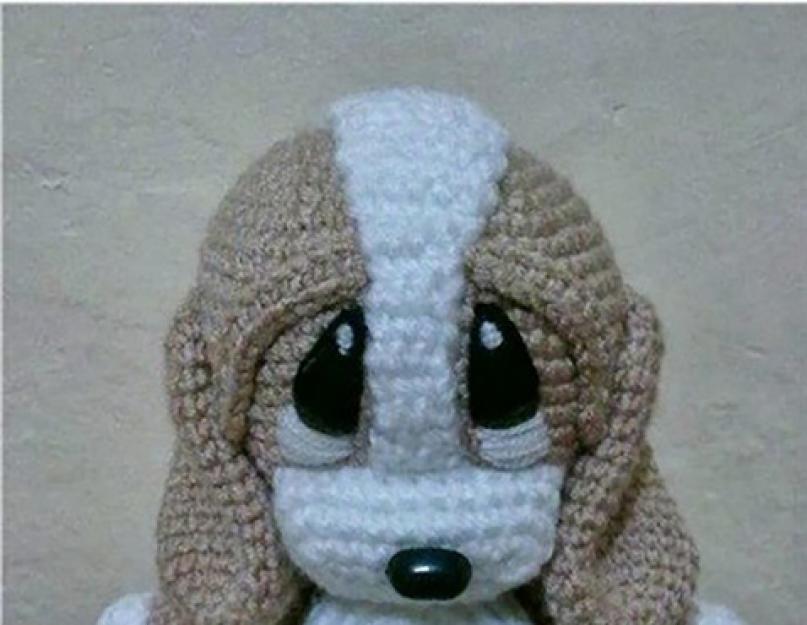
With the appearance of small children in the family, many needlewomen begin to knit more and more things for their kids - blouses, skirts, dresses ... Not the last place in this list is occupied by handmade toys. In today's master class, we will take a closer look at an example of how toys are crocheted with a dog's crochet, so even if you have just mastered the crochet hook, do not be afraid to try it!
For work we need:
- beige yarn for the body, head and paws, lilac for the ears, tail and nose, the rest of the yarn in black and white for finishing;
- hook;
- holofiber;
- some felt;
- needle;
- scissors.
Work description
We will knit in a spiral with single crochet columns (hereinafter s. Without n.) For both half-loops.
Important! We knit the first 2-3 rows counterclockwise, after which we twist the knitting and continue working clockwise, leaving the tail of the thread inside.
Head
We carry out crocheting with beige thread.
12-15 pp.: P. without n. = 66 s. without n ..
17 p.: P. without n. = 64 s. without n ..
18 p.: * 30 p. without n., ass. *, x 2 = 62 s. without n ..
19 p.: P. without n. = 62 s. without n ..
20 p.: * 29 p. without n., ub. *, x 2 = 60 s. without n ..
21 p.: P. without n. = 60 s. without n ..
22 p.: * 28 p. without n., ass. *, x 2 = 58 s. without n ..
23 p.: P. without n. = 58 s. without n ..
24 p.: * 27 p. without n., ub. *, x 2 = 56 s. without n ..
25 p.: * 12 p. without n., ub. *, x 4 = 52 s. without n ..
26 p.: * 11 p. without n., ass. *, x 4 = 48 s. without n ..
27 p.: * 6 p. without n., ub. *, x 6 = 42 s. without n ..
28 p.: * 5 p. without n., ass. *, x 6 = 36 s. without n ..
29-34 pp.: P. without n. = 36 s. without n ..
We fill the dog's face with holofiber and continue according to the scheme:
35 p.: * 5 p. without n., pr. *, x 6 = 42 s. without n ..
36 p.: * 6 p. without n., pr. *, x 6 = 48 s. without n ..
37-41 pp.: P. without n. = 48 s. without n ..
42 p.: * Ass., 6 p. without n. *, x 6 = 42 s. without n ..
43 p.: * Ass., 5 p. without n. *, x 6 = 36 s. without n ..
44 p.: * Ass., 4 p. without n. *, x 6 = 30 s. without n ..
45 p.: * Ass., 3 p. without n. *, x 6 = 24 s. without n ..
46 p.: * Ass., 2 p. without n. *, x 6 = 18 s. without n ..
47 p.: * Ass., 1 p. without n. *, x 6 = 12 s. without n ..
48 p .: kill. x 6 = 6 s. without n ..
We fill the toy part completely.
Eyes
We knit with black yarn for 6 s. without n. into the amigurumi ring and tighten the thread, leaving a small tail for stitching the toy parts. We carry out two such blanks - these will be the pupils of the eyes.
After that, we crochet with a white thread of the whites of the eye according to the scheme:
1 p.: 6 p. without n. in the amigurumi ring.
2 p.: Pr. X 6 = 12 s. without n ..
3 p.: * Pr., 1 p. without n. *, x 6 = 18 s. without n ..
5 p.: * Ass., 1 p. without n. *, x 6 = 12 s. without n ..
We knit two centuries with beige threads.
1 p.: 6 p. without n. in the amigurumi ring.
2 p.: 6 pr. = 12 s. without n ..
3 p.: * 1 pr., 1 s. without n. *, x 6 = 18 s. without n ..
4 p.: * 1 pr., 2 p. without n. *, x 6 = 24 s. without n ..
We tighten the thread, leaving a little for stitching the dog's parts.
We sew the eyelids to the head, add quite a bit of holofiber inside, then we sew the whites of the eyes and then the pupils.
Spout
1 p.: 4 p. without n. into an amigurumi ring, leave a long tail and continue according to the scheme:
2 p.: * 1 pr., 1 s. without n. *, x 2 = 6 s. without n ..
3 p.: * 1 pr., 2 p. without n. *, x 2 = 8 s. without n ..
4 p.: * 1 pr., 3 p. without n. *, x 2 = 10 s. without n ..
5 p.: * 1 pr., 4 p. without n. *, x 2 = 12 s. without n ..
6 p.: * 1 pr., 5 p. without n. *, x 2 = 14 s. without n ..
7 p.: * 1 pr., 6 p. without n. *, x 2 = 16 s. without n ..
8 p.: * 1 pr., 7 p. without n. *, x 2 = 18 s. without n ..
9 p.: * 1 pr., 8 p. without n. *, x 2 = 20 s. without n ..
We tighten the thread, leaving a little for stitching the dog's parts.
Flatten the resulting cap into a triangle and sew the nose onto the muzzle of the toy. We embroider the mouth with a thread-tail.
Ears
We use a lilac thread.
1 p.: 6 p. without n. in the amigurumi ring.
2 p.: 6 pr. = 12 s. without n ..
3 p.: * 1 pr., 1 s. without n. *, x 6 = 18 s. without n ..
4 p .: p. without n. = 18 s. without n ..
5 p.: * 1 pr., 2 p. without n. *, x 6 = 24 s. without n ..
6-10 pp.: P. without n. = 24 s. without n ..
11 p.: * 1 dec., 10 p. without n. *, x 2 = 22 s. without n ..
12-14 pp.: P. without n. = 22 s. without n ..
15 p.: * 1 ass., 9 p. without n. *, x 2 = 20 s. without n ..
16-18 pp.: P. without n. = 20 s. without n ..
19 p.: * 1 dec., 8 p. without n. *, x 2 = 18 s. without n ..
20-22 pp. without n. = 18 s. without n ..
23 p.: * 1 dec., 7 p. without n. *, x 2 = 16 s. without n ..
24-26 pp.: P. without n. = 16 s. without n ..
27 p.: * 1 dec., 6 p. without n. *, x 2 = 14 s. without n ..
28 p.: * 1 dec., 5 p. without n. *, x 2 = 12 s. without n ..
29 p .: 6 kill. = 6 s. without n ..
We tighten the thread, leaving a little for stitching the dog's parts. We do the second ear in the same way.
Torso
We continue crocheting with a beige thread.
1 p.: 6 p. without n. in the amigurumi ring.
2 p.: 6 pr. = 12 s. without n ..
3 p.: * 1 pr., 1 s. without n. *, x 6 = 18 s. without n ..
4 p.: * 1 pr., 2 p. without n. *, x 6 = 24s. without n ..
5 p.: * 1 pr., 3 p. without n. *, x 6 = 30 s. without n ..
6 p.: * 1 pr., 4 p. without n. *, x 6 = 36 s. without n ..
7 p.: * 1 pr., 5 p. without n. *, x 6 = 42 s. without n ..
8 p.: * 1 pr., 6 p. without n. *, x 6 = 48 s. without n ..
9 p.: * 1 pr., 7 p. without n. *, x 6 = 54 s. without n ..
10 p.: * 1 pr., 8 p. without n. *, x 6 = 60 s. without n ..
11 p.: * 1 pr., 9 p. without n. *, x 6 = 66 s. without n ..
12-14 pp.: P. without n. = 66 s. without n ..
15 p.: * 31 p. without n., ass. *, x 2 = 64 s. without n ..
16 p.: P. without n. = 64 s. without n ..
17 p.: * 14 p. without n., ub. *, x 4 = 60 s. without n ..
18 p.: P. without n. = 60 s. without n ..
19 p.: * 13 p. without n., ass. *, x 4 = 56 s. without n ..
20 p.: P. without n. = 56 s. without n ..
21 p.: * 12 p. without n., ub. *, x 4 = 52 s. without n ..
22 p.: P. without n. = 52 s. without n ..
23 p.: * 11 p. without n., ass. *, x 4 = 48 s. without n ..
24 p.: P. without n. = 48 s. without n ..
25 p.: * 10 p. without n., ub. *, x 4 = 44 s. without n ..
26 p.: P. without n. = 44 s. without n ..
27 p.: * 9 p. without n., ass. *, x 4 = 40 s. without n ..
28 p.: P. without n. = 40 s. without n ..
29 p.: * 18 p. without n., ub. *, x 2 = 38 s. without n ..
30 p.: P. without n. = 38 s. without n ..
21 p.: * 17 p. without n., ass. *, x 2 = 36 s. without n ..
32 p.: P. without n. = 36 s. without n ..
33 p.: * 16 p. without n., ass. *, x 2 = 34 s. without n ..
34 p.: P. without n. = 34 s. without n ..
35 p.: * 15 p. without n., ass. *, x 2 = 32 s. without n ..
36 p.: P. without n. = 32 s. without n ..
37 p.: * 14 p. without n., ub. *, x 2 = 30 s. without n ..
38 p.: P. without n. = 30 s. without n ..
39 p.: * 13 p. without n., ass. *, x 2 = 28 s. without n ..
40 p.: * 12 p. without n., ub. *, x 2 = 28 s. without n ..
41 p.: * 11 p. without n., ass. *, x 2 = 24 s. without n ..
42 p .: 12 dec. = 12 s. without n ..
43 p .: 6 dec. = 6 s. without n ..
We tighten the thread, leaving a little for stitching the dog's parts. We fill the body with holofiber.
Front legs
Crochet with beige thread.
1 p.: 6 p. without n. in the amigurumi ring.
2 p.: 6 pr. = 12 s. without n ..
3 p.: * 1 pr., 1 s. without n. *, x 6 = 18 s. without n ..
4 p.: * 1 pr., 2 p. without n. *, x 6 = 24 s. without n ..
5 p.: * 1 pr., 3 p. without n. *, x 6 = 30 s. without n ..
6 p.: * 1 pr., 1 p. without n. *, x 6 = 18 s. without n ..
7 p.: * 1 pr., 17 p. without n. *, x 2 = 38 s. without n ..
8 p.: * 1 pr., 18 p. without n. *, x 2 = 40 s. without n ..
9 p.: * 1 pr., 19 p. without n. *, x 2 = 42 s. without n ..
10 p.: * 1 pr., 13 p. without n. *, x 3 = 45 s. without n ..
11 p.: * 1 pr., 14 p. without n. *, x 3 = 48 s. without n ..
12-14 pp.: P. without n. = 48 s. without n ..
15 p.: * 10 p. without n., ub. *, x 4 = 44 s. without n ..
16 p.: P. without n. = 44 s. without n ..
17 p.: * 9 p. without n., ass. *, x 4 = 40 s. without n ..
18 p.: P. without n. = 40 s. without n ..
19 p.: * 8 p. without n., ass. *, x 4 = 36 s. without n ..
20 p.: P. without n. = 36 s. without n ..
21 p.: * 2 p. without n., ub. *, x 9 = 27 s. without n ..
22-41 pp.: P. without n. = 27 s. without n ..
42 p.: * 7 p. without n., ub. *, x 3 = 24 s. without n ..
43 p.: * 2 p. without n., ub. *, x 6 = 18 s. without n ..
44 p.: * 1 p. without n., ass. *, x 6 = 12 s. without n ..
We tighten and cut the thread, as usual, leaving the ponytail. We make the second foot in the same way.
Hind legs
We continue knitting with the same beige thread.
1 p.: 6 p. without n. in the amigurumi ring.
2 p.: 6 pr. = 12 s. without n ..
3 p.: * 1 pr., 1 s. without n. *, x 6 = 18 s. without n ..
4 p.: * 1 pr., 2 p. without n. *, x 6 = 24 s. without n ..
5 p.: * 1 pr., 3 p. without n. *, x 6 = 30 s. without n ..
6 p.: * 1 pr., 4 p. without n. *, x 6 = 36 s. without n ..
7 p.: * 1 pr., 5 p. without n. *, x 6 = 42 s. without n ..
8 p.: * 1 pr., 6 p. without n. *, x 6 = 48 s. without n ..
9 p.: * 1 pr., 7 p. without n. *, x 6 = 54 s. without n ..
10 p.: * 1 pr., 8 p. without n. *, x 6 = 60 s. without n ..
11 p.: 60 p. without n. crochet the back half loop to form a "scar" when going from sole to foot.
12-14 pp.: 60 s. without n. in the usual way.
15 p.: 18 p. without n., ub., 20 p. without n., ub., 18 p. without n. = 58 s. without n ..
16 p.: 17 p. without n., ub., 20 p. without n., ub., 17 p. without n. = 56 s. without n ..
17 p.: 16 p. without n., ub., 20 p. without n., ub., 16 p. without n. = 54 s. without n ..
18 p.: 15 p. without n., ub., 20 p. without n., ub., 15 p. without n. = 52 s. without n ..
19 p .: 14 p. without n., ub., 20 p. without n., ub., 14 p. without n. = 50 s. without n ..
20 p.: 13 p. without n., ub., 8 p. without n., 2 ass., 8 p. without n., ub., 13 p. without n. = 46 s. without n ..
21 p. 12 p. without n., ub., 7 p. without n., 2 ass., 7 p. without n., ub., 12 p. without n. = 42 s. without n ..
22 p.: 12 p. without n., * ass., 1 s. without n. * repeat ** x 6, 12 s. without n = 36 s. without n ..
23 p.: * Ass., 4 p. without n. *, x 6 = 30 s. without n ..
24-43: p. without n. = 30 s. without n ..
44 p.: * Ass., 3 p. without n. *, x 6 = 24 s. without n ..
45 p.: * Ass., 2 p. without n. *, x 6 = 18 s. without n ..
46 p.: * Ass., 1 p. without n. *, x 6 = 12 s. without n ..
We tighten and cut the thread, leaving a long end for sewing the toy. We crochet the second foot in the same way, after which we fill both parts of the toy with holofiber.
Tail
We use lilac thread.
1 p.: 6 p. without n. in a ring amigurumi
2 p.: * Pr., 2 p. without n. *, x 2 = 8 s. without n ..
3 p .: p. without n. = 8 s. without n ..
4 p.: * Pr., 3 p. without n. *, x 2 = 10 s. without n ..
5 p.: P. without n. = 8 s. without n ..
6 p.: * Pr., 4 p. without n. *, x 2 = 12 s. without n ..
7 p .: p. without n. = 12 s. without n ..
8 p.: * Pr., 5 p. without n. *, x 2 = 14 s. without n ..
9 p .: p. without n. = 14 s. without n ..
10 p.: * Pr., 6 p. without n. *, x 2 = 16 s. without n ..
11-15 pp.: P. without n. = 16 s. without n ..
We tighten the thread and cut it off, leaving a long section for sewing the tail to the dog's body.
Collar
With lilac yarn we crochet a chain from 30 century. etc. and knit all the loops with double crochets.
Assembly
We sew the dog's head to the body, wrap the collar around the neck and sew it. After that, you need to sew the ears to the head of the dog, and to the body of the toy - the legs and tail. If you wish, you can embroider the toes on the paws with a contrasting thread and sew circles of felt, which will serve as pads on the hind legs. Knitting of the toy is over!
We hope our tutorial will be useful for you. Happy knitting!
Crochet puppy: video master class
Selection of schemes


Knitted crafts should not only be lovely and cute, but also useful. The amigurumi dog meets this criterion; in addition to its unique grace, it can become an excellent fun for a child and a souvenir for a holiday for loved ones. Beginners in such an exciting activity as knitting can try their hand at creating small animals in the amigurumi style. The result will not be long in coming - you will definitely want these adorable animals around you. We offer you ways of how to knit an original amigurumi dog with your own hands.
Before you start knitting, prepare the following:
- Yarn in several colors.
- Hook according to thread thickness.
- Cotton wool or synthetic winterizer.
- Glue.
- Scissors.
- A needle with a large eye or special for making soft toys.
- Beads or other jewelry that will become eyes and nose.
Choose for yourself how the dog will look like. The choice is wide: Dalmatians, dachshunds, bulldogs, poodles and other breeds. In accordance with what kind of dog will knit, select the color palette of the yarn.

Bright threads will do; you need a hook number 1.5. You need to start work with the dog's body. Its beginning and end must be the same color. In the middle, a rainbow of shades will look beautiful. When the torso is ready, fill it with filler and then start knitting the head. The nose should be the beginning. It is also stuffed, and then tied up. The last are the neck, ears, tail and paws, after the details are sewn together, the eyes are glued.
To get an excellent result, you need to clearly follow the presented scheme.

Keychain Puppy
A keychain made in the form of a miniature dog will be a surprise for any adult. The growth of the crumbs that you can knit according to the scheme is only 2.7 cm.To create it, you need:
- The threads are pink.
- Hook No. 0.75.
- Synthetic fluff as a filler.
- Mouline thread (black).
- Needles, scissors and future eyes with a spout.
First, knit the head, put marks in the places where the eyes will be sewn. When the head and nose are ready, go to the ears and front legs, then the torso, hind legs and tail will go. Fill the workpiece with filler and sew with a needle. Do not forget to make eyes and a nose, they can be glued or sewn on.

Puppy for New Year
Since the holidays are not far off and, moreover, the Year of the Dog, then by tying a wonderful New Year's dog you will delight the ruler of 2018. You need to prepare a standard set of accessories.
In this case, you need to start knitting from the lower legs, tie them separately, and then connect them. Next, go to the body, then separately knit the upper legs, ears and muzzle. Finally, you need to make a cap, like Santa Claus. Fill all the details with filler, sew, glue the nose, eyes and enjoy your work!
If you wish, you can decorate the crafts with interesting details, for example, tie a collar or place a hairpin on the head of a new resident of your house. Show your imagination, and your life will be filled with colors along with the amigurumi dogs.