Carnival costumes- an invariable attribute of children's parties. And often important detail Many children's costumes feature a crown. It’s great if you have ready-made costumes for a king or queen, prince or princess. But if there is none, parents are faced with the question: how to make a crown with your own hands? The easiest way to make a crown is from paper or cardboard.
We offer a simple master class on making a crown from cardboard. This crown is suitable for both girls and boys.
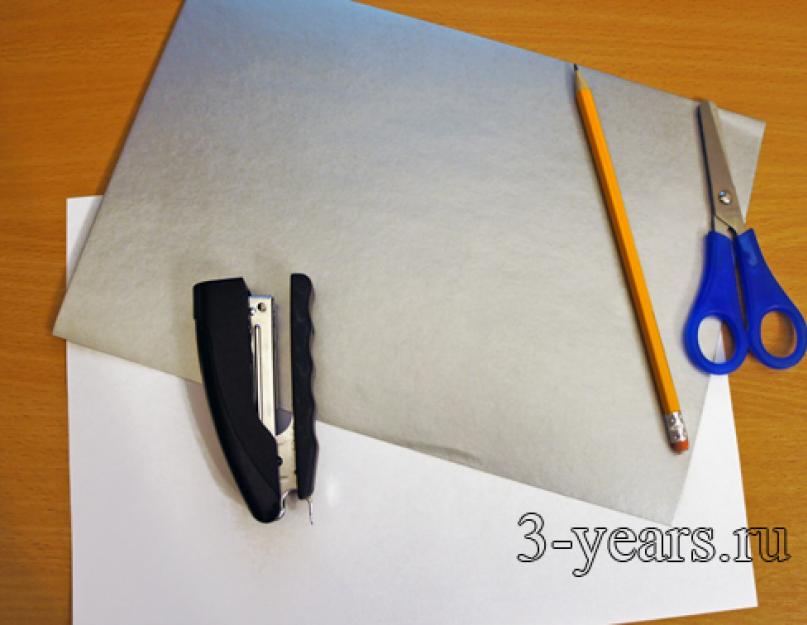
So, we need:
- Plain paper;
- Pencil;
- Scissors;
- Colored paper or cardboard;
- Stapler or glue.

First, let's create a sketch of the crown. Then we will translate it on plain paper. We folded the A4 sheet in half to make our decoration symmetrical and drew a preliminary diagram. Keep in mind that the size of a sheet of cardboard or colored paper may be slightly smaller than standard A4.

The lines were slightly rounded. We got this crown template.

We then cut out the crown pieces from paper.

Now you need to fasten the halves with a stapler and try on the mock-up of the crown on the child’s head. If necessary, we adjust the size of the crown - narrow it or, conversely, make the template a little wider.

We separate the parts again and transfer the template to colored paper or cardboard.


Carefully cut out the parts and connect them using glue or a stapler. The crown for the princess or prince is ready. If desired, you can decorate it with colored applique or rhinestones.

You can create your own crown pattern or download crown template from our website and print it. Even if you use a ready-made template, it is better to first make a layout from plain paper to make sure that the product is the right size for the child.
Happy holiday to you!
All fathers and mothers have princes and princesses. And since the attribute of noble persons is a crown, you definitely need to get one. After all, sooner or later your royalty will have to put this symbol of greatness on their heads - at least as an element of costume for a matinee. This is when tips on how to make a crown out of cardboard will come in handy for parents.
No matter how wonderful fancy dress prince or princess, king or queen, it won't look right without a crown. In addition, cardboard hats can also be used as:
- game element;
- gifts for guests who came to the birthday party.
Making a crown out of cardboard with your own hands is very simple; even a child can do it. Moreover, it will take very little time, but the joy from a successful creative process is guaranteed.
For cardboard hats, as the definition suggests, you need cardboard and glue. The quality of these materials determines how durable and beautiful your craft will be. As for glue, it can be regular PVA. It is only important that its consistency is not watery, otherwise unaesthetic wet spots will remain on the cardboard. You can also use Moment glue, especially for models that involve decoration with beads or rhinestones.
It is also very important to choose the right cardboard. It should be:
- dense, but not thick;
- smooth, not corrugated.
That is, the base material should hold its shape, but at the same time bend easily. Cardboard for children's creativity, which can be purchased at stationery stores, meets all these requirements.
6 models of cardboard crowns
To make the royal headdress neat and realistic, do not be lazy and first draw a paper pattern, and only then trace it on cardboard and cut it out.
Vintage decoration
Cardboard covered with newspapers or vintage paper will make the crown ultra-modern and at the same time stylized as antique.

Materials:
- cardboard;
- pages from newspapers and sheet music;
- stationery scissors;
- PVA glue;
- glue "Moment";
- brush for applying glue;
- rhinestones, sparkles;
- centimeter.
Instructions:

Resourceful parents came up with the idea of making crowns with an elastic band so that the royal headdress would last for many years.

Materials:
- cardboard;
- newspaper;
- heat gun;
- rubber;
- awl;
- stationery and manicure scissors;
- threads, needle;
- paints, felt-tip pens;
- rhinestones, beads, glass beads.
Instructions:

Golden headdress
You can make an elegant and sophisticated king's crown with your own hands in just half an hour. For this you will need colored cardboard.

Materials:
- golden cardboard;
- PVA glue;
- pencil, ruler;
- stationery scissors.
Instructions:

Princess model
If you are thinking about how to make a cardboard crown for a princess, or more precisely, which model to choose, then turn your attention to a mixed type headdress. Paper, beads, sewing, and applique work well together in it.

Materials:
- cardboard;
- 80 weight colored paper;
- compass;
- a simple pencil;
- stationery scissors;
- PVA glue, “Moment”;
- rhinestones, sequins.
Instructions:
- Cut out a rectangle 15 x 30 cm from cardboard.
- Using a compass, we draw small circles and cut them out - these are decorations for the crown.
- Glue the round blanks onto the rectangle.
- Cover the base with colored paper.
- We make a decorative seam along the top edge.
- We cover the crown with rhinestones, colored paper applications and sequins.
- Glue the sides of the headdress together. The craft is ready.
Humble Grace
If there is absolutely no time to make a crown, then you can get by with a small model, like the Princess in the cartoon about the Bremen Town Musicians.

Materials:
- empty cardboard toilet paper roll;
- scissors;
- glue "Moment";
- foil.
Instructions:
- Cut cloves onto the roll.
- Carefully cover the workpiece on both sides with foil.
The Russian style crown is made in the form of a kokoshnik.

Materials:
- colored cardboard;
- A4 sheet of paper;
- hoop;
- rubber;
- glue gun;
- a simple pencil;
- scissors.
Instructions:
- On paper we draw half of the kokoshnik-crown.
- We attach the pattern to the cardboard, folded in half, and cut it out.
- We make a couple of small cuts on the top of the kokoshnik to make it easier to roll it into a circle.
- Glue the blank onto the hoop.
- Glue a piece of elastic to the edges of the hoop.
- We decorate the headdress.
Every girl dreams of feeling like a real princess, and often boys don’t mind playing as representatives of royal blood. So why shouldn't parents please their children? A DIY paper crown can be made in a matter of minutes. We bring to your attention instructions for making this accessory and some useful tips.
What is the “correct” crown shape?
Start by taking measurements. You need to find out the exact volume of the little princess or prince's head. Cut out a wide enough strip of paper, the length of which is equal to the value obtained from the measurement. Making a crown is quite simple - you just need to attach it with paper tape correct form from the top edge. The easiest option is to cut out identical cloves. But the template can look more interesting. Try making the protruding elements semicircular or even curly. You can also cut a crown consisting of several large teeth in the central part at the front. The workpiece must be fastened into a ring; use a stapler for this or simply glue the ends together.
Miniature made of paper

Small royal headdresses look interesting and gentle. A small decorative crown can simply be cut out of paper or cardboard and attached to a hairpin, headband, or paper ribbon that is secured around the head. To make such a craft, draw or print a template and cut it out of the selected material. A DIY paper crown can also be made using the appliqué technique. Glue several layers of paper together different color and/or texture and cut out the desired shape.
Kokoshnik - headdress of Russian beauties
As a complement to the Russians folk costumes, in the image of a princess or the Snow Maiden, it would be appropriate to make not an ordinary crown, but a kokoshnik. The shape of such an accessory can be a regular semicircular or with a protruding center and symmetrical rounded edges. Interesting idea- make a triangular kokoshnik. We cut out such a headdress from paper or cardboard, attach ties or elastic to its edges, and then decorate it to our liking. Helpful advice: since the kokoshnik has enough big size, it is best to cut it out of thick paper or cardboard.
Decor of royal accessories

Now you know how to make a paper crown in several various techniques. But, most likely, your preparation will not look festive and luxurious enough. The finished crown must be decorated. The simplest option is to cover it with colored paper, foil or shiny fabric. Don't be lazy to glue separate decorative elements: rhinestones, beads, you can also use braid and lace. If the crown you make to New Year's party, it wouldn’t hurt to decorate it with tinsel. Another design option is to paint the paper blank with paints to your liking. You can conduct an interesting educational activity with children by inviting them to create and decorate crowns to their liking. It’s very good if, in addition to regular paints, you have glitter, gold and silver gels on hand. A crown made from paper with your own hands can be decorated in some original techniques. Unusual “precious” pebbles can be obtained by cutting a CD with a mirror surface into small elements. Try also finely cutting the rain and gluing it to the base. Don't be afraid to experiment. The best part is that the cost of this craft is such that, if desired, new crowns can be made at least every day.
Preparing for holidays, theatrical performances, matinees, photo shoots and other children's events always causes many difficulties, as there is a need to prepare a costume that matches the intended image.
A headdress is an important component of any thematic outfit, and the crown remains one of the most popular today: in different incarnations, this accessory can be used to complete the image of many fairy-tale or real-life characters.
Of course, you can buy a ready-made crown in stores, but an accessory made from a sketch of a paper crown and designed according to the finished image can look much more interesting.
Today we will figure out how to make a paper crown with your own hands for a boy and a girl.
DIY paper crown, photo
Making a crown on a cardboard base
The easiest way to make a crown out of cardboard with your own hands involves cutting it out according to a sketch and decorating it with foil. All you need to create such an accessory is a couple of sheets of cardboard, scissors, glue, pencil and foil.
Attention! The larger and more “magnificent” the planned crown, the greater the number of original sheets will have to be used. We advise you to stock up on enough material, since it is possible that such a craft will have to be re-glued several times.
We start the process with measurements: measure the circumference of your child’s head - and add a few centimeters to the obtained parameters, since the sheet of cardboard will stick together on the back side. After the calculations, proceed to cutting out a long strip that will serve as the basis for the craft.
The next stage is creating the top of the crown. You can use a ready-made crown pattern made from cardboard, or cut out the desired shape yourself. For example, manually draw teeth of the same or varying heights with a pencil and cut along the contour.

Next, let's start decorating the crown: coat the cardboard with glue - and glue the foil suitable size. We recommend folding the edges of the foil inward on each side of the craft so that the cut joints are not noticeable. The remaining part of the foil is glued to the inner walls.
Once the crown is dry, carefully cut off the excess foil between all the crown teeth. Bend the edges of the material inward similarly to the previous manipulations. Only after the crown has been completely glued and has completely dried can you attach the teeth to the holder strip - and fasten the edges together. You will get a circle with parameters suitable for your child.
A cardboard crown can be made in another way: cut out and sequentially fasten several dense layers together, and then decorate the craft with beads, sparkles, foil elements, rhinestones, ribbons, tinsel and other details.
If you are creating a crown for New Year's image, an excellent addition to this accessory would be a bright rain or a fluffy layer of cotton wool along the bottom edge.

The simplest example of how to make a crown from cardboard is in the video:
Paper crown according to the pattern and idea with a snowflake
You can make a crown with your own hands from paper using a template. Take a thick sheet of paper and draw a crown shape using a pencil using the stencils you found. It is better to make a crown made of paper using a cutting template in bright colors.
In addition to colored paper, you will need glue and a stationery knife.
We invite you to try to implement one more idea - snowflake crown.
To create a paper crown on your head using a stencil with your own hands, just follow a few procedures:
- Cut out strips of colored (for example, red and yellow) paper with dimensions of 7 mm by 25 cm.
- To create the base of the paper crown, prepare 20 circles and 2 diamonds of the same size. To create the first row, we will need circles that will be connected to each other with glue.
- Next we make the second row: this time take the diamonds and glue them between the circles of the first row. The remaining rows are made in a similar way by alternating two geometric shapes and shades.
- The main accent of this decoration will be a snowflake. Schemes of a paper crown with a snowflake can be downloaded from the Internet, but you can also make a good decoration by hand: glue diamonds and circles together to create a large snowflake of a multi-colored palette. This composition is glued to the center of our craft.
To make the crown “more magnificent”, each subsequent geometric layer can be made wider. Then the composition will expand towards the top - and will look much more interesting than traditional store-bought jewelry.
Advice: To make the crown with a snowflake look more impressive, make it in quilling style.

Now that you already have an idea of how to make a simple paper crown, we advise you to familiarize yourself with the layout of a paper or cardboard crown, which will be even more suitable for a royal look.
Volumetric crown with golden shimmer
How to make a princess crown from cardboard or paper? Besides the sheets themselves, we only need scissors and glue. If you only have white materials for cutting, stock up on paints or glitter that will imitate gilding.
In this case, a paper crown pattern is not needed, since the craft will consist of many small elements.
What should be done:

 Cardboard crown, photo
 That's all! All that remains is to smooth out the sides of the crown with your fingers and decorate this accessory.
This master class on how to make a crown from paper or cardboard for a princess will be useful to anyone who is willing to spend about 30 minutes on the craft (remember that the glue must dry).
Creative crown for girl
All girls are partial to sweets. Therefore, your child will surely like a bright and unusual crown in the form of a cake. Make such a paper crown with your own hands for a girl - and we are sure that at any holiday she will outshine all the guests.
Advice: if there is no thick paper, use cardboard, but first paint it in bright colors or decorate with colored paper.
How to make a crown for a girl out of cardboard? First, decide on its size: measure how big the ring should be so that such jewelry fits securely on your head. To give this accessory the desired shape, use a cardboard crown template.

Follow these steps:
- Take a square sheet and cut it in half so that the new fragments have dimensions of 15 by 30 cm.
- Use cardboard to cut out two circles with a diameter of 11.5 cm.
- Now we make the base - a cardboard headband. Using the template, cut out the composition on an already prepared rectangular sheet. Then proceed to create a similar second fragment.
- On one side, the cut rectangles should be glued together. In the photo, such a cardboard crown is decorated with ribbons and stitches at the top, but you can come up with your own decor.
- Now use stickers or draw pictures of different goodies. You can use any materials: in the example, the crown is decorated with ribbons, paper pictures and rhinestones.
- Glue circles with a diameter of 5 cm to the tops of the upper waves. Inside, make round patterns from threads of matching color.
- Place the crown on the girl’s head and cut off the unnecessary length. Only after this can the halves be glued together on the free sides.
No strict rules, how to cut a crown out of cardboard, and even the chosen theme is not necessary. The presented template can be a suitable basis for many children's images.

"Royal" crown for a boy
How about a medieval-style paper crown for your head? This decoration is suitable for boys who portray princes or kings at the holiday.
How to make a beautiful paper crown? To begin, take a thick sheet of paper and cut a long enough strip for the base. The two ends of the strip are immediately glued together to create a ring. Two wider strips are cut out from colored paper of a different shade. They must be glued to the base crosswise, and in such a way that when put on the head, such a crown does not cause discomfort.
Six thinner strips should be cut for the main decoration. One end of such strips is cut to create a semicircular and slightly elongated border. Glue the other side of the strip to the inside of the ring base of the crown. The result should be something like the sun.
Now, based on the photo of the paper crown, give these stripes the correct shape - and secure the decorations to the top. All that remains is to add details: beads, colored paper inserts or a figurine for the top.

If you are not sure how to make a crown of this type from colored paper so that it stays on your head, we recommend covering the black stripes with pieces of fabric or thick cardboard that are suitable in size and shape. Then the crown will not move out.
Kokoshnik made of paper or cardboard
The Russian image remains no less popular during the holidays. Do you want to know how to make a kokoshnik out of paper with your own hands using a stencil?
First, we draw a picture of a kokoshnik stencil from cardboard or paper. It can have any shape, but make sure that it is not too bulky, otherwise the jewelry will not be able to stay on your head.
Attention! When creating a kokoshnik template from paper, you need to correctly calculate the head coverage.

We cut out a complete decoration on a dense material. Now you need to apply glue along all the borders of the decoration: fur, rain, ribbons and other decorations will be attached to them.
Advice: If desired, the entire front side of a kokoshnik for a girl made from cardboard can be decorated with fabric, but then the borders will have to be sewn with ribbons so that uneven joints are not noticeable.

The paper kokoshnik pattern will be held on the head with the help of ribbons. Therefore, hem them on both sides to the semicircular base. And don’t forget about beads, paints, sparkles and other decorative elements.
This is what a homemade head decoration might look like if you use the instructions on how to make a kokoshnik from cardboard with your own hands using a template:
 DIY kokoshniks made of cardboard, photo
 Now you know that you can spend very little time cutting out a template of a crown or other headdress from paper - and the festive image will turn out even more vivid. And the main advantage of such decorations is the opportunity for the children themselves to participate in creating joint decorative masterpieces.
Preparing for holidays, theatrical performances, matinees, photo shoots and other children's events always causes many difficulties, because there is a need to prepare a costume that matches the intended image. A headdress is an important component of any thematic outfit, and one of the most popular today is the paper crown, which we will make with our own hands.
We will tell you how to make an unusual paper crown for a boy or girl with your own hands.
How to make a paper crown with your own hands on a cardboard base: the manufacturing process
The easiest way to make a crown from cardboard is to cut it out using a template with your own hands and decorate it with foil. All you need to create such an accessory is a couple of sheets of cardboard, scissors, glue, pencil and foil.
Start the process by taking measurements: measure the circumference of your child’s head - and add a few centimeters to the obtained values, since the cardboard sheet will be glued from the back side. After the calculations, proceed to cutting out a long strip that will serve as the basis for the paper crown.

The next stage is creating the top of the crown. You can use a ready-made crown pattern made of cardboard, or cut out the required shape yourself. For example, manually draw teeth of the same or varying height using a pencil and cut along the contour.
Next, proceed to decorating the frame of the crown: coat the cardboard with glue and secure with a sheet of foil of a suitable length. We recommend folding the edges of the foil inward on each side of the accessory so that the cut seams are not noticeable. The remaining part of the foil paper is glued to the inner walls.

When the crown is completely dry, carefully cut off the excess foil between all the teeth of the design. Bend the edges of the material inward similarly to the manipulations described above. Only after the crown has been completely glued and completely dried can you attach the teeth to the holder strip - and fasten the edges to each other. A circle has formed with characteristics suitable for your child.
A cardboard crown can be made in another way: cut out and sequentially attach several dense layers to each other, and then decorate the craft with beads, sparkles, foil elements, rhinestones, satin ribbons, tinsel and other little things.
If you are creating a crown for the New Year's carnival, a bright rain or fluffy cotton layer along the lower border of the crown would be an excellent addition to this accessory.
You can make a crown quickly and easily with your own hands using a paper template. Take a thick sheet of paper and use a pencil to draw the shape of a crown using the stencils you found. It is better to make a crown made of paper using a cutting template in bright colors.

In addition to colored paper, you will need PVA glue and a stationery knife.
We suggest you try to implement one more unusual idea- snowflake crown.

To create a simple and elegant paper crown on your head using a template with your own hands, just do a few simple manipulations:
- Cut out strips of colored (for example, red and yellow) paper with dimensions of seven millimeters by twenty-five centimeters.
- To create the base of the paper crown, prepare twenty circles and two diamonds of the same size. To create the first row you will need circles that will be connected to each other with glue.
- Next, complete the second row: this time use diamonds - and fix between the circles of the first row. The remaining rows are performed using a similar method by alternating two geometric shapes and shades.
- The main highlight of this decoration will be an unusual snowflake. Schemes of a paper crown with a snowflake can be downloaded from the Internet, but you can also make a good decoration by hand: glue diamonds and circles together to create a large snowflake of a multi-colored palette. This composition is glued to the center of your craft.
To make the crown more magnificent, each subsequent geometric layer can be made wider. Then the composition will increase towards the top - and will look much more interesting than traditional store-bought accessories.

A selection of thematic videos for the article
After reading our article, we suggest watching a selection of thematic videos. This will allow for a more in-depth study this question. You can also learn other subtleties and tricks of making a crown from paper or cardboard for festive events or do-it-yourself photo shoots. Enjoy watching!