This quest will become available only if you sell stolen goods worth at least 600 gold to the buyers. After that, Methredel will find you (you must be in a city, not necessarily Imperial, just in the capital they will find you faster) and tell you that the Gray Fox wants to meet you at Helvius Sesia's house in Bruma. So, you have finally come face to face with the mysterious head of the Thieves Guild! What does he want from you? And he wants from you the Stone of Savilla, located in the Monastery of the Ancient Moth to the northeast of Cheydinhal. You will also receive permission to kill (if necessary) the guards guarding the Stone, but you will not be allowed to kill innocent monks. This is a fairly simple quest. Go to the monastery and talk to the monks until one of them agrees to show you the entrance to the catacombs. They have only four levels, the first two being the living rooms of the monks, through which you can slip through without any difficulty. The third level is somewhat more difficult (but not too much) - the undead are walking there, and there are also several traps. The fourth level, where you will find the desired Savilla Stone, is very small - only the prelate guarding the Stone is waiting for you there. Beware of the red trap stones - they will activate as soon as you get close to the stone! It is impossible to turn them off - just grab the prey as quickly as possible and run out of their area of action. You don't have to go back the same way. In a small room to the right of the location of the Stone is a staircase that will take you outside the monastery. In a chest near the stairs you will find a note from which you will learn some details about Nocturnal's cape and the curse lying on it. The Gray Fox is already waiting for you in Broome. Give him a stone, get a reward and this quest will be completed. You can ask him about the cape and he will tell you some sad details of his life. (And it will leave you wondering when you might have met him without a mask, and under what name.)
Arrow of Liberation
This quest will be available only after you sell the stolen goods worth at least 700 gold to the buyers. After that, Amusey will find you (yes, he is now also a member of the Thieves Guild) and will give you another message from the Gray Fox. The Guildmaster is waiting for you in Chorrol at the home of Malincus Ancrus. Your task is to obtain for him the Arrow of Liberation, a certain artifact that is currently the property of Fatis Arena, Bravil's court mage. In Bravil, priceless beggars will tell you that the magician keeps his main valuables in a tower outside the city. It is impossible to get into the tower without a key, but there is a secret passage inside the castle through which you can get there bypassing. Go to Bravil Castle and find the chambers of Fatis Arena (oddly enough, the best time for this is during the day, because at night two guards are constantly on duty at the doors leading to the inner chambers of the castle). After you search the chests in his quarters, you will have a new message in your journal suggesting you look for a secret door. The secret door is opened by clicking on one of the decorative pillars against the wall. Go in the direction of your quest arrow until you hit a body of water. To advance further, you will have to dive and find a passage under water. (You'll see it on the map, so it shouldn't be difficult to find it. Just don't dive all the way to the bottom - the passage is located a little higher.) Get out of the water and follow the arrow until you find the door to the second dungeon, the Lair of the Bravil Mages. As the name suggests, it's full of mages. You can kill them all without negative consequences for your reputation, or you can leave them alone and just slip through unnoticed. This dungeon is very simple, follow the quest arrow and you will enter the expanse of Fatis Tower. The chest with the arrow is located on one of the upper floors, and Fatis himself usually stands nearby. (Keep in mind that if you are a member of the Mages Guild and kill Fatis, then you will be expelled from the Guild. But it is not necessary to kill him. If you are a member of the Mages Guild, you can simply walk up and take the Arrow Head (this, alas, is all that from It doesn't even count as stealing and Fatis won't say a word to you.) That's all, you can go to the Gray Fox for a reward. In addition to money, you will also receive a new rank - Master Thief.
Boots of Jack the Leaper
This quest will become available only after you sell stolen goods worth at least 800 gold to the buyers. After that, Amusei will bring you an invitation to another date with the Gray Fox, this time in Cheydinhal in Ganrendel's house. You must find the boots of the famous thief Jack the Jumper, who lived several centuries ago. Presumably he was buried in them, so you have to find his grave. The only offspring of the deceased is the Imperial City Jakben, Baronet Imbel. Ask the beggars, they will give you the address and some curious details about this Jakben's lifestyle. In the house you will find a terrified owner who will give you the keys without a word and tell you that the family mausoleum is located under the house. Go to the basement, and from there - to the dungeon (very small). You will find vampires in it, as well as Jack the Jumper's coffin and his diary. The boot, alas, will not be there. Go back to the house and the baronet will attack you. On his corpse you will find the boots you are looking for. (Actually, you don't even have to go down into the dungeon. If you hesitate a bit to enter the basement, Jakben will attack you and you can immediately take the boots from him.) Return to the Gray Fox in Cheydinhal. He will thank you and say that he will need you in the future for one more, very last task.
Theft of the century
To receive this quest, you need to sell stolen goods worth at least 1000 gold. Amuseus will bring you a note with an invitation - this time to Otrello's house in the Elven Gardens of the Imperial City. Gray Fox's last assignment is to steal the Scroll of the Ancients from the Imperial Palace. This is without a doubt the most difficult - and longest - task you will ever receive in the Thieves Guild. For its implementation, you will receive two items stolen by you earlier - the Arrow of Liberation and Jack the Jumper's boots. In the interest of the cause, you will also be allowed to kill anyone who gets in your way. (But you can just as well do without them, it's quite possible.) The first step to fulfill your plans is to infiltrate the palace to turn on the Glass of Time - a magical hourglass. They are in the basement. The corridor is patrolled by guards, but nevertheless it is unlikely to be too difficult to slip through the door you need at this stage. Activate the watch. After that, the mysterious Old Way should open to you. True, it still needs to be reached. Exit the palace and head towards the entrance to the city sewer. Inside, you need to find the entrance to the palace sewers (it's not hard at all, the sewer system is quite simple there, and the locked grates are usually opened by a nearby lever or wheel). The Old Way is behind the wooden door. Once you get to it and go through the door, you'll have a new journal entry reminding you that you'll somehow have to use the Arrow and Boots to advance further. How - it will become clear after a while, when you reach the locked gate. They open with a button located in the same room, on the top row, but alas, the steps to this row crumbled, and it is almost impossible to jump to it. (Almost - because if you have excellent acrobatics, you can do it very well.) Put on Jack the Jumper boots and jump. Pressing the button will open the gate (but not for long, so quickly jump down and run through it). And beware - along with the gates, traps in the form of red stones that have not been active so far will also work. So, you have overcome the first major hurdle. (Undead roaming the dungeon doesn't count - you can kill all the enemies, or you can just sneak past them if you don't want to waste time on such trifles.) Follow the quest arrow, which will lead you to the statue. Here you will receive a new journal entry suggesting that this is the statue you are to test the Arrow of Liberation on. Turn around (if you are facing the statue) and you will see a bridge, the middle of which is blocked by two closed gates. Yes, yes, that's where you need to get up so that the lock opens, into which you have to hit with an arrow. But to do this, you must first unlock the doors. From the statue go east. Near one of the walls you will receive a new message in the journal. Not far from the wall is a door, and behind it is a button that will open a room that has not been accessible to you so far. In this room you will find another button, press it and the gate on the bridge will open. (And there will be some new enemies near them, so be on the lookout.) Now you just have to stand on the slab in the middle of the two gates (you will receive a new message in the journal when you get in the right position). Save the game, put in your quiver (you captured with a bow, right?) Arrow of Liberation and shoot the opened hole in the statue. (Take aim a little higher than the castle, the distance is very long even for a good archer and the arrow usually hits lower than you aim.) After your arrow hits the target, a path to the palace will open under the statue. Now you just have to follow the quest arrow, which will take you straight to the Library after a few rooms. (Guardians patrol the corridor, but you can easily walk past them undetected if you want. Sneak right behind them or use invisibility.) The monks will bring you a scroll. Once you take it, you will have a new journal message saying that you must find another way out of the palace. Follow the quest arrow and go up the stairs. The arrow will lead you to a room with a fireplace (and a mage, but you can go unnoticed if you try). Jump into the hatch in the fireplace. Be aware that if you are still wearing Jack the Jumper's boots, you will lose them when you land. If you want to keep them for yourself, take them off before jumping (I hope you have enough health to take the hit). So, you are back in the sewers and out of reach of the palace guards. Return to the Gray Fox. The quest does not end there - now you have to deliver the ring to Countess Millone in Anvil and report to the Gray Fox how she will react to it. (The ring is an engagement ring, by the way, so if you had no idea who the mysterious thief really was, this might give you a hint.) The Countess immediately recognizes the ring, and in the next scene, the Gray Fox takes off his mask. , will announce his retirement from criminal affairs and name you as his successor. The Nocturnal Cape (already without the curse that was finally lifted) will be given to you along with the title of Guild Master. Congratulations, you just became the Gray Fox! You can have fun walking the streets of cities with a mask on and take it off as soon as you envy the guards running towards you. (Just keep in mind that if you take it off after talking to the guards, they will continue the pursuit.) In any case, your quests in the Thieves Guild are over.
Joining the Thieves Guild is very beneficial for everyone who wants to not only get rich, but also get new opportunities. These include, for example, the ability to remove the bounty on your head for half the price.
There are two ways to find members of the Thieves Guild:
1. Nearly every gate in the Imperial City has a sign that a certain Captain Hieronymus Lex is looking for a thief named Gray Fox. After reading such an announcement, you need to talk to any beggar in the city. When asked what they think about the Gray Fox, they will of course answer that it is just a myth, but a couple of gold (AND a good attitude) will loosen the tongue of any poor fellow. When asked why you need a Gray Fox, answer that you want to work with him, and you will be shown the right place.
2. The second way is even easier. Go to any store (You can also go to the house) and in front of everyone steal any item that you like. Naturally, the guards will come running. Agree to serve time in jail. After leaving the prison, it is worth waiting for a while (depending on the distance between you and the Imperial City) and a Dunmer named Myvryna Arano will come up to you and give you a letter from the Gray Fox, which will contain the time and place where you need to be come.
So. At midnight, go to Dareloth's Garden in the Waterfront, in the Imperial City. There you will see a person, an Argonian and a Bosmer, waiting for something (or someone). We approach and talk to a person, Armand Christophe. Armand is a foreman (doyen) of the Thieves Guild.
To be accepted into the Guild, you must pass a test. It will be as follows: steal the diary of Amantius Alektis (Amantius Allectus). You can follow the Bosmer woman (Her name is Methredhel), who already knows where Amantius' house is, or you can ask the beggars. For a couple of coins, they will tell you that Amantius' house is located in the Temple area (A marker will appear on the map). The Bosmer is already in the house, so we must get ahead of her. The diary is in Amantius' desk. We take the diary and back to the Coastal region. Give the Diary to Armand Christoph, and he enrolls you in the Guild.
If Metredel managed to steal the diary before you, don't despair. After all, she will give the diary only the next night. Find out from the beggars where Methredel lives. Now go to her house (it is best to do this during the day) and quietly steal the diary from her chest. You have the diary and you can safely go to Armand.
But if you didn't manage to steal the diary from Methredel, all is not lost either. You and the Argonian Amusei will be given one more chance (Which Amusei for some reason will not take advantage of). You must steal Rosshan's Antique Cutlass sword. At night, break open the door of the A Fighting Chance store. The sword is in the store owner's chambers. Entering the room, you will find a very bad animal. The poor animal will have to be killed. It remains only to take the sword from the chest and bring it to Armand.
You are now a full member of the Thieves Guild. Armand will advise you to visit Ongar in the city of Bruma. He needs to sell any stolen goods for 50 gold. Clean whoever you want, the main thing is that you should not be noticed. We carry everything stolen to Bruma. Once you sell enough, your journal entries will update. You should go to Armand Christoph for the task (again at midnight, in the Coastal region).
To receive this task, as already mentioned, you need to sell stolen goods for 50 gold.
Armand will instruct you to steal the tax roll and the money of the inhabitants of the Waterfront from under the nose of Hieronymus Lex. Start the quest by talking to the beggars. They will tell you that Lex lives in a watchtower in the Temple District. It is best to come there at night. Lex lives on the top floor of the tower. Break open the lock, grab the statement and money, and then calmly leave. At night, find Armand, who, for completing this task, assigns you the title of robber (Footpad).
It is required to sell stolen goods for 100 gold.
The next task is to steal the statuette of Lady Llatasa Indaris (Bust of Llathasa Indaris), wife of Count Cheydinhal (Cheydinhol), who died under unknown circumstances. We go to the city and talk to the beggars. They will tell you that the figurine is in the crypt under the Chapel and is well guarded. We go into the Chapel, break open the door to the crypt and quietly sneak to the grave of the Countess. We take the figurine and quickly leave the chapel.
We return to the Port area. But... Something is wrong. Almost all of the city's guards had gathered in the Waterfront, along with Hieronymus Lex himself. And they're looking for Armand Christophe.
After talking with the locals, we learn that Metredel is looking for you. Yes, yes, the same Bosmer woman who passed the first test with you. It turns out that there was no customer for this figurine. The operation was aimed at exposing a spy (a Dunmer named Mivrina Arano) implanted by Lex in the Thieves Guild. Methredel will ask you to put the figurine in Mivrina's closet and then turn it in to Lex. After completing this simple operation, Lex will ask you to go with him to make sure your accusations are true (does not trust the reptile). Follow him. After you enter the house of Mivrina Arano, we observe an interesting scene: Lex, having searched the closet and found the figurine, accuses and arrests the Dunmer woman. All. The next night, meet with Armand Christophe, who will elevate you to the rank of Bandit (Bandit) and tell you about the new buyer of stolen goods Dar Jee from Leyaviin. He will also tell you that from now on, you will receive all tasks from S "Krivva (S" krivva) - a Khajiit living in Bravil.
It is required to sell stolen goods for 200 gold.
Krivva will ask you to return the Adgarji ring, which can be found in Leyawiin. Adarji will tell you that the Argonian Amusei (Remember this one?) stole the ring from her. She will ask you to kill Amusei (this is prohibited by the rules of the Thieves Guild!). "No need to find an Argonian. Talk to the beggars. For a small reward on your part, they will tell you that the Argonian was caught and put in the Leyawiin prison. We go to the prison. We give the guard a small bribe, as a result of which he allows us to go to Amusei. It is worth giving the Argonian a master key, and for this he will tell that the ring was taken by Countess Alessia Caro. After talking with some servant of the Countess (and raising relations with him), you will find out that the Countess wears the ring all the time and takes it off only at night. into the countess's bedroom at night and steal the ring from the box to the right of the bed. Leave the castle and carry the ring to Adarzhi, then return to S "Krivva in Bravil. She will assign you the title of robber (Prowler).
It is required to sell stolen goods for 300 gold.
Krivva is very worried about the unrest in the Imperial City: the guards, led by Hieronymus Lex, have occupied the Port Area and many members of the Thieves Guild have already been arrested. we learn that the Bosmer is hiding in the house of Dynari Amnis "House", which is on Talos Plasa. Methredel will send you to steal from the Secret University, at the Archmage (!!!) Hrormir's Stuff, and in the Archmage's bedside table you need to put a letter from the Gray Fox. We bring Methredel's staff. She will send you to the Port area, for reconnaissance. As soon as you find Lex, a messenger from the Mages Guild (Dremora) will appear.He will give a letter to Lex, after reading which, he will have to withdraw troops from the Waterfront.He will drop the letter, so do not forget to pick it up.Go back to Methredel.She will ask you show the goodwill of the Gray Fox and return the staff.But do not drag the staff to the Arcane University.We need to take it to the house of the retired magician Onthus Vanin (Onthus Vanin).That's it, you saved all the thieves of the Waterfront (and not only).Now it remains to return to S "Krivva and get a well-deserved promotion to a raider (Cat Browler).
It is required to sell stolen goods for 400 gold.
The next task from Krivva is that a certain Teranis (Theranis), also a member of the Guild of Thieves, was tasked to bring the book “ Lost Stories". But he never returned. You need to find Teranis, and along with him, the book. By when you arrive in Skingrad, talk to the beggars (as usual) You will find out that Teranis has been imprisoned. If you try to bribe the guards, you will be refused, so you need to find another way to get into prison. You can commit some kind of crime, or you can be hired worker (feed the prisoners) at the butler - the orc Shum gro-Yarug. Anyway, once in prison, you will not see Teranis. Talk to the prisoner Larthjar the Laggards. Promise him release, and he will tell you about everything that is happening very often a certain Pale Lady visits the prison and constantly takes away several prisoners who then do not return.Recently, she took Teranis and his cellmate - a wounded Argonian (guess who) After searching the prison, you will find bloody footprints that lead somewhere behind the wall. Click on the Strange Candle and the wall will open up. Follow the bloody footprints further and soon you will come across a vampire. Having finished with her, search the body of the dead Teranis (did not have time, as always). Of course, he doesn't have a book with him. But behind bars...yes, that unfortunate Argonian Amusei. He will ask you to release him and take him outside the castle (do not catch the eye of the guards). Having fulfilled his request, you will find out that the book we need lies behind the well in the bushes (marked with a marker) in Skingrad. Back to S "Krivva"
It is required to sell stolen goods for 500 gold.
Krivva says that we need to take care of the one who has always prevented the existence of the Thieves Guild. We are talking about the captain of the imperial guard Hieronymus Lex. The plan to eliminate Lex from the Imperial City is simple: a new guard captain is needed in Anvil. one that will contain the name of Lex (with excellent recommendations, by the way.) In Anvil, we will learn from the beggars about the “right people” and about the secret passages of the castle. , leading to the room of Dairihill (Dairihill) - adviser to the Countess of Anvil (She keeps the letter of recommendation in her place). you about the one who is engaged in forgery - about the Stranger (A Stranger) He can be found either in the castle of Anvil, right in front of the throne of the countess, or in an abandoned house (Abandoned House). For 500 gold, he will agree to forge a letter. After 24 hours, we pick up the fake and go to the office of the Imperial Legion, which is in the area of the Imperial prison, to stamp the papers. Be careful - the territory is well guarded. Place the seal and go to Anvil, directly to the Countess. The letter should be delivered directly into the hands of the countess. The Countess will give you an order to transfer Lex, which you must deliver to him. For this task, S "Krivva promotes you to the rank of Shadowfoot. From now on, you work directly with the Gray Fox.
It is required to sell stolen goods for 600 gold.
Metredel will find you and give you a note from the Gray Fox. He will be waiting for you in Bruma, at Helvius Cecia's House. The great thief will ask you to find Savilla's Stone, which is located in the Temple of Ancestor Moths. The Temple is located near the statue of Azura, in the northeastern part of Cyrodiil. The monks, as before, cannot be beaten, but the guards of the stone ... In general, go to the temple. There, talk to one of the NOT blind people towards the temple. When you finally get there, talk to one of the NOT blind (that is, sighted) monks. You will need to increase his location, and then ask him to show you the entrance to the catacombs. Follow the markers and you can easily find the hall where the stone is located (the main thing is not to catch the eye of the monks). Grab the stone and run through the right room, which will take you to the surface. You can return to Bruma to the Gray Fox.
It is required to sell stolen goods for 700 gold.
This time, the letter from the Fox will be given by Amusei, who nevertheless joined the guild. You need to come to the house of Malintus Ancrus "House. You need to steal the Arrow of Release from the court sorcerer Fathis Aren from Bravil. The fox allows you to kill him, but only outside the castle. The beggars of Bravil will tell you what Fatis has tower outside the city, but the entrance to it must be somewhere in the palace. Naturally, there is no arrow in his room in the palace, but one of the supports on the walls moves away, opening the way to the catacombs. This is a rather complex labyrinth filled with Daedra, spellcasters and rats. My advice to you is to save before climbing into this corridor. After passing this labyrinth, you will find yourself in a dilapidated tower, where you will find Fatis. You can kill him, or you can just get the tip of the Arrow of Release (the tip is enough) from his chest and quietly dump.Return to the Gray Fox, who will happily raise you to the rank of Master Thief.
It is required to sell stolen goods for 800 gold.
The letter from the Gray Fox will again be brought by Amusei. Go to Ganredhel's house in Cheydinal. The great thief needed Jack Springhill's Boots, which he says are now in the possession of Jack's descendant, Jakben, Earl of Imbel. Also, the thief will mention that Jack was buried in his famous boots. After talking to the beggars, you will learn that Jakben is nocturnal. Enter Jakben's house. Talk to him and he will give you the key to the basement that leads to the crypt. Get down into the crypt, and looking into the stone sarcophagus ... do not find the boots. But there is a diary in which it will be said that Jack Springhill is a vampire who lives to this day and is known as Jakben, Count of Imbel. Come back upstairs. Along the way, you will meet Imbel, who, apparently, decided to end you. Kill him and take the boots. Return to the Gray Fox.
It is required to sell stolen goods for 1000 gold.
The hour of the most audacious robbery has come. It will definitely go down in history (I warn you - this is the most difficult quest in the entire game, so draw your own conclusions). This time the Gray Fox will be waiting for you at Othrelo's house in the Elven Gardens (Imperial City). He will return Jack Springhill's Boots and the Release Arrow to you. I also advise you to stock up on good armor, a bow and a set of arrows. It would also be useful to have an Invisibility spell, or at worst, at least a Chameleon. Your task is to steal the Elder Scroll. The fox will give you his plan in writing, so I advise you to read it.
First point. We need to get into the basement of the Imperial Palace. Make sure no one sees you. There will also be a guard in the basement. While he is patrolling, sneak into the room right behind him and activate the Glass of Time. Now you can go to the Ancient way (Old Way). Get into the sewers in the place where the marker indicates. You will wander through the sewers for quite some time, but the proximity of the Ancient Path will be heralded by the appearance of a few opponents (undead), but they will be fairly easy to deal with. After a bit of winding, you will find the Ancient Path. Here the long run will end in a large hall with three statues.
The largest statue has a keyhole, and the passage can be opened with an accurate hit from the right position. Now look around. See two red lights right in front of the big statue. That is where you need to get to. But the path to the point is blocked by a metal grate. It is opened by pressing the buttons located behind the door on the upper level. Now return to the point between the two crystals and watch the large statue turn towards you, and a keyhole will open in it, which you need to hit with the Arrow of Release. You MUST save now. First, release a few regular arrows (you will hear a characteristic sound when hit). Next, without releasing the scope, release the Release Arrow. If you hit, the large statue will move away, opening a passage, and the smaller statues will come to life. These statues are quite serious opponents, so if you have an invisibility spell, you can get past them. Now save again and go through the door. You ended up in some room where the guards sleep.
Now you should not catch the eye of ANY guard, even for a moment. Following the marker, make your way to the next floor. You are in front of the Imperial Library. A blind monk will be sitting on the right, and right behind him is a lever. Turn it and go around the grate. When entering the Library, do not talk to anyone. Just sit on a chair and wait. Some time later, an Elder Scroll will be brought to you! The monks will think that in front of them is Celia Camoran, who has disappeared somewhere, so do not give yourself away. Take the Scroll and sneak upstairs. After reaching the room of the Battle Mages, jump into the fireplace. This is where Boots are needed. They will fall apart (self-destruct) as soon as you touch the ground, but will keep you from falling. You are not far from the beginning of the Ancient Path. Get out to the surface and return to the Fox.
However, the Gray Fox will ask you to take one ring to the Countess of Anvil, Milone Umbranox. She (and you, probably) will be surprised to see the ring. It turns out that this is the engagement ring of her husband, whose name and face she somehow cannot remember. And then the Stranger appears (yes, yes, the one who forged the letter of recommendation) and puts on a mask. So this is the Gray Fox! But now, with the help of the Elder Scroll, he was able to remove the curse from his hood. Before you is my lord Corvus Umbranox, Count of Anvil, missing under mysterious circumstances. Corvus gives you his helmet and gives you the title of Gray Fox. You are now the Chief Thief, congratulations. Now you can visit the Coastal District, where the office of the Thieves Guild will be located. You will meet many familiar faces there.
Good luck and may the shadow keep you.
© Hearingly
Introductory quest and assignments by Armand Christoph
Quest TG00FindThievesGuild - Finding the Thieves Guild
Wanted...
Is there really a king of thieves, the Gray Fox, who commands all the thieves of Cyrodiil, at the mention of whose name any respectable citizen begins to seethe with indignation? Many believe that it is not, and the hype raised around him is nothing more than the excessive service zeal of Captain Hieronymus Lex...
While in the Imperial City, pay attention to the Wanted Poster pasted on the walls of buildings. Wanted Gray Fox - for theft, embezzlement, forgery, pickpocketing, counterfeiting, robbery, conspiracy to commit a crime, grand larceny, tax evasion, slander, fraud, perfidy and impudence, just something ... If you want to get to know this undoubtedly talented person, then ask the townspeople or guards about him and you will find out that he prefers to steal from the rich, so the nobility hates him, and the poor adore him. Then it remains only to talk to the first beggar who comes across, although this is not easy. The sly one will pretend that he does not understand what you are talking about, but after persuasion, charm or bribe, he will tell you that you can learn more about the Thieves Guild at midnight in the Garden of Dareloth, located in the Waterfront of the Imperial City.
The path to the Thieves Guild described above is not the only possible one. You can try to enter illegally (breaking locks) into the houses of citizens or steal something from their pockets. It is enough just to get caught at the same time, or after the theft, find a certain fine on your head and surrender to the guards. Upon leaving the prison, the GV messenger Myvryna Arano will find you and hand you a mysterious note (Mysterious Note) with an invitation to come to Dareloth's garden at midnight.
You can also talk to the Argonian City-Swimmer in Bravil about the city. According to her, only honest and law-abiding citizens live here, but in the next remark, when you choose the question of what the Thieves Guild is, you will hear about Dareloth's garden. In general, it is not necessary to talk to anyone, it is enough just to be in this garden at midnight and you will see all the characters there. Depending on the development of events, this quest may or may not be logged.
Quest TG01BestThief - May the Best Thief Win
Infamy +1 or +2

In the midnight garden of Dareloth you will find three - Armand Christophe (Armand Christophe), Argonian Amusei (Amusei) and wood elf Methredhel (Methredhel). Most likely, you will have to raise Armand's attitude so that he believes you and starts talking. So, Armand Christophe, a follower of the Gray Fox and his doyen (doyen), has the right to choose the best of the three who wish to join the Thieves Guild gathered here, and is now arranging something like an entrance exam.
According to the conditions of the test, the one who brings the diary of Amantius Allectus (Amantius Allectus) will be accepted. You get scant information that he lives somewhere in the Imperial City, beggars can help you in your search, but for a fee. You will have to break into the Allectus house, so the lockpicks will be very useful, and if you don’t have them, then Armand will sell them right here. Remember that you are not allowed to kill the owner of valuable records and your pretenders. The diary appears in Amantius's desk after starting this quest, so it can't be stolen beforehand.

And what's so special about the diary...
If the diary of Mr. Allectus is in your hands, then it is quite understandable that you will want to read it. The notes are a description of an attempt to grow unusual plants - bloodsuckers. As the name suggests, they need blood to feed. The ruthless experimenter at first caught animals, but there came a moment when the plants demanded human blood... After that, he decided to destroy all the notes on breeding bloodsuckers, and take the plants themselves to the roof, under the hot rays of the sun, and an hour after sunrise they all withered. You can see the remains of plants in pots in the basement of Amantius's house, but for some reason the diary survived, and someone unknown wanted to get it...
After the words of Christophe, Amuzai loudly announces that Allectus lives in the Elven Gardens, while Methredel is quickly carried away to the city. You should not listen to the Argonian, this is not true, but you can follow the nimble Bosmer and she will lead you to the door of the desired house (if you do not fall behind her on the way). Or you can ask some beggar, for five coins you will find out that the house of Allectus is located in the eastern part of the Temple District, and with a high location, the tramp will say it just like that. The nearest tramp sleeps right next to the garden - Puny Ancus.
When you enter Amantius' house, you will almost certainly see Methredel there. She sneaks very quickly to the table and pulls out the diary. By the way, after the successful theft of the diary, Methredel chooses an amazing route - through the basement of Allectus, and then, apparently, through the sewer system, he enters the city streets. But if you furnished it, then bring the diary to Armand (he waits in the garden until three in the morning) and accept his congratulations - you have become a pickpocket (Pickpocket). This will complete the quest and add one unit of notoriety.

Nice doggy...
If you are late, then the game gives a hint that the diary can be stolen from Methredel, the easiest way is from her house during the day, it will be in a locked chest, and she herself sleeps during the day (since neither you nor Methredel are yet members of Guild, then theft is not prohibited from it). After that, wait until midnight and hand over the diary to Armand, on this the quest will close with an increase in notoriety by one unit.
If Methredel failed to steal the diary, then you just have to look at how the Bosmer will give it to Armand and ask for a second attempt. This time, you will be asked to steal the ancient Rohssan Cutlass from A Fighting Chance in the Imperial City Market District. But this is the last chance. Although in this case everything is simple, because Amuzai is a bungler and will not compete with you.
The saber lies in a chest in the private quarters on the second floor of the Soldier's Fortune. During the day, the hostess trades downstairs and may notice your attempts to break in, so it's best to break into the house at night, while she sleeps. And everything would be fine, but there is a dog upstairs ... You will either have to calm her down using knowledge in the school of illusion, or rely on a pumped stealth skill, or kill her (the rules do not apply to animals). From the noise of the fight, Rossan seems to wake up, but he does not try to come up to see what is there. Return to Armand with a saber, he will accept you into the Thieves Guild, the quest is completed, notoriety increases by two units.
Subsequently, wild rumors begin to circulate among the townspeople that Amantius Allectus was killed during a robbery of his house, even if he remains alive.
Quest TG02taxes - Untaxing the Poor
Infamy +2

From now on, you need to sell stolen goods to a buyer for a certain amount in order to get a job from Armand. This time, it will be enough to turn in stolen goods worth at least 50 coins to Ongar the World Weary in Bruma. Then you can safely apply for assignments to Armand.
Armand reveals that recently Captain Hieronymus Lex of the Imperial Guard, the very embodiment of law and order, collected taxes from the inhabitants of the Waterfront. It is customary for the city not to tax them, despite its legal right, since the amounts that can be squeezed out of these people do not cover the cost of the fees themselves. Lex clearly did this in retaliation for their help to the Gray Fox, who, out of principle, simply cannot allow such an injustice to be done. Your task is to find out where Lex keeps the collected taxes, seize them and bring them to Armand, along with tax records, in order to return the citizens paid.
You need to get to Lex when he is sleeping or absent on business, a table with money and statements locked on the middle lock is located immediately to the right of the entrance. Grab both (money is not necessary to complete the quest) and leave just as quickly and unnoticed. Then, for the sake of interest, read the papers, there is a certain Raven Camoran on the list, from whom 2 coins were taken, a very remarkable surname ... And Mivrina Arano was generally released ... At midnight, hand over everything that was obtained to Armand. He will say that such a miserable amount as 53 gold you can keep for yourself, the Gray Fox will surely find so much to distribute to the poor, and will promote you to a robber (Footpad).
After completing this quest, a special issue of the Raven Courier will be released - "The poor have been taxed!". It says that recently some scoundrels broke into the southern watchtower and stole from the office of Hieronymus Lex a small amount of money, oddly enough, but exactly equal to that previously collected from the inhabitants of the Port District...
Quest TG03Elven - The Elven Maiden
Infamy +2

To receive the next task, you need to hand over stolen goods to Ongar in the amount of at least 100 Septims. Further, you will learn from Armand that the Guild has received an "order" for a unique figurine - a bust of Llathasa Indarys, the recently murdered Countess of Cheydinhal.
In Cheydinhal, any beggar for 15 coins will tell you that Count Indaris recently ordered a bust of Llathasa and installed it on her grave in the crypt of the chapel. He also set guards there so that no one disturbed the grave, and earlier everyone could visit it.

Something About Countess Llathas
The death of Countess Llathasa is shrouded in mystery - her body was found at the foot of the stairs in the throne room of Cheydinhal Castle with traces of severe beatings. This incident caused a terrible scandal. Count Andel Indarus is suspected of her death, but it is unlikely that it will ever become known for certain whether he killed his wife or not, whether it was an accident or not ...
The crypt of the chapel is guarded all the time by the guard of the chapel. The elf is constantly patrolling the room, so you have to wait until she enters the right half of the crypt, and quietly sneak to the left, to the grave of Llatasa, and then pick up the bust. If the guard sees you, he will attack. Of course, you can rob the coffin of Llatasa, but here the unnecessarily greedy will be disappointed - the prey is so-so, but the leveled ghost of Llatasa appears (her dark ghost with a beard looks especially interesting!) And attacks you, and this can attract the attention of the guard. Her murder is forbidden, as well as all other NPCs living in this chapel. If the task seems difficult, then use potions or spells with chameleon and invisibility effects, there is another option - to calm the guard down for a while.
Returning to the Waterfront, you see that it is filled with Imperial guards looking for Armand Christophe. It turns out that Count Indaris accused him of stealing the bust of Countess Llatasa. There is no doubt that Armand will not come to the garden tonight. By the way, he is hiding in the basement of the warehouse of the Imperial Trading Company, but he will only say that you will receive instructions from Methredel.
Metredel will find you herself, and then it turns out that the client who ordered the theft of Llatasa's bust from the Guild was not there. Armand used you to track down an informant who had infiltrated the Guild. This is Mivrina Arano, oh, how careless Lex, because he did not tax her ... Now you have to blame the theft of the bust on Mivrina by placing this bust in the closet next to her bed, and then convincing Hieronymus Lex that she is a thief. Lex's location must be over 70 (at your service is a mini-game of persuasion, charms or an increase in charm), in order for him to believe you and go to see if there really is a bust in the closet. Amazed, Lex finds a bust in the closet, then you will listen to his conversation with Mivrina, as a result of which he arrests her. Subsequently, she can be seen at her new permanent residence in the cell of the Imperial Prison.
After all the events, the siege of the port of the guards is removed and Armand can appear on the street. He will give you a reward - 100 coins, will produce a bandit (Bandit), and will name another buyer of stolen goods - Dar-ji (Dar Jee) from Leyawiin. This was Armand's last assignment, now you should contact S "Krivva (S" krivva) in Bravil for work.
Independent theft
This is a permanent quest that is activated immediately after completing the task "" - your initiation into the thieves guild. The sole purpose of the quest is to sell stolen items for the required amount in order to unlock subsequent tasks for the Thieves Guild.
Buyers of stolen goods
You will gain access to the Fences in a given order as you rank up in the Thieves Guild by completing "Special Assignments". If you are not a member of the thieves guild, then the fences will not buy stolen goods from you and will claim that they do not know what you are talking about at all.
- After completing the quest "" you can no longer use Fatis Ules as a buyer of stolen goods due to a bug.
- The "unofficial" fence Hafiz is added with the official "Thieves Den" DLC.
Quests
: Steal the tax reports of the inhabitants of the waterfront. (need to sell stolen items worth: 50 gold)
: Steal a bust for a mystery shopper. (need to sell stolen items worth: 100 gold)
: Return the stolen ring. (need to sell stolen items worth: 200 gold)
: Help the Thieves Guild bring the waterfront back to normal. (need to sell stolen items worth: 300 gold)
: Finish a job that your guildmate didn't return from. (need to sell stolen items worth: 400 gold)
: It's time to send Hieronymus Lex to a new position. (need to sell stolen items worth: 500 gold)
: Steal a stone for the Gray Fox. (need to sell stolen items worth: 600 gold)
: Steal an arrow for the Gray Fox. (need to sell stolen items worth: 700 gold)
: Find out where Swift Jack is buried and retrieve the magical boots for the Gray Fox. (need to sell stolen items worth: 800 gold)
: Steal the Elder Scroll for the Gray Fox, and for glory! (need to sell stolen items worth: 1000 gold)
Adviсe
Even after you can access the best dealers, use the old ones for less expensive items. "Low-ranked" buyers may have less gold, but they have a lower "Trade" skill, which will give you better prices. Investing in "low-ranking" buyers makes them much more useful.
Good options for stealing:
- Armor from the Imperial armory located in the prison area.
- The chest in the Imperial Legion - Working Rooms can hold up to three pieces of armor and three types of weapons, each of which can be enchanted, and all of them can be accessed at the highest quality.
- The basement in Drakelow (a farm south of Cheydinhal) contains over 4,000 gold coins and soul gems (the entrance is hidden inside an unlit fireplace).
- In the basement of Skingrad Castle, there are four racks of wine filled with many bottles worth over 1400 gold, including valuable wines such as Surili Brothers Wine 399 and Tamiki Wine 399.
- The Red Diamond Jewelry Store in the Imperial City Market District has over 1,500 gold in jewelry.
- In Castle Chorrol, you can easily steal the Varla stone (base price 1000). The stone is located in the showcase (main hall with thrones).
- The Skooma Stash in Bravil contains 38 bottles of Skooma (2850 gold), although most must be obtained by pickpocketing. This is fairly easy, as many residents have liability 0. If residents with liability 0 are the only witnesses, then there will be no consequences for any theft.
- After the quest "Secrets of the Ayleids", stealing Ayleid figurines is quite easy, because Umbacano will no longer be in his house.
- Over the course of the game, several houses will become (mostly) uninhabited due to the death of their owners, but with contents still marked as stolen. These include houses: Arnora Auria (Bruma); Aldos Otran (Cheydinhal); Yakben Imbel, Umbakano and Agamir (Imperial City); Glarthir (Skingrad) and many of the Mythic Dawn Sleeper Agents.
- There is a bug that allows you to "turn" non-stolen items into stolen items.
- Open the chest with the red theft icon.
- Switch to your inventory and place the item(s) in the chest.
- Switch to the inventory of the chest and collect the item(s).
- Switch back to your inventory and place the item(s) in the chest again.
- Exit the chest.
- Open the chest again, then take the item(s) and exit the chest.
- Check your inventory for stolen items.
- Some items cannot be marked as stolen.
You cannot sell items with no value, as they will never appear in the buyer's inventory when sold.
Bugs
If you collect a lot of loot in one visit, you will exceed the amount needed to receive the next few special tasks. This may cause any following quests to remain active in your journal.
- This has the advantage that as long as the quest is active, the map marker will always direct you to the "richest" fence (Fatis Ules towards the end of the storyline).
- The quest can be forced to end using the setstage TGStolenGoods 120 console command.
Diary entries
| Number stages |
KZ | Diary entry |
| 20 | Armand said he would not give me another job until I had sold enough stolen goods to the fence Ongar. I'll have to turn in at least 50 gold worth of stolen goods before Armand can trust me enough. | |
| 25 | The goal has been reached. I sold stolen goods worth 50 gold. I need to drop in on Armand sometime, he might have something interesting for me. | |
| 30 | Armand said that he would not give me another job until I had sold more stolen goods to the fence Ongar. I'll have to turn in at least 100 gold worth of stolen goods before Armand can trust me enough. | |
| 35 | The goal has been reached. I sold stolen goods worth 100 gold. I need to drop in on Armand sometime, he might have something interesting for me. | |
| 40 | S"Krivva said that she would not give me another job until I sold more stolen goods to buyers - Ongar or Dar-Gi. I would have to turn in stolen goods for at least 200 gold before S"Krivva could trust me enough. | |
| 45 | The goal has been reached. I sold stolen goods worth 200 gold. I need to drop in on S'Krivva sometime, she might have something interesting for me. | |
| 50 | S "Krivva said that she would not give me another job until I sold more stolen goods to buyers - Ongar or Dar-Gi. I would have to turn in stolen goods for at least 300 gold before S" Krivva could trust me enough. | |
| 55 | The goal has been reached. I sold stolen goods worth 300 gold. I need to drop in on S'Krivva sometime, she might have something interesting for me. | |
| 60 | S"Krivva said that she would not give me another job until I sold more stolen goods to fences. I would have to turn in stolen goods for at least 400 gold before S"Krivva could trust me enough. It will be necessary to go to the new fence - Luciana Galena. | |
| 65 | The goal has been reached. I sold stolen goods worth 400 gold. I need to drop in on S'Krivva sometime, she might have something interesting for me. | |
| 70 | S"Krivva said that she would not give me another job until I sold more stolen goods to Guild buyers, such as Luciana Galena. I would have to turn in stolen goods for at least 500 gold before S"Krivva could trust me enough. | |
| 75 | The goal has been reached. I sold stolen goods worth 500 gold. I need to drop in on S'Krivva sometime, she might have something interesting for me. | |
| 80 | Krivva said that she didn’t have a new job for me, but the Gray Fox himself might want to contact me soon. In the meantime, I need to sell more stolen goods to the Guild buyers. It's worth seeing what prices the new buyer, Orrin, is offering. | |
| 85 | The goal has been reached. I sold stolen goods worth 600 gold. When in the cities, it is worth looking to see if the Gray Fox messengers are looking for me. He can call me at any moment. I should wait in the Imperial City if I want word to reach me quickly. | |
| 90 | The Gray Fox can contact me any minute, and until then, I need to sell more stolen goods to fences like Orrin. I'll have to turn in at least 700 gold worth of stolen goods to get the Guild Master's attention. | |
| 95 | The goal has been reached. I sold stolen goods worth 700 gold. When in the cities, it is worth looking to see if the Gray Fox messengers are looking for me. He can call me at any moment. I should wait in the Imperial City if I want word to reach me quickly. | |
| 100 | The Gray Fox can contact me at any moment, but until then I need to sell more stolen goods to fences. I'll have to turn in at least 800 gold worth of stolen goods to get his attention. Now I can use the services of the Guild's best buyer, Fatis Ules. | |
| 105 | The goal has been reached. I sold stolen goods worth 800 gold. When in the cities, it is worth looking to see if the Gray Fox messengers are looking for me. He can call me at any moment. I should wait in the Imperial City if I want word to reach me quickly. | |
| 110 | The Gray Fox can contact me any minute, but until then I need to sell more stolen goods to fences like Fatis Ules. I'll have to turn in at least 1000 gold worth of stolen goods to get the Guild Master's attention. | |
| 115 | The goal has been reached. I sold stolen goods for 1000 gold. When in the cities, it is worth looking to see if the Gray Fox messengers are looking for me. He can call me at any moment. I should wait in the Imperial City if I want word to reach me quickly. |
Notes
- Not all entries may appear in your Quest Diary; which entries appear and which do not appear depends on how the task is performed.
- Stages are not always in order of passing. This usually refers to quests that have multiple possible outcomes or quests where certain tasks can be completed in random order.
- A checkmark in the "KZ" (End of Task) column means that the task disappears from the list of active ones, but you can still get new entries for it.
- You can use the console to progress through the quest by typing setstage TGStolenGoods stage , where stage is the number of the stage you want to complete. Note that it is not possible to cancel (i.e. go back) the quest stages. See SetStage for more information.
Have you seen the Wanted Notice for the Gray Fox in the Imperial City? Did you hear about the Gray Fox from beggars? Do you want to join the thieves guild, but you don't know how to do it? Then this article will tell you everything from A to Z about the Thieves Guild!

1. Joining the Thieves Guild.
To start the quest "Search for the Thieves Guild" you need to talk to any beggar. Note that the beggar will "dodge" the answer. This means that he is not well disposed towards you and does not trust you. To improve our relations with the poor stratum of society, it is enough to have at least a hundred or even two gold coins with us. We achieve relations> 70 and we see that the poor man's tongue is untied. However, there is also a trick here. The poor man will ask you "Are you looking for him?" to which you should reply "I want to join the Thieves Guild". Well, of course it was not necessary to write this, but you never know what. There are those who will first answer "I want to catch the Gray Fox!" But it doesn't matter, because you can still talk to the poor man one more time. In general, something I left the topic! So, having learned all the information from the poor man, he sends us to the Imperial City Port District. We teleport and by the flag we find the meeting place of the Guild of Thieves. What a misfortune you came, but no one is there? Hehe it's because you're not standing there at midnight! Therefore, you need to wait until 0:00 and boldly go to the guys at work. If you did everything right, then you should have a picture like this:

Aha! Here they are vagabonds! Well! We calmly approach the one in the center and say: “I want to join the thieves guild!”. And here you will find a bit of an unexpected bummer, so to speak. It turns out that in order to join the Thieves Guild, you also need to pass a “special” test! What brats! Well, it doesn't really matter! The developers did it in such a way that it was more interesting right ?! Probably, the reader will say: “Okay, that's enough! More business author! And he will probably be right! I just don't want to write simple "dead" text. You have to embellish somehow. In general, do not pay attention to me, I will not do this again!
P.S. Do not forget that you can buy master keys from NPCs for 5 coins each. You will need approximately 20. Depends on your hacking skill!
2. Trial of the Thieves Guild.
As mentioned earlier, we take the quest from Armand Christoph, which is in the center. He gives detailed instructions. You need to find the diary. Further, as the NPC advises us, we go to some beggar to ask where this house is located.
Advice from the author:
To be honest, I do not advise you to rush ahead of Methredel with great zeal, because believe me, she runs faster to me, and opens doors without breaking. It's a computer. Laziness is the engine of progress, as smart scientists say, and in this case they are very right. In fact, there are many ways to complete this quest, but I will skip all the ways I will give you the most reasonable and fastest.
1. If you really want to, you can follow Methredel. At the same time, you will find out where this house with a diary is. For the sake of interest. If Methredel takes the diary before you, then a quest message will appear that Methredel is ahead of you. Don't be upset! We will show her how to steal prey from under our noses!
2. I write further for those who, as they said, did not have time. To great luck, Methredel will not have time to return with the diary before the end of the Thieves Guild gathering. So you only have one day left! We quickly run to the beggar. Find out where Metredel is located. (naturally, a beggar should be in a good position) The Tramp tells us that she sleeps at her house until noon. A flag appears on the map. Oddly enough, her house is in the waterfront. Quietly we climb into her house. We are presented with the following picture:

In no case do not touch the girl herself. She will wake up! What you are looking for is in the chest, which is located to the left of my character. After a little sweat, opening the lock of the average difficulty level, you will find a lot of rubbish there, but you only need a diary. We tiptoe out of the room and calmly walk around the city, or do other quests, or wait until 0:00. At midnight we bring the diary to our NPC. And as a reward for completing the test, we are taken to the guild. But they demand from us an oath, the meaning of which is 3 rules. You must not: kill brother thieves and not shed blood during the task, steal from your own, steal from the poor, as the Gray Fox is watching them. Let's move on to the next step.
3. Independent Theft. (recurring)
After asking everything that could be asked, we will find out from the NPC that you need to sell the stolen items for the price of 50 gold. The first buyer of stolen goods is located in Broome. We teleport to Bruma and look for a buyer. Naturally, you first need to steal something. If you have items that you stole before joining the guild, then you can also sell them. When you have sold everything and the counter has exceeded 50, you receive a quest message that Armand Christophe is waiting for you at the meeting point of the Thieves Guild.
4. Exemption of the poor from taxes.
Having met with your doyen, he informs you that Hieronymus Lex is such a stupid guard who will forever put “sticks under your wheels”, but you still have time to teach him a lesson. So Hieronymus Lex collected a tax from the population of the Port Area! But it is inhabited only by the poor. Basically, your doyen asks you to go and steal a bill of lading so he knows who to give what to. (Don't forget to buy lockpicks if you don't have many). We head to the destination point. This will be the tower. Quietly we go into it. Then we go upstairs, again, again, there will be a lock on the stairs, open it and enter the chambers of the captain of the guards. We find a desk. The picture will look something like this:

We open the desk and take the invoice and gold. Calmly, but it is desirable to quickly leave the room. After you left the tower and saw no signs of the guards' anxiety, you can calmly exhale, because the guards did not "burn" you. Teleport to the Port Area. We meet with our NPC and report to him about everything. To your delight, he leaves the gold to you and promotes you in rank from "pickpocket" to "robber"! Congratulations!
5. Independent theft. (recurring)
Armand Christoph, forgive me again to steal something, and now the counter of stolen goods should exceed 100 gold. After you have the necessary goods, we go to Bruma to our buyer. We sell everything we need and get a quest message. We head back to the Port District and wait for midnight.
6. Elven girl.
We receive an order from our doyen to steal the figurine. It used to belong to the late Countess of Cheydinhal. For the figurine, the doyenne gives 100 gold. Let's go to Cheydinhal. We find a wandering poor man there and find out from him the information you need. The poor man directs us to the chapel. We go in, go down, break open the door (the lock is difficult, so as I tirelessly say, buy master keys in advance). Now we have such a task before us. Since the bust is guarded, you need to slip in unnoticed!
Advice from the author:
In case you haven't forgotten, the second rule in the Thieves Guild is "don't kill anyone during a quest, except for animals and monsters." Therefore, if you are still noticed, do not rush to draw your sword. It will be easier to snatch the bust and run as fast as you can to the exit!
Here is where the bust is located:

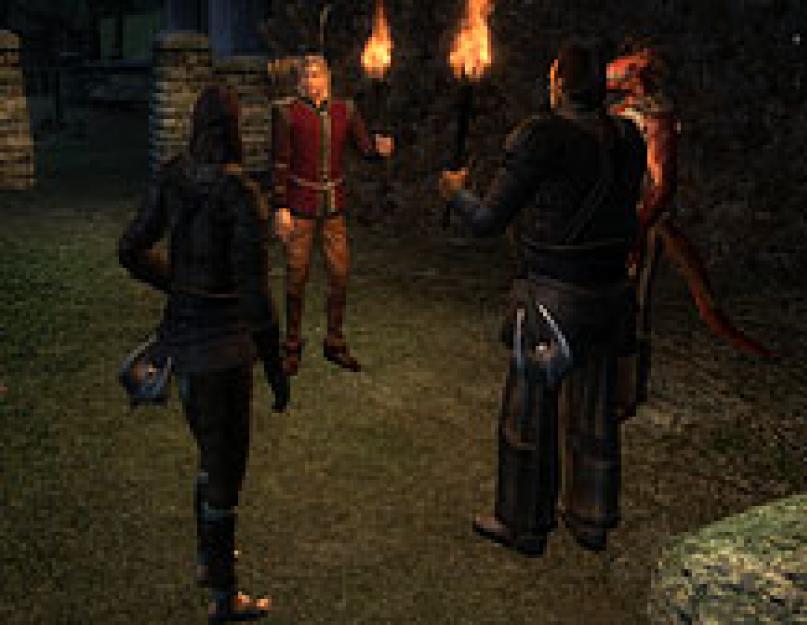
We go to the Port Area. And the quest message appears. It notifies us that the Imperials are patrolling the area and are looking for Armand. Do not panic. Head to the place where you usually meet, no one will be there directly. Look for some of your comrades, maybe they will tell you something, but in general, Methredel should find you. When she tells you that this was supposed to be a "set-up" task to find out who denounced the guild, you, slightly upset, or maybe not, will have to arrange your own "set-up"! To do this, wait for a convenient moment so that no one sees you, open the lock on the door of the scammer and quietly put the bust in her cupboard. We leave the room and go to our "beloved" Jerome Lex. Raise your relationship to >70 before informing him about the "thief". After you successfully bribe your "friend", or maybe use your "eloquence", he will say that he does not believe you, but as a fair captain of the guard, he is obliged to check your accusations. He takes you with him. Then we have a very funny picture, in the truest sense of the word. Here is a screen shot of how these two "burned out" in front of the entire Thieves Guild:

It's funny, isn't it? I was also pleased. After the "traitor" is arrested, we leave the room and do whatever we want until the next midnight. When you arrive at the next meeting of the Thieves Guild, you will again see your doyen holding a torch. He thanks you for saving his "skin" and asks you to forgive you for such use of you for the purposes of the guild, but supposedly it was necessary! However, the reward was not stingy: 100 gold coins, access to a new fence (Leyawiin), and even promotion to a "bandit"! Now the hour has come when you need to say goodbye to your already "old" doyen, as you have a new doyen. This is S'Krivva, who lives in Bravil.
7. Independent theft. (recurring)
As we do everything before, only now the counter should exceed 200 gold. After selling the next stolen "junk" we head to S'Krivva. She gets to know us and gives us a task.
8. Jewels of Adarji.
So, after meeting our new doyen, we get the task. We need to travel to Leyawiin and meet with Adarji. After we meet her, she tells us about her ring, which means a lot to her. It was stolen from our Khajiit by Amuzai, the same Argonian with whom you competed in the very first task of the Thieves Guild. We ask the guards where Amuzai is. They say he was put in jail for blackmailing the Countess. All this looks a little strange. We head to the prison, which is located in Leyawiin Castle. We give the local guard some gold, and he lets us through, as if nothing had happened. We speak with Amuzay. He answers us rather rudely, demanding to help him, otherwise he will not say anything about the ring. We give him a master key. After that, we listen to the whole story. The Argonian wanted to sell it to the Countess, but he screwed up. He was arrested. Now comes the most difficult moment. We go to the assistant to the Countess Hlidara Montrel. We bribe her and find out all the information we need. Countess Alessia Caro sleeps from 11 a.m. to 8 a.m. The rest of the time she has the ring, and while she sleeps, she puts it in a box.
Author's note:
This is the hardest part! I myself passed it somewhere from the 20th attempt. Of course, you can say that I'm a loser, but I'm not. When I went through the Thieves Guild, (1-2 years ago) I completed this mission 1-2 times. And this time it was all just in any!
Author's tip:
Naturally, it makes no sense to steal the ring on the countess. You just won't find it. I climbed with my great stealth skill. They didn’t burn me, but there was nothing but her clothes, personal belongings and my bribe gold. This is how I am having fun! In general, we are waiting for 11 o'clock at night. Then we watch as the bodyguard, the countess and her assistant go upstairs to their chambers. We are not in a hurry to immediately follow them, because the guard will notice you anyway. After waiting a bit, we enter the chambers. We immediately switch to the "sneak" mode and calmly go to the door of the chambers. By the way. Why did I complete this mission? I was helped by the elixir of invisibility. I had one, and very in vain. I advise you to buy it too, otherwise I don’t know what guide to write here. Well, or if you are a good magician, learn invisibility magic and it will help you out a lot from big problems. But I will not talk about it, I will tell you how I went through. As I approach the door of the first door in the chambers, I drink the elixir of invisibility and rush quickly to the door leading to the room where our countess sleeps. We quickly break open the door and close it behind us. We go with a calm step, do not rush to the box and open it. Here is our ring. Now, with the same calm step, we head to the door. If you don't have a second potion, you're going to have a "really" fun time. Well, it certainly applies to me. Sighing, with regret, I realized that I would not pass unnoticed past the bodyguard in the large room. And I decided to use the old "Morrowind" method. Run through. Naturally, a bunch of guards ran after me, but as a result of a 10-minute chase, I broke away ... Even the imperial guard was chasing me, you know, who always patrols the roads of Cyrodiil with a torch. Luckily, he got off his horse, which gave me a chance for a clever maneuver. I made a strong blow, which staggered him back a little and jerked sharply towards the horse. Sitting on a horse, I rushed somewhere far away from him. A minute later, the guard, left without a horse, surrendered. Then I teleported to Bravil to buy off the law from S'Krivva. After successfully removing the fines, with a calm mind, we head to Leyawiin and receive our reward of two hundred gold.
After the successful completion of the task, we go to S'Krivva. She promotes us to the rank of "burglar" and thanks us for our loyalty to the guild.
9. Independent theft. (recurring)
We sell stolen goods worth 300 gold to the buyer of stolen goods, after which we go to S'Krivva.
10. Misdirection.
S'Krivva brings us bad news, Hieronymus Lex has begun the siege of the Waterfront. We need to go to the Imperial City immediately. We find Methredel in Talos Plaza. After we talk with Methredel, we get a task in which we are told about the "theft of the century." You need to steal the Staff of Hrormir from Archmage Traven. We are heading to the University of Magic. Naturally, we penetrate there at night so that there are fewer eyes. We go into the chambers of the Archmage and sneak up on the Staff.

After stealing the Staff, go to the bedside table.

We put a note and leave. After the successful completion of the task, we go to Methredel. The girl is delighted with your success and asks you to go to the Port District in order to reconnoiter the situation. We head to the Waterfront and look for Hieronymus Lex. After we find it, the following picture appears before us:

It was the Dremora who brought the note from the Mages Guild. After that, Lex removes his people to their former posts, and you calmly return to Methredel to tell about the successful completion of the task. The girl thanks you again, but asks you to take the Staff back to the Guild. However, not to the guild itself, but to one of its scientists. This is Ontus Vanin. We make our way to his house and put the staff in his chest:

After that, we go to S'Krivva and get a reward of 300 gold and an increase in the guild to the title of "burglar".
11. Independent theft. (recurring)
We sell stolen goods worth 400 gold to the buyer of stolen goods. We go to S'krivva.
12. Lost stories.
S'Krivva gives us the task to find some book. First we go to Skingrad. There we find a prison and ask the guard to enter the dungeon to the prisoners, to which we are refused. However, we learn that a certain Orc is looking for a laborer to distribute food to the prisoners. Having settled down, we go back to the dungeon, and they successfully let us in. Then we speak with the only prisoner there and ask about our Tanaris. Nord tells us that a certain Pale Lady took him. Then we follow the traces of blood leading to the wall. Click on the candle, which is to the right of the wall. The passage opens.


Click on the candle and the central barrel opens (see the picture below). We pass inside and hear the voice of the Pale Lady. We take out weapons and kill the evil vampire. We take the keys from her. We see that Tanaris is already dead. Amuzai is the only survivor. We speak with him and free him from captivity. Then you need to be very careful, because if the guards or even the inhabitants of the castle notice you, you will have problems. After you get out to freedom and move away from the castle, Amuzai will tell you everything.


We pick up the book and return to S'Krivva. The Khajiit regrets the death of Tanaris, but thanks you for the successful completion of the task and gives you 400 gold.
13. Independent theft. (recurring)
We collect 500 gold on the counter of stolen goods. After that, we go to S'krivva.
14. Getting rid of Lex.
S'Krivva gives us a new task. This time, Hieronymus Lex must be done away with forever! To do this, you need to steal a letter from Dairihil. Let's go to Anvil. There we speak with some beggar and find out that some blacksmith in the castle can help us. We leave for Anvil Castle and find a blacksmith there. Fortunately, the blacksmith turned out to be a Fox man and therefore happily shows us a secret passage. Quietly we pass into private quarters. First, we open one door, and then we meet the same passage that the blacksmith opened. Open it and tiptoe to the left. Oh, by the way, I almost forgot, you need to do all this, preferably after 8 pm, because Dairikhil is having dinner with the countess. We break open the door, go in, break open the table and pick up the letter.


We give him a letter. He agrees to fake it, but he needs time and money. We return to the Stranger in a day and pay him 500 gold for forging a letter. After we received the letter, we head to the Imperial City. There, on the flag, we find the exact destination of the Imperial Seal and go there. We break open the door, then another door and there will be a table in front of us, on which the seal directly stands.

We seal the letter and bring it to Countess Anvila Umbranox. The Countess will thank us for delivering the letter and tell us to collect the tip from her assistant Daerikhil. Angry Daerihil gives us 20 gold. After that, with great contentment, we head to the Imperial City, where we find Hieronymus Lex and tell him very "joyful" news. After you've had a good laugh at the pitiful guardian, head to S'Krivva and collect your reward. Our doyen promotes us to "Shadowmaker" and gives us 1000 gold. Oh, by the way, you can now use the services of a fence for stolen goods from Anvil Castle. Now comes the important point. S'Krivva reports that you are now too experienced to need a doyen. Now you will be given tasks by the Gray Fox himself.
15. Independent theft. (recurring)
S'Krivva says that the Gray Fox will be interested in you if the counter of stolen goods exceeds 600. After that, we head to the Imperial City's Waterfront District. There, the minions of the Gray Fox will find you the fastest. After receiving the necessary information from Methredel, we head to Bruma.
16. Deceive blind eyes.
After you meet with the Gray Fox and listen to everything carefully, we get the task. You need to go to the Ancestor Moth Temple and steal Savilla's stone.

On the map we find this temple and move towards it. At the place of arrival, you need to find some monk who could tell you everything. Naturally, you will have to fork out a little. After one of the monks agrees to take us to the place where the catacombs are located, we follow him. After the monk leaves, we go inside. Now you have the right to shed the blood of all who stand in your way. Therefore, I personally did not take a steam bath and only at the beginning had fun with "stealth". And then he just ran and shredded everyone to pieces. We go, we go, and once again we go along the flag, checking the map. Dolgov something to go, but what to do is the task.

Well, let's get back to our task. After you shed a lot of blood and finally get to the crystal, then do not hesitate to pick it up, because you will be fired at by a fiery crystal, which I personally can not stand!

We grab the crystal and run away. We leave the catacombs and leave the Temple of the Ancestor Moth, heading back to the Gray Fox. When you meet with the Fox and give him the stone, he will give you your 500 gold and ask you to leave the room. The Gray Fox will contact you later.
17. Independent theft. (recurring)
18. Arrow of release.
After you have a friendly talk with your new friend Amuzai, who has successfully joined the Thieves Guild and is now transmitting messages from the Gray Fox, we head to Coroll to the Gray Fox. After we speak with him, we head to Bravil. There we must find a certain Arrow of Release, which was recently acquired by Fatis Aren, the court wizard. We learn from the beggar that the magician pocketed some ruined tower in the southeast of the city, and even all this cannot be entered through the main passage. There is a secret tunnel linking the castle and the tower. We head to the castle, there we find the room of Fatis. After searching it, we see that there is no arrow in place, however, there is some strange secret door in the wall. We click on it, and a wall slab moves apart in front of us. This is our secret entrance.

Advice from the author:
When you stumble on water, in no case swim to the very bottom, and even more so do not go out there, into the open sea. This can lead to not very fun results if you don't have magic or maybe an elixir or even some item with the underwater breathing property. Therefore, just in case, I advise you to stock up on something of the above, it definitely won’t get worse. So, as I said earlier, you don’t need to swim to the very depths. Look closely, if you look closely, you will see a small opening leading under water just to the exit. We swim through it and reach the exit from the tunnel. Now take your time, be careful.
Next, we need to find Fatis in this ruined tower and pick up his arrow at his "workplace".
Note from the author:
If you kill a mage, you won't be charged a blood price, but as a member of the Mage's Guild, you'll have problems. You will be kicked out of the guild. So weigh everything in advance. Remember that if you have fast feet, then you can always take everything you need and run away.
After not entirely successful extraction of an arrow (it turned out that it was without a shaft), we head to the Gray Fox. He is pleased with our work, but fixing the arrow will take some time. As a reward, we get: 500 gold and promotion to "master thief".
19. Independent theft. (recurring)
We sell the stolen goods for 800 gold, after which we expect in the Imperial City's Waterfront.
20. Boots of Swift Jack.
Amuzai brings a new message from the Gray Fox. Now we need to meet with the great thief in Cheydinhal in the house of Ganredel. The Gray Fox informs us that he needs some Boots of Swift Jack. He says that they are buried with him, but we need to find out where Jack himself is buried. Fox says that the search should begin with the Imperial City, where his descendant Count Jakben lives. We head to the Imperial City and find out from the beggar where Jakben lives. After receiving a tip, we head over the flag to his house and enter there. Immediately go upstairs and open the door. In the corridor of the second floor, we open the door, which will be straight, and we see the count there. When he sees you, he will be very scared. We ask him about the family mausoleum, and he gives us the keys to it. Turns out he's in his basement. We go down to the basement.

We go into the catacombs. Be careful, there is one vampire there, don't get infected! As soon as we kill the vampire, we move on, and we see the coffin of Quick-footed Jack. Having searched it, we do not find boots, but we see some kind of diary. We read it to the end and find out that Jakben is the same Quick-footed Jack. We go back, but we see Jack rushing towards us. We kill him and take away his boots. After that, we return to the Gray Fox in the house of Ganredel in Cheydinhal. He thanks us for our work and gives us 500 gold pieces.
21. Independent theft. (recurring)
We sell stolen goods worth 1000 gold to the buyer. After that, we wait in the Imperial City's Waterfront District.
22. Daring robbery.
Amuzai brings us a message from the Gray Fox. We head to the house of Otrelos, which is located in the Elven Gardens of the Imperial City. The Gray Fox asks us for one last favor. He's about to commit the greatest heist of the century - stealing one of the ancient scrolls from the Library of the Imperial City. The fox has been preparing for this day for 11 years and now, finally, nothing will stop him. Savilla's stone reveals its secrets to the Gray Fox. The fox gives us the Boots of Swift Jack and the Arrow of Release. He says we'll need them as we find our way to the Imperial City Library. He also gives us a scroll with a plan so that if you forget something, you can always check. So, now begins the most incredible robbery in Tamriel. Attention attention! Please take your seats and get ready to watch!
1) We penetrate into the Palace of the Imperial City and find something called the “Vessel of Time” there. After we activate it, we leave from there.


3) Now, once in the Old Way, we go further along the sewers. We will come across all sorts of levers and moving wheels, so do not forget to activate them. If you do everything right and open all the necessary doors and passages, then you will face this thing:

We go further along the sewers of the palace. There you will meet a hall with raised walls on the sides. There are pressure blocks on these walls. This is where we need the Boots of Swift Jack. We jump in and click on the two blocks that are on different sides. The passage will open, and we move on.

4) We find ourselves in an even larger hall, in which there is a large statue. On the sides of this statue are two smaller statues. Now we go to the right side of the statue. There will be a grid. Open it and click on the block.


Advice from the author:
I strongly recommend that you do not go ahead of this monster, which is in the distance. This hazy ghost can cast a bunch of bad spells, one that will cause you to become overwhelmed and therefore unable to move. Trust me, I've been through this myself. Only the save saved me. The second time I was much more cunning and prudent, and I decided to sneak up. I approached the ghost unnoticed and hit it with a fire spell. Consequently, I had a gain in time, distance and, of course, in the first blow. This time I killed this cruel ghost without any problems.
Click on the block and go back. Now you will see that the walls are raised and the dead have come out of them. We kill them. After that, you must stand on the button, which is located between two walls. By pressing it, you will see how the statue will turn and a well will open in it. Now you need to hit her with the Release Arrow.
Advice from the author:
Take your time to shoot the Release Arrow right away. Use simple arrows to aim accurately. When you are sure that you have chosen the right point of the shot, then boldly take out the Arrow of Release and let it fly for a happy and final flight.
After hitting, a secret passage will open and at the same time two island statues will come to life. We kill the "ancients" without pity and penetrate the Imperial Palace.
5) Now we need to find the Library. Carefully, with a quiet step, we go in the direction of the flag. When you come across the closed door of the Library, you just need to go behind the temple guard and pull the lever to open the door. (see below)


After that, we calmly go into the library and sit on a chair near the fire.

6) Grab the scroll and tear the claws!!! But don't be too hasty. Now we understand what force majeure the Gray Fox was talking about. The monks closed the door from which you entered the Library. Stealthily climb up the stairs and quietly head towards the door. We open the most difficult lock and go further through the premises of the palace.

We find the room of Chancellor Okato and run away from the palace through his fireplace. Yes Yes!!! It really is.
Note from the author:
By the way! I almost forgot. I apologize to those who have already jumped into the fireplace, fell and crashed. If you want you to have at least like Nikulin’s “slipped, fell, the cast woke up”, then it’s better to put on Boots of Quick-footed Jack. Once again, sorry for the inconvenience caused!
7) Now that you've successfully escaped the Imperial Palace and pulled off a fantastic heist, let's get out of this filthy sewer as soon as possible. How I hate places like this. Ugh! Constantly there are some rats, crabs and even ghosts with vampires. In general, enough disgust, back to the task. So, in the end, you have to get to the entrance to the basement of the Best Defense store.
Note from the author:
By the way, my favorite shop in the Imperial City Trade District! There is a very kind seller of light armor. The prices are good, I don’t complain, and I’m always glad to talk with nice people.
As if nothing had happened, we leave the store and go to the Gray Fox. Having met him, he will be pleasantly surprised. The fox takes the scroll from you and says that he will study it later, but for now he sends you with the ring to Countess Millone Umbranox. We head to Anvil and find the Countess in her castle. We give her this ring. Millona wonders where we got this ring from, since it belongs to his husband, who disappeared ten years ago. Not having time to really be surprised, as the Gray Fox himself appears. He shows his face to the countess, who recognizes him as the long-lost count. Corvus (that's the name of the former Gray Fox) gives you the Gray Hood Nocturnal. Now you become the Gray Fox. By the way, an office of the Thieves Guild has opened in the Imperial City's Waterfront District. You can look at her if you like.

Well, it's time to congratulate you on your graduation from the Thieves Guild. Be an honest and fair thief and never forget the thieves' laws. As they say, "the law is written for all." Good luck on your travels and may the Shadow cover you!