Many who have tried to sew knitwear on a regular sewing machine have noticed that the machine often refuses to make a beautiful and even stitch. Gaps form in the knitted stitching, the bottom thread loops, and sometimes breaks. Why does this happen and how can I fix it?
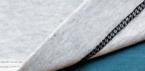
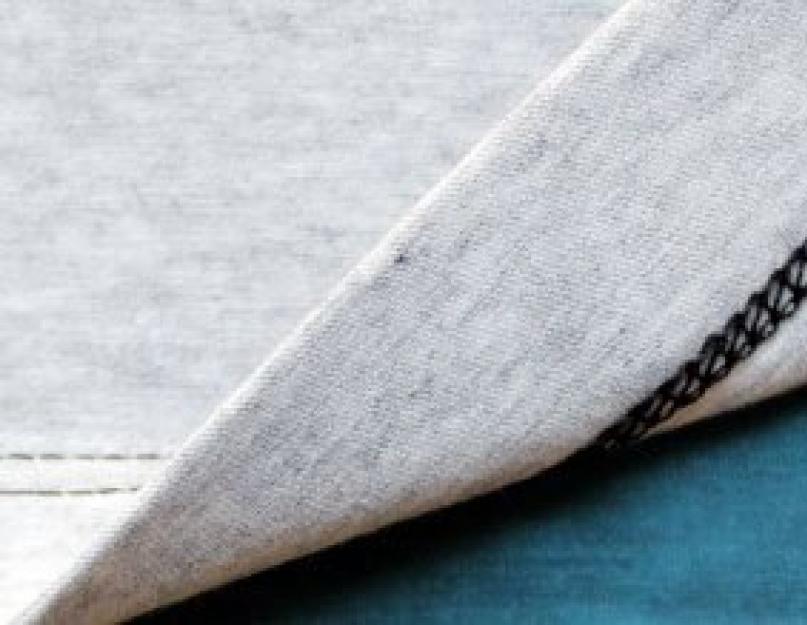
Firstly, for sewing knitted fabrics, a special knitting machine is used, it is called a flat-stitch machine - an open stitch machine or a chain stitch machine. The seam on the reverse side looks like a “pigtail”. Look at any factory processing of a T-shirt and you will see this.

Secondly, for sewing sections of knitted fabric, a knitted overlocker is used, which has a differential (stretching fabric) rake with simultaneous laying of a sewing chain stitch.

And thirdly, special needles and threads are used for sewing knitwear. The last point is decisive for your sewing machine, so let's figure out which needle you need to sew knitwear, what threads you need to use to get a high-quality stitch, and consider other factors that affect the quality of the stitching.
Needles for sewing knitted fabrics
There are many reasons that affect the quality of the stitch formed when sewing knitwear. One of them is an incorrectly selected needle. Universal needles, which are most often used on sewing machines, are “poorly” suited for sewing knitwear. Not only can the sharp edge of the needle damage the weave of the knitted fabric, but it can also cause the loop near the eye of the needle to be too small. And the nose of the shuttle simply passes by it without catching the top thread. As a result, gaps appear.
Replace the utility needle with a special needle with a rounded point designed for sewing such fabrics. A needle with such a point does not pierce the knitted fibers, but passes between them and creates better conditions for the formation of a loop. The packaging with these needles says “Jersy”, and “ball point” means that the needles have a rounded point.

However, you should know that buying a package of special knitting needles does not always solve the problem, especially for old-type sewing machines such as Podolskaya or Chaika. There are a number of other factors, which will be discussed below.
This diagram shows a knitted weave of stretch fabrics. Outwardly, it resembles knitting or machine knitting, which is why it is called knitted fabric. “Springy” loops give fabrics many useful qualities, such as stretchability, low creasing, etc., but at the same time they create certain difficulties when sewing them on ordinary household sewing machines.
Threads for knitted fabrics and their tension

Not a single lockstitch machine likes to sew knitwear. Knitwear for a lockstitch sewing machine is a test that not all machines can withstand. True, modern household machines cope with this task quite well, provided that certain requirements are met. As you already understand, one of them is high-quality thread and its correct tension.
Sewing threads should be thin, elastic and durable. Basically, all types of modern threads available for sale in the accessories department correspond to these parameters. But, nevertheless, you need to experimentally determine which type of thread is best suited for your machine.
Naturally, you need to “forget” about thick finishing threads, and even more so about threads from your grandmother’s old stocks. Ideally, threads on large conical bobbins are suitable for sewing knitwear, but since they are quite expensive, use threads on small bobbins, such as “Ideal”.
Before sewing knitwear, you need to correctly adjust the tension of the upper and lower threads.
Typically, the bobbin thread should not be adjusted, but when sewing knitwear, this can often eliminate thread looping in the stitching. If, when you tighten the top thread, the looping at the bottom does not stop, then try to slightly loosen the tension on the bottom thread.
Please note that when you sew pieces of knitted fabric, the stitching will be looser in one direction (usually transverse). This “effect” cannot be eliminated using tension. It’s just that the knitwear, under the influence of the foot and the teeth of the rake, stretches, and then takes its previous shape and the stitches are weakened. By the way, the presser foot pressure also needs to be adjusted.
To eliminate this, use stabilizers (gaskets), including pre-cut strips from newspaper. A paper strip is placed under the fabric, and then carefully pulled out of the seam. By the way, often just such a “cunning” method can eliminate gaps in the stitching of a Podolskaya or Chaika sewing machine.
But, naturally, this is too extravagant a method that is undesirable to use. If you have replaced the needles and selected the threads, adjusted the tension, but the looping and skipping have not disappeared, then you need to adjust the sewing machine. But only an experienced craftsman can set it up for sewing knitted fabric.
What is the difference between knitted overlock
Almost all modern household overlockers are knitted overlockers. The main difference between a knitted overlocker and a regular one is that a knitted overlocker has a special rack design (teeth under the foot). During operation, the lath specifically compresses (stretches) the knitted fabric, and after stitching, the fabric is stretched (pulled) back. As a result, the seam is stretchable and can withstand more tensile load.
For example, if you sew knitted fabric on a regular machine, and at the same time tighten the thread tension strongly to eliminate the slack in the stitching, you will get a very beautiful stitch, but not strong. Pull this area with your hands and your beautiful seam will simply burst. This is the main purpose of knitting machines - to create an elastic and stretchable seam.
Overlockers with a differential rake can sew not only knitwear. This function can be easily disabled using a special knob. And even, on the contrary, you can “force” the rail to collect the fabric. You need to know that overlockers of older models, including class 51 overlockers, cannot efficiently process knitted fabrics. And don’t be surprised if the connecting seams of knitted clothing, processed only with a three-thread overlocker, will burst over time.
Other reasons why the machine does not sew knitwear
Well, one last thing. A Podolsk sewing machine or a Chaika sewing machine often refuses to sew knitwear at all. And even a master cannot always set it up for sewing knitted fabric. If you want to check the work of a sewing machine repairman, ask him to sew a piece of the most “harmful” knitted fabric at the end of the job. If the line does not have even one omission, it means that this is a “good” and experienced master.
Older machines have different adjustments for the interaction between the needle and the nose of the shuttle. After all, at the time when they were released, no one suspected that such fabrics would be used all the time. Therefore, modern machines are configured for sewing knitwear, but old machines need to be reconfigured.
How to sew knitted fabrics on a regular sewing machine
How to sew knitwear without an opener on a household machine
In order to make a new knitted product on knitting needles, you need to knit its individual parts, and then the question arises, how to correctly connect the resulting individual parts into a complete product? Moreover, the seam of the parts should not disturb the knitting pattern. For joining, a knitted seam is used in knitting. Dont know…
Knitted stitch in knitting
There are different types of knit stitch in knitting. The choice of seam depends on both the pattern, the thickness of the yarn, and the texture of the fabric. It is done not only with knitting needles, but also with crochet, but that's another story.
If the knitwear is not too voluminous, then the details of such a product can be sewn together with a large stitch by hand using a darning needle (with a large eye and a blunt end) or on a sewing machine. It is advisable to make stitches with the same yarn as the entire product.
Let's look at the types of seams in more detail with photos and videos for a better understanding.
Horizontal seam
Intended for: joining two parts in opposite directions.
It is invisible in appearance, similar to an ordinary knitted row, ideal for products made from bulky yarn.
When you finish knitting a piece, there is no need to close the loops! Or knit 2 - 3 rows with a contrasting thread in the same way, without closing the loops.
Thread the threads you used to knit the garment into the darning needle.
Place the pieces with open loops opposite each other on a flat surface.
Connect the loops by picking them up from the knitting needles. If you used the contrast thread method, then gradually unravel the section with the other thread at the same time as tying.
You should have a horizontal seam as in the photo. 
Intended for: joining two parts in one direction, editing and restoration of the product.
A knitted stitch in knitting called “Loop to Loop” will save you from the tedious work of bandaging, because you can remove only a certain part of the product, or shorten it.
How to implement? 
Mark the boundaries of the restoration
Cut the thread and carefully remove it.
Do not cover the loops.
Take the darning needle and the yarn you used to knit the item and join them together. The length of the thread should be 4 times longer than the area being stitched. It is better to take more thread than to tie another thread to it or redo it.
Open loops are sewn on the front side. Don't pull it too tight!
Try to repeat the pattern of the product and imitate the loops as in knitting. 
If the photo did not help you understand the knitted seam technology, then use the instructions or watch the video.
Step-by-step instructions for knitted stitch “loop to loop” in knitting
Secure the thread to the bottom fabric on the right (since most people are right-handed, left-handed people can turn the project over and start from the top fabric on the left).
Insert the needle into the first loop from the wrong side.
Insert the needle from below - up into the outer loops, then from above - down (for left-handed people, do everything in reverse).
Sew the first stitch of the bottom row to the first stitch of the top row, and so on.
During all this stitching, do not forget to remove the loops from the knitting needles.
Look at the picture again and compare your result with the image.
Vertical knit seam
Intended for: connecting two parts using a butt seam. Also known as the "Mattress Seam".
This type of knitted seam in knitting is used for sewing the side edges of parts along the front side. 
Looks like a purl row.
Important: the sides to be sewn must have an equal number of rows, so if you are going to change the number of loops, do it not at the edges. Do not pull the thread too tight when sewing the pieces together.
How to make one?
Place the pieces right side up next to each other.
Connect the edges of the cast-on rows (connect the outer loops of the bottom row).
Sew the second loops from the edge, not the outermost ones, which are closed. Don't skip a single stitch!
The path of your thread is similar to the gait of a snake (however, this method is noticeable) or a zigzag (below in the photo), which technique do you like best? There are two possible methods of joining. The zigzag stitch is less noticeable because it creates a flat stitch, similar to a purl stitch.
Kettel seam
Let's look at the third type of knit stitch in knitting.
Designed to: connect two parts with open loops in the shortest time with the highest probability of success. Used for edging the edges of knitted products, as well as for sewing parts to the product: collar, pockets, etc.
Advantages: it doesn’t matter which side you sew from, in any case it will turn out aesthetically pleasing and invisible. 
Important: if for previous seams you used the thread from which the product was made, then here you need to use a thinner thread!
Let's sew!
This type of seam can be described as: leave the loops open and sew them like regular fabric!
Let's take a closer look:
Check out the photo.
Place the two pieces opposite each other with the hinges open.
Thread a thinner thread through the needle.
Start on the side that is comfortable for you (usually on the right), sew 2 stitches forward
Start a new step from the previous loop. That is, literally take two steps forward, one step back.
Below are videos that explain the knitted seam technology in detail.
23:27 Unknown 1 Comment
Hello, dear readers!
In this article we will look at several ways to perform a closed seam.
Covering seam- this is a type of machine connecting seam with closed cuts, which is performed with two lines - connecting and connecting-finishing; On the reverse side of the product both stitches are visible, but on the front side only one is visible. The sewing seam is used in the manufacture of bed linen, which is why this seam is also called the “linen seam”, as well as when sewing shirts and denim clothing.
The advantage of a closed seam is that when making it, the fabric sections do not need to be overcast, and the seam itself is quite strong.
In factories, the sewing seam is performed on two-needle machines; at home, a special machine foot is used, using just one operation.

With a regular foot, a sewing seam is performed in several operations, and depending on the characteristics of the fabric and the model features of the product, the methods for performing a sewing seam vary; we will look at the three most common methods of making this seam.
For ease of perception, as an example, I will use fabrics of two different colors and contrasting threads for laying stitches.
First way
To perform this method, seam allowances should be 1.5 cm.

Fold the parts with the front side inward along the cut along which the parts need to be connected, while the cut of the lower part should protrude 7-8mm from the cut of the upper part.

We will go around the cut of the upper part with the allowance of the lower part

and sweep up the allowance.

We sew the folded seam allowance with a seam width of 5-6mm, that is, retreating 1-2mm from the cut of the fabric, securing the stitching at the top and bottom.

Iron the seam on the rib on both sides.


With the wrong side up, we will lay out our parts on the surface so that each part is on different sides of the seam.

Iron the allowance on the side of the part, which we consider to be the top,

and be sure to iron the seam on the front side of the product.

Let's adjust our seam allowance from the wrong side of the product using a stitch with a tack, departing 1 mm from the fold of the seam allowance.

Iron the seam from the back and front sides.


And this is how we got the sewing seam - on the wrong side - two lines

and on the front - one, and the sections of fabric are hidden inside the seam.

Second way
The seam allowance is 1.5 cm.

Fold the two parts right side inward along the connection line, aligning the cuts of the parts.

Sweeping away the givers

and sew with a stitch with a bartack, seam width 1.5 cm

Iron the seam on the rib on both sides.


Now we will trim the allowance of the part on which the allowances in the product will be ironed. Cut 1cm from the edge, leaving 5mm from the seam.

Let's go around this cut with the allowance of the second part.

and sweep the allowance so that the cut of the fabric does not reach the seam line by 1mm.

Place the connected parts on the surface on opposite sides of the seam, face down.

and iron the allowance onto the side of the part from which we cut the allowance.

Iron the seam from the front side.

Now we will sew the seam allowance from the wrong side with a stitch with a tack, retreating 1 mm from the fold of the fabric.

Iron the seam on both sides of the product.


And again we got a closed seam with two lines on the wrong side

and from one to the front.

Third way
This method is similar in principle to the previous method, and its implementation also requires allowances of 1.5 cm.

We will put the part on which the allowances will be ironed aside for now, and for the second part we will bend the allowance on the front side by 7mm

and sweep it away.

Now we will fold the parts along the connection line with the front side inward and sweep the parts along the stitching line, while the allowance of the first part will be larger, since we did not bend this allowance.

We sew the parts together with a tack stitch and iron the seam on both sides.


The next step is to trim the seam allowance of the first piece by 1cm, leaving 5mm from the seam.

Let's lay out our parts on the surface on opposite sides of the seam

and iron the allowance on the first piece, from which we cut 1cm.

Iron the seam from the front side

and on the wrong side of the product we sew the seam allowance with a stitch with a tack, departing from the fold of the seam allowance 1mm.

Iron the seams on both sides.


And here we have such a sewing seam, on the wrong side we see two lines,

and from the front - only one.

Sewing seam in denim products
I have already mentioned that a backstitch is used in denim products, but this seam differs from those presented above in that on the front side of the product two lines are laid with a thread of a contrasting color, which are both decorative and connecting. The factory sewing seam in denim products has two chain stitches on the reverse side; such a seam is performed on machines with three needles in just one operation.

Without special equipment, we will not be able to perform such a sewing seam, however, it is quite possible to make a seam similar to a factory one.
Using the example of two small denim parts, I will show how to make a backstitch, which on the front side will look like a factory one, and on the back side - instead of chain stitches, we will have regular ones.
So, to make a seam, the allowances of our parts should be 1.5 cm.
Many types of knitwear do not fray, so processing of sections of the product is not required. It is enough to grind the parts. There are five ways to make “knitted” seams using a sewing machine.
Straight stitch

It is only suitable for knitted fabrics with little stretch, as it does not have elasticity. When sewing parts, the fabric should be slightly pulled towards itself. Then it will return to its original shape, and the stitching will be strong. After stitching the parts, iron the seam. You can use a multifunctional ironing pad.
Zigzag stitch

Suitable for all types of knitwear. The zigzag stitch does not tighten the fabric while sewing. On the machine, set the minimum values for the length and width of the stitch, the line should be narrow. Do not stretch the fabric while sewing parts. After stitching, press the seam allowances.
Double stitch

The parts are stitched with two straight or zigzag stitches, which are performed in parallel, at a distance of 3 mm from each other. First, lay one line with an allowance of 1.5 cm. Then step back approximately 3 mm towards the cut and sew a second line. Trim off the excess allowance close to the line. Sewing scissors are available.
Double needle stitch

This seam is suitable for any type. The sewing function is found in almost all modern sewing machines. Follow the instructions for working with. Thread the left needle first, then the right. Stitch the parts at a slow speed.

The stitching retains its elasticity thanks to a zigzag stitch formed by a shuttle thread on the reverse side of the seam.
Stretch stitch

This narrow stitch is specifically designed for sewing knitted fabrics together on a sewing machine and allowing the seams to be pressed completely flat.
If there is still a need to process open cuts, use a stitch that imitates an overlock stitch.

The result is a strong seam and a finished edge, like on.

For convenience, overlock stitching is performed using a foot for finishing the edge. The seam width is approximately 5 mm. Do not pull on the fabric while sewing.
Photo: Yulia Dekanova
Material prepared by Yulia Dekanova
How to sew knitwear? Comfortable and beautiful, this material is suitable for a wide variety of clothing, both for adults and children. A large selection of knitwear will allow you to choose the fabric of the right quality and the right price. If you have an overlocker and a cover stitching machine, you can sew knitwear professionally and quickly.
How to sew knitwear on a regular sewing machine? We will tell you what techniques and tricks will help you solve this issue. We will help you choose the right fabric, talk about the nuances of pattern making and cutting, as well as caring for knitwear.
Types of knitwear
The main difference between knitted fabric is elasticity, the ability to stretch in length and/or width. Knitted fabric is “knitted” with loops: front and back. On the front side of the fabric, the loops are located in vertical rows of “braids”, and on the wrong side you will see horizontal rows. There is also a double knit, this is a dense fabric in which vertical “face” rows are on both sides of the material.
Knitwear is made from natural, synthetic, and mixed fibers. Cotton knitwear is easier both to sew and to care for. This is a fairly durable material at an affordable price. Knitwear made from silk, wool, viscose or linen requires more attention at all stages of processing.
In general, knitwear made from natural fibers is more comfortable to wear than synthetic ones: it is breathable and does not electrify. Blended-fiber knitwear retains the comfort of natural fabric, but it wrinkles less and is more durable. However, such fabric is susceptible to the formation of “pellets”.

Let's say a few words about the most popular types of knitwear.
Jersey– universal fabric of different densities. This is a single knit fabric for shirts and dresses, and is also used for sewing underwear. The jersey barely stretches in length.
Sweatshirt– cotton jersey with a pile, which is located on the wrong side. This is a simple cut sportswear fabric.

"Rubber" (or "noodle")- thick knitwear with pronounced “pigtails” on both sides. The “elastic” stretches well and is used for hemming sections of armholes and necklines, as well as cuffs. In addition, dresses, turtlenecks and pullovers of adjacent silhouettes are sewn from elastic.
Interlock also has facial rows on both sides. This is a lightweight fabric that does not stretch much in width. Interlock is used for sewing T-shirts and blouses, sportswear, sleepwear, and underwear.
Stretch knitwear Made from highly elastic spandex, it stretches in all directions. May also contain cotton, nylon and polyester fibers. Ideal for tight-fitting models: swimsuits, leggings, etc.
Extensibility coefficient
Different types of knitwear stretch differently. This must be taken into account when creating a pattern. If you chose a pattern from a magazine, the description should indicate the desired percentage of elasticity (stretchability) of the fabric. The easiest way is to buy the same fabric, otherwise you will need to find out this value for a new fabric when purchasing. This information may be included on the price tag, but be prepared to calculate the stretch factor yourself.To do this, measure a piece of 10 cm on the fabric, departing approximately 7 cm from the cut of the fabric. Take the piece on both sides, stretch it and attach it to a ruler or centimeter. Note the resulting size.

If the fabric stretches to 15 cm or more, it is a high stretch knit (from 50%) If the fabric stretches to 13 cm, it is a medium stretch knit (30%) If the fabric stretches to 12 cm or less, it is a low stretch knit (up to 12%)
Creating a pattern for knitwear
The values of the stretch coefficient can be ignored if you are going to sew a voluminous model with a loose silhouette. When sewing tight-fitting models, the higher the percentage of elasticity, the narrower the pattern should be.For example, if the elasticity of knitwear is 30%, then the measurements for the chest, waist and hips should be reduced by this percentage.
However, for a better fit at hip level, we recommend reducing hip circumference measurements by only half the factor, or not reducing them at all. Then the skirt or dress will not ride up when moving. In addition, in models with a tight-fitting silhouette, keep in mind that when the fabric is stretched in width, it shortens somewhat in length.
The percentage of elasticity should also be taken into account when modeling the neckline and armholes. For fabrics with an elasticity of 50% or more, draw these cuts shallower. After the first fitting, you will be able to adjust the contours of the cutouts more accurately. Tight-fitting models made from high-elasticity knitwear do not require darts or increases for a loose fit.
Preparing fabric for cutting.
If your knitwear contains natural fibers, it is necessary to decatify it. Soak it in warm water and then gently dry it flat. It is better to wash cotton knitwear two or three times, as it can shrink multiple times.Uncover
If your knitwear slips on a smooth surface, lay it out on a thin blanket or other soft fabric. Cut out the details in one layer. The direction of the grain corresponds to the vertical rows of loops on the front side of the knitwear. Place pieces in the same direction, as knitted weaves can produce color variations depending on the viewing angle.Make sure that the fabric does not hang from the working surface, otherwise the direction of the grain may shift.
Needles and threads
One of the main components of success is the correct choice of needles for sewing knitwear. There are two types of needles that are used to sew different types of knitwear.- Needles "Jersey" Suitable for working with bulky, tightly knitted fabrics.
- Needles "Stretch" designed for thin elastic fabric: the tip of such a needle has a rounded shape and does not tear the fibers of knitwear. Choose high-quality threads with a smooth surface, polyester or nylon. Be sure to try different needles and threads on scrap fabric to find the optimal needle size, stitch length, etc.
Try different stitch options on scraps of fabric and choose the most accurate option. Study the instructions for your sewing machine; perhaps the range of stitches offered includes special “elastic” stitches.
Try sewing parts with a narrow zigzag seam, with a small stitch width (up to 1 mm). If your sewing machine is skipping stitches, try placing thin paper (tissue paper, newspaper, wrapping paper, paper towel) under the fabric. After finishing the stitching, the paper should be removed.
Use a little tension when sewing knits with a slight stretch. Check the seam for elasticity. Pull the sample firmly and determine where the break is: on the lower or upper thread.
It is necessary to adjust the tension of the threads so that there is no break or both the upper and lower threads break in the same place. Knitwear with a high degree of elasticity is the most difficult to sew. If you can’t adjust the stitching, try using a brush to starch the stitching area, let it dry and stitch. You can also use special water-soluble reinforcing materials.
Nuances of seam processing
Some types of seams must be made with stabilization to avoid stretching: for example, shoulder seams. For this purpose, you can use a strip of adhesive interlining material or knitted tape inserted into the seam. It is also necessary to strengthen the sections of knitwear before sewing in a zipper (for example, in sportswear). Processing the bottom of the product and sleeves is an important stage in sewing clothes from knitwear. For professional processing of these parts, a cover stitching machine is used.Using a regular sewing machine, try several processing options. It is most similar to a cover stitching machine - stitching with a double needle. You can also zigzag the cut, turn it to the wrong side and hem it by hand. To keep the seam elastic, do not pull the thread too tight. You can also trim the bottom with an edging made of finishing fabric or a strip of the main material folded in half.
Knitwear care
The composition of the fabric determines the temperature of the iron! Iron cotton or linen knitwear at high temperature, woolen or viscose knitwear at moderate temperature, synthetic knitwear at low temperature. Be sure to try it on a scrap piece of fabric!To prevent the fabric from stretching, iron in the direction of the front “braids” along the grain. Iron the fabric from the wrong side, first smoothing the fabric with your hand.
Washing knitwear also depends on the composition of the fabric. Wash knitwear made from mixed or synthetic fibers on a delicate cycle or by hand. Choose special detergents for washing. Wash cotton jersey at a temperature of 40-60 degrees. Items made from expensive wool or silk knitwear can be dry cleaned or hand washed with delicate detergents. Gently wring out the fabric (without twisting) and lay it on a towel to dry.
To remove pellets, use a special machine that will carefully cut them off the surface of the fabric. Store knitted clothes folded in a closet; the fabric may stretch on a hanger.