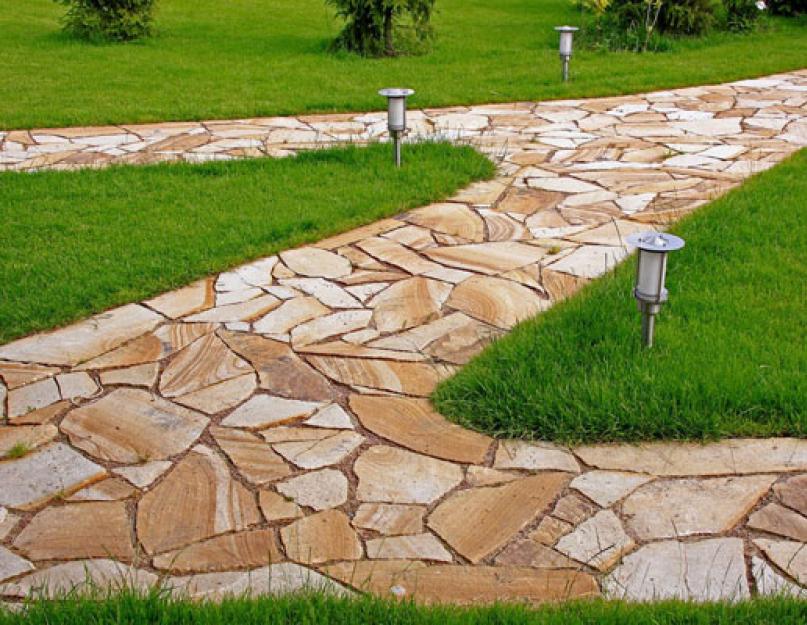
Natural stone for paving paths will help to decorate the local area, add a resemblance to nature to the site. Beautifully laid paths of an interesting shape will add a special charm not only to the landscape, but also to the house, which will look like an old castle.
It is quite possible to make such beauty with my own hands. The main thing is to familiarize yourself with the technology of the process in advance and prepare everything you need (Fig. 1 Path made of natural stone).
- high strength;
- ease of processing;
- environmental friendliness;
- low cost.
- limestone;
- shell rock;
- shungite;
- slate;
- granite.
- construction roulette;
- container for mixing mixtures;
- Bulgarian;
- building level;
- rubber mallet;
- shovel;
- Master OK;
- brush with hard bristles.
- wooden pegs;
- kapron cord;
- gravel;
- sand;
- cement;
- wooden board;
- chalk for marking;
- rag.
- Master OK;
- Bulgarian;
- roulette;
- shovel;
- cord;
- pegs;
- cement;
- tamper;
- building level;
- watering hose;
- formwork boards;
- metal brush;
- water;
- gravel;
- sand.
- the composition includes sand;
- the composition includes gravel;
- the composition includes a layer of concrete, usually reinforced.
- Territory marking: for a footpath, the area must be at least 80 sq. cm, for the main entrance - 3 m.
- Digging a trench 20-30 cm deep, compacting the soil.
- Laying curb blocks along the walls of the trench or laying formwork from boards fastened together with self-tapping screws, coating them with a primer.
- Geotextile laying.
- Backfilling in the trench of a pillow consisting of the same layer of sand and gravel, its thickness should be 30 cm.
- Watering, tamping.
- Laying flagstone, the gap between the individual slabs is minimal;
- Careful filling of seams with sand, to which small crushed stone can be added. With frequent use, a layer of sparse concrete 2-3 cm thick is additionally laid on the stones.
- Insulation of every 70-80 cm of the surface with expansion joints.
- Formwork installation.
- Laying a gravel pad on the ground, placing a reinforcing mesh.
- Pouring a concrete solution with a thickness of 20-30 cm, there should be no differences.
- After the base has dried, the stone is laid on a special glue, the drawing is laid out in advance.
- For some, our stone flagstone will be the answer to the highest requirements;
- Others will opt for tiles tumbled in a special drum with an amazing texture and streamlined corners;
- Others will be attracted by their unique palette of paving stones or exclusive paving slabs made of stone ...
- Professional paving with natural stone deservedly belongs to the category of elite landscaping.
- Nature itself endowed it with an elegant decor, which is impossible to repeat man-made.
- For a long time, it is ready to serve, retaining its original shape and external characteristics.
- It fits perfectly into any landscape concept, has a high resistance to the most negative climatic influences.
- Manual processing of a stone only improves the material bestowed by nature, gives it all the data of an unshakable favorite!
- Garden paths made of round stones and pebbles are best done immediately on a concrete screed, since they have a smaller pressure area and sag more under load.
- It is necessary to open with impregnation and varnish at a temperature of +10 and above, in addition, all this must be done 4-5 hours before precipitation, and preferably 1 day in advance, choose good weather.
- Natural stone for paths in the country can be obtained for free, for example, on a pebble beach. You can also save money when buying used sandstone, because whatever you want will go to the floor.
- Use only a rubber hammer, a metal tool will immediately break the tile during shrinkage.
- It is better to make paths on a small hill, because in the hole they will be washed away during heavy rains and will give a drawdown, they will have to be redone.
Show all
How to choose a stone
Garden paths made of stone can be laid out with flagstone. Sandstone is recognized as its most popular type of paving. There are many varieties of natural sandstone. This stone has a wide range of colors from light gray to reddish. Therefore, from it you can create an interesting ornament on the track, lay out a curly composition.
The main advantages of sandstone are:
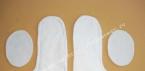
Flagstone is sold in small tiles of irregular shape. Their thickness is from 10 to 30 mm. The technology of working with flagstone is simple. The tools needed are the simplest.
In addition to flagstone, another wild stone is also used for garden paths:

Required Tools
For paving paths in the garden, you need to prepare the following tools:
Additionally you will need:

Plot marking
To make a natural stone path comfortable and neat, you must first mark its location on the local area with a cord stretched between wooden pegs. The width of an ordinary garden path is 0.8 m. If desired, you can make it a little wider. The path is laid with a slope of 3 ° to ensure the flow of water during rainfall and during irrigation.
The designated area must be cleared and leveled. To make the path with a smooth edge, make a formwork from a wooden board. Reinforcement will give the screed additional strength. Concrete is poured over the gravel pad. The required concrete thickness is from 15 to 20 cm.

It is better to purchase the solution in the form of a dry mixture and dilute it yourself with water according to the attached instructions. Concrete should be poured in dry weather on dried soil. During the summer at high temperature concrete should be moistened with running water 3-4 times a day. Otherwise, it will dry out and crack. While the concrete dries, you can begin to prepare the stone.
Material preparation
The prepared paving stone should be washed under running water, removed adhering dirt and small debris with a stiff brush or thick cloth and dried. The required thickness of light flagstone for laying on a concrete base is 4 cm. The sufficient thickness of gray flagstone is 2-3 cm.

First you need to choose the central stone around which the whole composition will be formed. It should be the largest and thickest of all available samples. Smaller stones are laid around it, trying to match them in shape so that the elements fit snugly together. On the surface of each stone, the necessary marks are made with chalk so as not to be mistaken during the final laying.
If desired, a stone pattern can be laid out on the path like a mosaic. For this, samples of different colors are used. The drawing must be thought out in advance and drawn in full size. It is convenient to do this on plastic wrap, a strip of paper wallpaper, etc. Stones are laid on top of the prepared scheme, which must be marked with chalk.
To give the individual stone elements the desired shape, you can use a grinder. The cutting wheel must be selected specifically designed for working with stone. It will be marked "stone".
Adhesive laying
Laying stone on the tracks is made on a special glue. With it, you can not only fix individual elements on the track, but also slightly lift thin tiles to make the track smooth.
Glue is sold at a high price. To save money, you can prepare a cement-sand mixture and add it to the glue. Sand must first be sieved to remove debris and small pebbles. When mixing glue, it should be 2 times less than a mixture of sand and cement.
It is necessary to knead the glue immediately before laying the stone. In density, it should resemble liquid sour cream. There should be no lumps.

The selected stones must be smeared with glue on the reverse side using a brush with a hard bristle. Then they need to dry a little.
While the stone dries, the concrete base of the path must be thoroughly cleaned of dust and debris in a dry way. You can use a broom, hard rags (if the path is small) or a vacuum cleaner.
A mixture of glue, cement and sand is applied to the concrete surface using a trowel. The mixture must be applied in excess so that subsequently there are no voids into which moisture and small debris will fall. This will lead to the destruction of the structure.

First, the central stone element is laid. It must be properly pressed to the surface (you can use your feet). This will help spread the glue under the stone evenly and remove any excess. Excess glue can be collected with a trowel and added to the main glue mixture.
Once the center stone is in place, smaller elements can be placed around it. You can lay the stones end-to-end, pressing down the adjacent side first. Then press down the stone from the opposite edge. You can lay an adjacent stone at a distance and gradually move it close to the laid element. Excess glue, which in this case will be on the surface of the stone, must be immediately removed with a trowel. Then wipe the stone with a rag. Dried glue can be difficult to remove. In this case, there is a risk of damage to the surface of the stone. It will ruin appearance tracks.
In the indicated order, you need to gradually lay down all the desired elements. The finished natural stone path must dry out so that the adhesive solution grabs.
How to lay on the sand
Large natural limestone is used for laying on sand. The required stone thickness is from 5 to 8 cm. After preliminary marking of the site, a bed for the garden path is arranged on it. Its required depth is 5 cm more than the thickness of the flagstone elements. The bed is covered with a sand pillow. Its thickness is 5 cm.
The sand must be leveled, moistened with plenty of water and compacted. Stone elements are laid end-to-end on sand, leaving seams no more than 20 mm wide. After laying the stone in the seams, sand is poured to the top and water is poured.
It is desirable to use this method in regions with a warm climate, in frosty times water lenses form on such a path, the surface becomes uneven.
On clay heaving soil, it is impossible to lay tracks in this way.
Gravel use
On heaving soil, the method of laying on a gravel cushion is used. The bed for such a path must be deepened by at least 20 cm. The maximum depth of the bed is 30 cm. The required stone thickness depends on the color of the flagstone. Light flagstone from white to orange color a thickness of 4 to 5 cm is required. Gray limestone can be thinner - 3 cm.

The prepared bed must be covered with a sand cushion. Gravel is poured over the sand (crushed stone is possible). Both pillows require an equal amount of material. It is better to measure sand and gravel in advance. Pillows need to be leveled and tamped dry. Then moisten with plenty of water and tamp again.
A mortar is applied over the gravel (layer thickness - 3 cm). It is laid on it natural stone. You can smooth the surface with a wooden mallet. The path must be paved from the end edge, gradually moving along the length of the path. The seams between the stones are subsequently filled with mortar and leveled.
Every 0.6-0.7 m it is necessary to equip transverse expansion joints with a width of 10 to 50 mm. When the mortar hardens, sand or fine gravel screenings are poured into small transverse seams. Soil is laid in wide seams and lawn grass is sown. This will brighten up the path.

After about a day, you need to abundantly moisten the path with running water from a hose and carefully clean it with a brush with a hard bristle. To preserve the effect of wet stone, the tracks are covered with polyurethane varnish. To protect light limestone from dirt, a special impregnation is applied to it.
Design options
Making garden paths from natural stone with your own hands, you can show your imagination when creating an ornament or pattern from natural stone and arranging the path. In addition, self-laying stone will save a lot of money.
The decoration of the track depends on its main purpose. If you need to carry a cart along the path, carry loads, etc., it is better to refuse exquisite design.
A decorative path leading from the entrance gate to the porch of the house or from the house to a place of rest in the garden, playground, pool can be decorated with a decorative border, raised above ground level, planted along it with lawn grass or small flowering plants.
The original design of decorative paths will be a geogrid. In this case, the composition of natural stone is complemented by lawn grass planted between the individual elements.
The main advantage of the material is its environmental friendliness and safety, which is very important in the current environmental situation, where a person is surrounded by dirty air and water, harmful radiation and products.
Natural stone, unlike artificial analogues, does not emit chemicals during temperature changes.
The material is characterized by high strength and wear resistance, is not subject to deformation under the influence of humidity and other climatic changes.
Another advantage of natural stone is its aesthetic appearance, the material is widely used in finishing work, recently laying natural stone on paths is widespread.
The range of shades and textures offered by nature itself can satisfy the most demanding client.
The only drawback of natural stone is the high cost, which is offset by a large number of advantages.
Flagstone is considered the most suitable material for paving paths, as it is durable, versatile, easy to install and operate. The technology is not complicated, laying natural stone on the paths does not require the use of complex equipment or materials.
how to make garden lilies plastic bottles read step by step.
Also find out what shrubs to choose for her.
Necessary materials and tools
For the construction of paths, you will need the usual set of tools that any owner of a country house has at his disposal.
Necessary tools and materials:
Paving methods
Depending on the purpose of the tracks and the device, their bases exist different ways laying natural stone.
When choosing a method, the level of groundwater and the type of soil are taken into account.
Ways of paving paths with flagstone, depending on the composition of the base:
For the construction of a conventional garden path, the first method is suitable, since the loads in this case are minimal. The thickness of flagstone should be 5-8 cm, the size of the stone should be as large as possible.
When paving a path intended for intensive use, as well as when laying stone on clayey and heaving soils, the second method is recommended, the device of which involves the use of a gravel pad. The thickness of the stone in this case should be 4-6 cm, the size of the stone is medium and large.
The third method is chosen when arranging a driveway, parking area or laying out blind areas around the house, the thickness of the stone is 2-3 cm.
All methods of laying natural limestone stone require its preliminary preparation: the material is thoroughly washed, dried, sorted by size and thickness, so that during installation it would be more convenient to select individual elements according to the pattern. Strongly protruding parts of the stone are cut off by a grinder.
Pavement paving with sand
Step-by-step instruction:

Some site owners, on the contrary, leave large seams and sow the space with seeds. It must be borne in mind that this method of paving is rather unreliable and for the next season such paths may lose their original appearance.
Pavement paving with gravel
Step-by-step instruction:

The method of laying the track on gravel is used when the track is used intensively.
Laying stone on concrete

A stone path laid out on concrete has increased strength
This method is considered universal, suitable for paving a variety of paths:
Laying natural stone with your own hands in all three ways requires maintaining a surface angle of 3 degrees, which will ensure that water drains from the surface.
For planting and caring for forsythia, readThe company offers natural stone for paving, both in its raw form - flagstone, and in the form of tiles and paving stones made of stone. The range of natural colors is simply limitless. If the price of natural stone for paths is a priority for you, the numbers in the catalog will surprise you with their affordability. We, as a manufacturer, can afford a favorable price policy for you.
Buy natural stone for paving from the manufacturer
Pankamen offers customers to buy natural stone for paving - a spectacular Premium class material. These are tiles made of practical and beautiful rocks: slate, sandstone, lemesite, zlatalite.
The indisputable advantages of paving with natural stone
Help in making the right choice
For paving paths, natural stone is best suited - flagstone and products made from it. This stone is distinguished by the durability and practicality of stone slabs, decorative properties. When creating a blind area around the house, flagstone 2-3 cm thick is used, since there is no load and the laying is done on a concrete base. Material 3-4 cm is ideal for pedestrian areas, and can serve for a long time without loss of quality. When paving sites experiencing traffic loads: roads, parking lots, parking lots - it would be better to stop the choice on a stone 4-5 cm and higher.
The overall visualization and prestige depend on how thoughtfully the paths and grounds near the buildings (houses) are located, what coating they are ennobled with. Paving with natural stone is considered exclusive - neither concrete, nor a neat lawn or wooden flooring can be compared with it. Only this high-quality material is characterized by durability, coupled with an amazing variety of patterns and shades! The versatility of the properties and decorativeness of natural stone (including flagstone) will not leave you indifferent. It remains only to find your material for paving ...
Only those who already have garden paths made of stone rejoice in the warm, quiet rain. Others gloomily set off to knead the dirt with galoshes and glide smoothly over the unstable surface, gradually overcoming meter by meter of their yard. Agree, it is not very comfortable to be dependent on weather conditions, to expose your clothes to pollution, and yourself to bruises. This needs to be radically changed.
In the article we will tell you how to do the paving of paths with natural stone with your own hands, so as not to spend a lot of money on hiring workers. Of course, you won’t be able to do this for free, you still have to buy materials (from 150 rubles per 1 m 2 approximately), but everything else, including borders, can be done with your own hands and not overpay 100-200 rubles for laying 1 meter.
Preparing the foundation for stone garden paths
Most building work starts with a foundation. In our case, work below ground level will also be needed, especially if it will then be necessary to drive equipment along the path (vacuum trucks, garbage trucks, trailers, etc.). If you still only walk - just make a backfill before laying natural stone on the paths. Let's consider step by step.
STEP 1: make a groove. Draw the shape of the required path on the ground, dig 1 bayonet with a bayonet shovel, tree roots can be cut along the edges. Then we remove the earth with a shovel so that the sole of the pit is solid.
STEP 2: put up borders. Do not skip this step, they must be placed in front of the mound of building material, as it will hold the curb in place and prevent it from tilting to the side. 
STEP 3: crushed stone. You can use cinder blocks, wild stones, large construction slag, etc., the main thing here is to place heavy materials that will put pressure on the soil and have minimal shrinkage. The layer is no more than 10 centimeters or 50% of the height, approximately as in the photo of stone garden paths. Then it is desirable to walk with a rammer. 
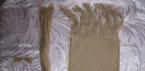
STEP 4: sanding and rammer. Everything is simple here. It is necessary to pour 5 centimeters of sand and tamp everything manually or with the help of a special machine that can be rented for 1 day. Now everything is ready, you can paving with natural stone. We also recommend that you fill the sand with water and wait until it dries. This will allow additional shrinkage of the material if you did not use a rammer. 
Borders can be bought ready-made, but making them yourself is also easy. You need to take a container 70-80 cm long, 25 cm wide and 4-5 cm thick. You can buy it on the market or weld it with a welding machine, make a couple of small holes 3-4 mm in diameter at the bottom.
We lubricate with technical oil (working out), pour concrete, after 1 day we lay it out carefully from the mold and make the next border. So little by little you can make borders for garden paths with your own hands in 2 weeks, and they will be no worse than purchased ones.
 Photo of a sandstone path
  Photo of the track without grouting
  Do-it-yourself sandstone paths!
  Photo of a typical sandstone walkway
Do-it-yourself natural stone walkway: we disassemble step by step
The first step is to choose the material from which you will make the track. Of course, there are many options: wild stone and granite, marble tiles, artificial ceramic tiles, imitation of natural stone, pebbles, round rubble and more. But we still recommend making garden paths from artificial stone with sandstone. This inexpensive material has a good decorative appearance, is easy to fit and lasts a long time. Consider step by step how to lay it on a prepared sand cushion.
STEP 1: assemble the drawing. Working with sandstone is complicated by the fact that it is necessary to find pieces of material that are suitable in shape in order to make the drawing as beautiful as possible with small seams. You can lay out pieces of sandstone on the ground beforehand and try to lay down the desired pattern.

STEP 2: install. It would be better to use sandstone with a thickness of 1.5-2 centimeters, since when laying thin material, cracks can appear even with minimal subsidence. After you put a piece of sandstone on the pillow, you need to lightly tap it with a rubber mallet. 
STEP 3: sealing the seams. After the tiles are all laid, you can take a black grout (it is better to use a waterproof elastic one) and seal everything, after hardening it will resemble a tight seam from a sealant, it will give a better look to the tile. 
IMPORTANT: if you make garden paths from natural stone with your own hands, be careful when choosing a grout. They are for internal works, for external works, are used in the room and outside. Take only for external use and frost-resistant grout.
STEP 4: varnishing. Please note that natural stone paths will look much better if they are opened with impregnation and varnish, but there is a very big drawback - they become slippery after rain and in winter. The surface roughness is lost after varnishing. We recommend that you use only impregnations or be careful when moving in adverse weather (walking on a dry surface is normal). Opening varnish in 3 layers of sandstone will look something like this: 
Now we can already assume that the garden path made of stones with our own hands is already ready and can be used a couple of days after paint and varnish coatings. If you intend to use heavy vehicles on the tracks, then the sand layer in the cushion must be replaced with concrete, everything else remains unchanged. Here are some photos of sandstone garden paths:
Making garden paths is a very simple process, but we will not hide the fact that there are still some nuances and they must be taken into account in the manufacture so as not to redo the work and the result met everyone's expectations.
Our step-by-step path is made of natural stone, this process takes about 5-6 linear meters per day, if you work at your usual pace and carefully select the pattern. We also suggest watching a video of sandstone grouting with a special grout (can be made based on soot), it is not so durable, but it is much easier to make it and you can then “correct” it: