The simplest and effective ways join new thread when knitting - an invisible connection without knots.
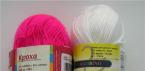
Method one - tie in the ends. We overlap the thread from the product and from the ball and knit 3-4 loops with double thread, then continue to knit with one thread, this time from the new ball. On the English-speaking Internet this method is called Overlap join(Attachment by overlap). You can see photos of what this method looks like in the finished product. And for those who prefer video - the Knit-in Join video.
This is the simplest and quick way, but due to the fact that the ends of the yarn remain outside, it is not very suitable for double-sided products (scarves, stoles).
 Method two - Felted Join. Unwind a few centimeters of the ending thread and the new one, tear it off (namely tear it off, not cut it off), and then roll them together, making one whole thread out of them. It’s similar to how in felting you get something homogeneous from scraps of yarn, which is how it got its name. Watch the video master class at the link.
 It is better to introduce a new thread into knitting at the beginning of the row, this will make it easier to tuck the ends of the threads into the seam. For tricks on how to calculate whether there is enough thread from the ending ball to complete a row, read on the website
When knitting many amigurumi toys it is necessary to change the color of the thread and when usually tying a new thread, the knitting does not look very beautiful; on the new row in the new color half-loops of the “old” color are visible. IN this master class Shown are 2 ways to change colors when knitting toys to make the transition look clean and neat. The first method demonstrates changing the thread when knitting in a spiral, and the second - when knitting in closed rows.
Method 1: spiral knitting
We knit to the place where you need to change the color. Now insert the hook into the loop of the next stitch, grab the thread of the old color and pull it out. You have two loops of the old color on your hook.
Now we grab the new thread with the hook and pull it through the loops on the hook.

Insert the hook into the next loop, grab the thread, pull it out and pull it through the loop on the hook (it turns out to be a half-column).


Method 2: knitting in closed circular rows
Having completed a row in the old color, do not close it with a connecting loop.
Remove the loop from the hook and insert the empty hook into the loop in which you would end the row.

Now take the loop you removed from the hook and place it on the hook from front to back.

Now put a thread of a new color on the hook and pull it out. Do air loop rise and then knit the row as usual.

For greater clarity, you can look
Very rarely, one ball of yarn is enough to crochet a product. Therefore, the question of how to quietly connect two threads when knitting is very relevant. I tried different variants. When I first started (I didn’t have the Internet then), I even tried to simply tie it into a knot, similar to those used to tie threads when sewing. Of course, all these knots looked ugly, it was hard to hide them, in general, it was a hassle.
A lot of time has passed since then, and I use a different method. Everything turns out beautifully, neatly and unnoticeably on both sides of the canvas, which is very important if the pattern is double-sided. The main stitches in crochet are single crochet and double crochet. The connection of threads will occur according to the same principle. I’ll show you using a double crochet as an example.
Yarn over as usual and draw the working thread through. We have two loops on the hook. The tail of the working thread (which has ended) can be held with the little finger of your right hand, but it will not run away anyway.
Now take a new working thread and pull it through 2 loops on the hook, i.e. we tie a double crochet.

The tail of the new working thread should also be left. We got 2 tails at one point.

Now there are 2 options. If the thread is very slippery, you can tie a knot from the tails. If it's fluffy, then it's not necessary.


Knitting each next column, we tie these two remaining threads.
This is what it looks like from the back.

This move secures the threads and the knitting will no longer unravel, although if you are worried, then tie a knot.

On both sides it turns out clean, even and beautiful.

Every knitting lover periodically faces a problem called “The thread has run out.” And then another problem arises: how to connect the threads so that it is neat and with front side, and with the wrong side. Craftswomen are also looking for ways to join threads when they need to switch from one color to another.
We bring to your attention two interesting ways that will help you cope with the above problems.
WAY 1. How to connect threads when knitting with a strong mini-knot
It is also called an industrial hub. The knot turns out to be very small, one might say miniature, and perfectly connects any yarn.
This method can be used for both knitting and crocheting. The connection of the threads is practically invisible and there are no ends of the threads left, which then need to be threaded.
For clarity, here is another video tutorial: how to tie a weaving knot in as many as 3 ways.
METHOD 2. How to connect threads when knitting securely, quickly and without a knot
This method is perfect for regular yarn and simple, tight knits.
Winding yarn into a ball.
Before knitting, it is best to prepare the yarn by winding it from a skein into a ball - this will make feeding the thread more convenient and faster when knitting.
1. To do this, carefully straighten the skein and ask an assistant to put both ends of the skein on your hands, or you can put it on the back of a chair instead of an assistant. Find the end of the thread and wrap it around your fingers as shown in the picture, then tie it in the middle with the free end of the thread, forming a “butterfly”. Fold the two “wings” together and place them in your left hand.
2. We begin to wrap the thread around the “butterfly” and thumb(see picture), this way we will have a small free hole inside the ball. We continue to wind the thread further until the skein runs out. Remember to turn the ball frequently so that the thread is wound evenly throughout the ball. When you start knitting from the ball, remove the butterfly from the center and use the free end of the butterfly thread to knit. Pulling the thread from the center of the ball will prevent the ball from rolling from side to side.
Square knot.
When we need to connect the ends of the threads when knitting so that the knot remains on the wrong side, we can use this type of knot. For clarity, shown in two colors.
Encircling knot.
Used when joining yarn of different thicknesses in knitting.
1. Make a loop of thick thread and press with your finger. Insert a thin thread into the loop and wrap it around the loop.
2. Now take the end of the thin thread that was wrapped around the loop, pass it under the thick thread and over the other end of the thin thread.
3. Hold the ends of the thick thread in one hand and the ends of the thin thread in the other, gently pull the ends, tightening the knot
Attaching a new thread to work.
Attaching a thread from a new ball.
1. Always join a new thread to the work at the beginning of the row. Tie the ends of the knitting threads and the new ball into a knot.
2. Pull the knot so that it is close to the 1st loop. Subsequently, this knot will be hidden under the seam with which the product will be sewn together. If you are knitting a product without seams, for example, such as a blanket or scarf, then tie the knot loosely, so that you can then untie it and quietly weave the ends of the threads into the edge of the product.
Attaching a thread of a different color.
1. Wrap around right knitting needle the ends of the yarn from knitting and from the new ball, folding them together. Knit the 1st stitch of the row with a double thread (of two colors). Now simply lower the thread with the previous color and continue knitting the next row with the thread with the new color.
2. When you finish knitting the part, you need to weave a thread with the 2nd (attached) color from the 1st color and thread the free ends of the thread using a tapestry needle into the edge of the product.
Winding up the long end of the thread left at the beginning of knitting.
The long end of the thread, left at the beginning of knitting, can get tangled and interfere with the process. To keep it out of the way, you can wind it in the form of a “butterfly” (see picture) close to the knitting.
1. Trying to stay close to knitting heaven, wind long end threads on the thumb and index fingers, as shown in the figure, in the shape of a figure eight.
2. Remove the butterfly thread from the large and index finger, and wrap the tip of the thread around the middle several times. Thread the ponytail through the knot.
Securing the end of the thread into the knitted edge.
If you have just finished knitting, you will need to tuck in the ends of all the threads so that the reverse looks neat. We thread each end of the thread into a tapestry needle with a large eye and fasten them vertically or horizontally - depending on the direction of the loops on the wrong side of the work, pulling them through the loops, as shown in the figure.