Many teachers and educators stubbornly talk about the benefits of educational toys. In fact, such entertainment is aimed at developing a certain skill or skill in the child: fine motor skills, knowledge of colors, sizes, numbers, and so on. For each age, toys are selected individually, because what is interesting to a one-year-old child is unlikely to attract the attention of a five-year-old.
0-12 months
At this age, the baby is only aware of his abilities, so it is important to develop coordination, the ability to concentrate, and the grasping reflex. Toys should be bright, textured and light: beads, rattles, mobiles, rings, rag balls, educational rugs - what is needed for a child up to 6 months old. For older children, you can find musical toys, sorters, nesting dolls and so on. From the age of 9 months, you can offer glove and finger puppets, strollers, soft books, insert toys, cubes and so on - they are aimed at developing motor, speech activity, as well as fine motor skills.
1-2 years
Now you can give your child toys that can be disassembled and assembled, by the age of one and a half, offer the child objects that can be generalized according to one criterion: color, size, and so on. By the age of two, you can play object games - construction, story games, use various cards, pyramids, sorters, books, and so on.
2-3 years
It's time to develop not only fine motor skills, but also the ability to distinguish the world around. Developing toys for this age include crafts made of paper, natural materials, plasticine, plot and object games to test knowledge and skills, homemade cards that simulate situations.
3-5 years
All possible games for the study of numbers, the alphabet, seasons, clocks, board games for children, puzzles, constructors, bingo, books, educational boards and so on.
What materials can I use?
.jpg)
Dear needlewomen, do-it-yourself toys can be made from various materials: scraps of fabric, yarn, old clothes.
Using a variety of accessories (Velcro, large buttons, zippers, buttons, buckles, stripes and so on - the main thing is that the child cannot tear them off and put them in his mouth), wrappers from sweets, cereals, pasta, bells, foil, fillers like foam rubber or padding polyester and other things.
DIY developing cube: master class
.jpg)
To make such a cube, you will need: 6 equal squares of fabric of different colors, synthetic winterizer or foam rubber for filling, non-woven linen, various accessories - buttons, ribbons, scraps of fabric, brooches and so on, threads, a sewing machine.
Cut 6 equal squares from the fabric.
.jpg)
From non-woven fabric, it is necessary to cut squares 1.5 cm smaller than fabric ones. We apply them to the fabric and heat them with an iron so that the non-woven fabric sticks to the base.
.jpg)
Each side of the future cube needs to be decorated: make an applique from patches, sew on beads, snakes, buttons, and so on. The easiest way is to draw the pattern with a fading marker and then lay it out on the fabric. For example, like this.
.jpg)
When the decorative part is finished, you need to sew 4 squares in one strip.
.jpg)
Then we sew two more squares.
.jpg)
All stitched seams must be fixed, sewn along the contour of the non-woven edges. We sew a sweep: two faces need to be joined, and the allowance of the third must be wrapped inward.
.jpg)
You need to leave a hole in the corner of the last face: turn out the finished product, fill it with padding polyester and sew it with a blind stitch. You can also put a bell or rustling paper inside the square. The product is ready!
.jpg)
We sew a developing pillow: master class
Educational toys are a rather voluminous concept; they can also include a pillow, but not usual for sleeping, but decorated with voluminous applications and details - an excellent tool for developing fine motor skills. The "Birdhouse" pillow will be interesting for children of all ages.
.jpg)
To create it, you need multi-colored scraps of fabric, non-woven or soft material like teak, synthetic winterizer, braid, narrow ribbon, thread, needle. Optionally, you can sew on beads and buttons.
From teak we cut out the pillow itself in the form of a house (2 parts), sew it along the edge, leaving a small hole for stuffing.
.jpg)
We sew a pillowcase of the same shape from a bright fabric.
.jpg)
From two rectangular patches folded in half, we make a roof for a birdhouse, decorate it with braid.
.jpg)
In the frame of the house we cut out a round hole, hem the edges and decorate with braid.
Now you can sew a bird (2 parts for the little body, 4 parts for the wings), and you can also make eggs (two oval parts, sewn together).
.jpg)
We use a synthetic winterizer as a filler, after which the hole in the body is sewn up. We attach a ribbon to them, we attach the other end of the ribbon inside the birdhouse.
.jpg)
From the outside we sew a pocket into which the "inhabitants" of the nest are placed.
.jpg)
The pillowcase can be sewn together or fastened with a zipper so the cover can be washed. We put a stuffed pillow into the pillowcase, you can decorate it with appliques and beads and start the game!
.jpg)
A few more options for developing pillows:
.jpg)
.jpg)
DIY lacing toys
The little ones still have very inept fingers, so it is very difficult for them to perform precise movements and coordinate their actions. Fine motor skills are not only the development of certain areas of the brain, but also the preparation of the hand for drawing and writing. Lacing games are an excellent simulator that you can make yourself without any material costs.
The easiest way is to cut a shoe-shaped figure out of thick cardboard, use a hole punch to make holes, arm yourself with suitable laces and offer your child new fun.
.jpg)
A more complex option is lacing toys in the shape of animals or so-called "sewing" with prepared details and holes: for example, a tree with leaves or a hedgehog with apples, or a cheerful sun with rays.
.jpg)
.jpg)
.jpg)
Developing rugs for children of different ages
.jpg)
Choose a dense base for the rug: it can be a fabric with a padding polyester or an old baby blanket - then the child will not crawl coldly on the floor. The background can be made both plain and from large pieces, the easiest way is to put the fabric on an adhesive base - it will last longer. We attach each element - from buttons to fabric trimmings - carefully so that the child cannot tear them off. It is best to duplicate the buttons on the wrong side. Velcro, rattles, rings, pouches with rustling paper inside, buttons and appliqués - all this is suitable for decoration. By the way, if you wish, the rug can be knitted - who is good for what, as they say.
.jpg)
By the way, for older children, rugs can be thematic: they can be decorated with animal figures, numbers, alphabet letters, or even divided into 4 parts a la 4 seasons and decorated with snowflakes, leaves and other paraphernalia.
.jpg)
.jpg)
By analogy, you can make educational books with soft applications, the main thing is that they are bright and interesting.
.jpg)
.jpg)
.jpg)
For the little ones, you can sew or knit a relief rattle bracelet: in the form of a flower or a funny animal. You can put rustling bags or bells inside.
But such a bracelet contributes to the development of a child's vision and hearing, as well as coordination of movements.
.jpg)
You can also make so-called sling beads - they also contribute to the development of tactile sensations and fine motor skills. You can also attach funny knitted key chains to them. The easiest way to make beads is to crochet or knit them, and then collect them on a tight thread.
.jpg)
You can make a development stand out of the materials at hand, there are so many interesting things on it that you can turn, unfasten, press - a lot of fun for real researchers! And at the same time you can learn colors, numbers, letters, and so on.
.jpg)
.jpg)
You can make rag pillows or figures and stuff them with various cereals - buckwheat, rice, beans, and so on. Give it to the baby - let him touch it with his fingers: both he has a job and a little rest for his mother.
.jpg)
.jpg)
For children from 3 years old, you can make a coloring or applique with leaves of a tree, you can cut out figures, letters, numbers, and so on from cardboard or fabric and invite the child to recognize the figure by touch. Make cards, design crafts from matches, wire, polymer clay, plasticine, old kinders can be used to make loto, bottles can be used to make skittles, sew rag dolls and arrange a performance - this simple action will bring you closer to your child and at the same time it is very useful for the development of the baby !
Galina Utkina
Currently, there is a very huge selection toys for children - bright, beautiful, unusual. Choose any! But it's always nicer and more interesting to do something. do it yourself.
Toys - homemade products have great pedagogical possibilities.
They develop imagination and creativity, constructive thinking and ingenuity, expand the gaming experience, give knowledge about the world around them, enrich children's vocabulary, and form the ability to communicate with each other.
Toymade hands, even with the help of an adult, is not only the result of labor, but also a creative expression of the individuality of the creator. Homemade toy very dear to the child, with her it is much more fun to portray the heroes of fairy tales, songs and small stories.
A little imagination - and no one will guess what your unique art object is actually made of.
Only the one who creates lives. In the game, the child develops, grows smarter. But what a game without toys? The more toys, the more fun and interesting it is to play, and especially if this toy made by the child himself or together with an adult.
Tasks:
1. To form children's interest in making toys from junk material and paper.
Foster a desire to bring joy to yourself and others toysmanufactured do it yourself.
2. Develop creative thinking, artistic taste, imagination when creating an image, accuracy and independence.
3. Use methods of transformation and design (cone, cylinder, box, cardboard - turn into toy).
Complement the proposed option with details, by gluing and painting on.
4. To form the ability to organize a workplace, plan the stages of their activities, choose methods of action, bring the work started to the end.
5. Determine effective forms of work with parents.
Psychologically "Hiding" behind toyspeaking on her behalf, the child becomes more open and courageous in contacts with others, begins to try on different models of social behavior.
Dolls work wonders: amuse, educate, develop, correct behavior. In the manufacturing process toys- self-made preschoolers acquire labor skills and abilities, develop creative imagination and constructive thinking. Children develop a taste for beauty and a desire to do it. do it yourself... You should always praise the child and thus maintain his interest. Firstly, this is a very exciting activity, and secondly, it brings children closer to each other. With made homemade toys you can not only play, but also give them to their brothers, sisters, grandmothers.
In the process of work, preschoolers consult, discuss whether the part is suitable, rejoice if they succeed in their plans. This creates conditions for the formation of a children's team, dialogical interaction, friendly verbal communication.
And these Russian folk proverbs also help during work:
The eyes are afraid, but the hands are doing.
When starting a business, think about the end.
Without difficulty - you can't even get a fish out of the pond.
You can't cut a dress without scissors.
It is not enough to want, you need to know and be able.
If you hurry, you will make people laugh.
"Maybe" and "Somehow" will not lead to good.
Try it on seven times, cut one.
Tyap yes blooper - the ship will not come out.
Children like toysmade do it yourself, are not afraid to break, spoil the crafts, as they can repair them on their own. But, the most important thing is that the child's imagination manifests itself here, he opens up internally, liberates himself. And each, at first glance, unnecessary thing turns for the child not only into an interesting character for games, but also into a dear friend.
Surely at your home there are boxes of Hochland cheese or candy boxes left for disposal. You can make fairy-tale heroes or cartoon characters from them, and the legs and feet of the heroes can be made using yogurt or kefir lids.

Nyusha's hair, face and legs are cut from a viscose napkin, the chamomile on her hair is made of cotton pads.

Masha's hair is also cut from a viscose napkin.
From champagne cork, cotton pads and viscose napkin, you can also make tabletop theater characters.

These are the grandparents who turned out for theatrical play.
It turns out fascinating toysmade from unusual bottles of shampoos, a little fantasy and here are some toys will work


Such machines can be made from boxes of cream, wheels can be made either from cardboard or from lemonade lids.


This KAMAZ tank is made from a jar "Rastishki".
This ginger cat is made from a box of cream, the head is from a strip of paper rolled into a roll, small parts are cut out of colored paper

The world of human fantasy is not excised, you just have to pick up any waste material, a little creativity, that's ready homemade toy... From a roll of toilet paper, a plastic coil, a lid from under the cream, we got such a doll for theatrical play

These animals can be made from cups of yogurt and cotton pads.

This merry horse - the symbol of the year is sewn from a viscose napkin, inside there is cotton wool, a mane and a tail made of threads of two colors, eyes made of buttons.

By February 23, such planes and a tank can be made as a gift for dads. We used cardboard, a matchbox or an egg from a kinder surprise, colored paper, glue, and the wheels are made of pasta and painted black.


This soldier is made of thick white paper glued into a cylinder, colored paper and cardboard are used for decoration.

This cow's head and body are also made of white cardboard glued into a cylindrical shape, small parts are cut out of colored paper.

The piglet is molded of salted dough and painted with gouache.

And these are seemingly ordinary candy cans, but inside, if you open, pop up surprise toys"Merry Parsley", "Bunny"

In this toy the main thing is to make the spring correctly (take two multi-colored strips, glue them, bending alternately, then one or the other strip to the end - you get a two-color spring, draw any muzzle of your own free will, cut and glue it to the tail of the spring, glue the opposite end of the spring to the bottom jars, close the lid. Toy - surprise ready.

Thus, toys - homemade products are of great importance for the development of a child of any age. They develop not only fine motor skills, but also imagination, the ability to express themselves and an understanding of the world around them.
This is how we play with homemade toys


The long-awaited child has finally appeared in the family! Together with him, not only happiness and joy came to the house, but also experiences and chores. In the first months of life, it is enough for a child to feel your love and care. But, starting from 3-5 months, a child needs various kinds of toys for normal development.
Starting from this age, parents increasingly begin to visit children's toy stores and buy something special for their baby there, spending not only a lot of time and effort, but also money on finding and purchasing toys. However, it is not at all necessary to buy children's toys, since they can be easily made from improvised means on your own.
Pros of DIY toys:
- They are safe. You are unlikely to make toys from small parts or toxic materials.
- They do not require large investments. All toys can be made from scrap materials or things that everyone has at home.
- They are original in their own way. It is unlikely that in some store you will find a toy that is even slightly similar to the one you made yourself.
How to make an educational toy for your child yourself?
In order to please your beloved child with a new toy, you need one free evening, improvised materials and a little imagination. Turn on pleasant, unobtrusive music and tune in to fruitful work.
So what kind of educational toys can you make?
Beanbag
At the age of up to one year, the child needs to put light rattles in the handle and teach him to hold them tightly, shift them from one handle to another. Thanks to the rattles, the baby's muscles will begin to "work", the baby will master new skills and movements. It is rattles that begin to develop fine motor skills of the hands.
Therefore, the first hand-made toy should be a rattle. To do this, you need to take a small bottle with a tight-fitting lid. You can pour cereals (for example, buckwheat) into it and tighten the lid well.
In order for the kid to be interested not only in "rattling" the jar, but also just to look at it, the jar must be decorated. You can tie it with a bright ribbon, draw a picture on it.
You can also make a rattle from a transparent jar. So the child will have the opportunity to examine what is inside her. In this case, it is worth filling the jar with multi-colored beads or bright buttons.


Mini pads
For children 5-6 months old, tactile sensations are incredibly useful and interesting. This allows you to develop fine motor skills, sense of touch. Small pads with a diameter of 7-10 centimeters will come to help in the development of the child. To make them, you need to take fabrics that are different in texture, color and print.
The big advantage of these pads is that you don't need to buy material specifically for them. Old things will do for this: a colorful dress, unnecessary jeans, a "pregnant dressing gown" that is no longer needed, and your little things will also come in handy. Pillows can be made square, round, oval. The pattern will depend on the shape.
Let's take a look at the simplest round pillow. It is necessary to cut two circles of a given diameter from the fabric cut. In this case, you can make a circle from one fabric, in the second from another from another, so the future toy will turn out. Do not forget to leave allowances of 0.5-1 centimeter, depending on the quality of the material. We fold the two cuts to each other with the front side and stitch them, leaving a gap of 3-4 centimeters so that you can turn out the pattern and stuff the pillow through it. We turn it out.
In the center, you can sew on a button that you have or you can make it yourself. To do this, take a coin and some cotton wool or padding polyester. Roll a ball and place it on a coin. Then cover the resulting blank with a circle of fabric and fasten it at the bottom with a thread. Sew to the middle of the pillow. This trick will make your pillow even more interesting for the child. Now that the shell is ready, we fill it. To do this, you can use bulk materials - buckwheat, rice, millet, sand (look at the density of the fabric, the stuffing should not "leak" out), as well as standard synthetic winterizer, cotton wool and foam rubber. Now you need to sew up the packing hole. For this we use a blind seam.
To make it more interesting for the child, you can create pillows - animals, decorate with various ribbons, stickers and large buttons. Please note that all parts must be securely fastened and large enough so that the child cannot swallow them, because children's fingers are able to pick out even the most securely sewn beads.


Buying a play mat can hit a family's budget hard. In cheaper models, poor-quality paint is most often used, which can cause allergies on the delicate skin of the baby. You can avoid wasting money and be confident in the quality of the finished product if you create it yourself. This does not require large investments, enough desire and a little patience and time. In addition, in your rug, you can include a large number of pockets and attributes than will be offered in stores.
So, for a rug, you need shreds of different colors and textures. The more variety, the brighter and more interesting your child is. Distinguishing fabrics by touch, he will begin to understand what is smooth, there is rough, there is cold, there is warm. You can even make a small section of wool from the edge so that it pricks your baby slightly. To make the rug warmer and softer, make it two-layer and place a rolled synthetic winterizer between the layers. So that it does not slide out, and the rug can be washed in case of emergency, sew it along the borders of the patches.
For decoration, you can use fabrics of other shades, various sew-on applications. If imagination and time permits, you can make your own owl, dog, cat, hamster, penguin or hedgehog. This does not require special skill, it is enough to find detailed instructions on the Internet, make patterns and sew them in a certain sequence to the rug.
Use interesting tricks. Place some rustling material under a few patches. To do this, use cellophane from store packaging from under clothes. They rustle louder than cellophane bags. The pockets are a great addition to your play mat. You can hide small toys in them, and then find them. The tweeters sewn inside will attract attention and teach you how to point-click with your finger or pen.


An alternative to a developing mat is a fabric sensor book.
If you have come up with the idea of \u200b\u200bcreating an educational toy when the baby is already confidently sitting, then the rug may not interest him. So, an alternative option comes to the rescue - a developing book. The principle is the same, but this time, the child is comfortable holding it in his hands and needs to turn the pages to see new images, which means that it develops coordination and helps to better navigate in space.
To make such a book, different square pieces with a side of 20 centimeters are needed. These will be the pages of the book. You do not need to do a lot of them so that it is not too massive, because because of the applications, the pages will not adhere to each other and will create additional volume. On average, books have about 6 pages. Thus, you need to prepare 12 scraps - the basics.
It will be interesting for a child to look at a book with multi-level applications. A striking example is a house. Opening doors and windows will teach your toddler to grasp small parts with two fingers. Imagine a child opens a window in a book, and there is a chanterelle. Unexpected, joyful and memorable. Thus, the child made a fine-sensory movement and recognized one animal. Opening windows and a climbing tree branch work on the same principle. Mushrooms, berries and flowers should be bright.
It's good if you can sew zippers and Velcro into the book. Various buttons will also be useful inserts, which can be installed in the next clothing repair. Eyelets will allow you to create lacing on one of the pages. At first, the child will look at her, and then he can start active training. Use whatever you can find.


Board "Masters"
This educational toy will definitely not go unnoticed, but it will be easier for dad to make it than mom. To do this, you need to take a wooden base (it can be a cabinet door or part of a countertop). The wood base must be sanded and varnished. After that, you can attach a latch, a switch, a door lock, hooks, latches, levers and all household little things that attract the attention of children to it. Such a "toy" is capable of keeping both a boy and a girl busy for a long time.
In addition, the existing switches, latches and other attributes of everyday life will be easier to explain when he already has an idea of \u200b\u200bthem. Do as many movements as possible together, annotating each action over and over again.
It is very useful to make a clock on the board, so you will teach the kid about numbers and the concept of time. Let him not understand this yet, but in the future for him, obtaining this knowledge will be easier. Babies at 3-4 years old can already count to 10-12, and learning in practice is always more interesting.


Making beads for the game
An original and very useful toy for the development of fine motor skills, which means that beads can become a baby's speech. Ordinary, purchased ones, inherited by the baby from the mother, will not work. Because most often they use the same beads, approximately the same size and texture. Making it on your own, you can add interesting details to the beads, which the kid cannot help but pay attention to.
To make beads, we need a thread of 30-40 centimeters (it is best to take a double thread so that the child cannot break it). The length will depend on how much and how you will place on them.
Now, the fun part. Disassemble an old box with sewing accessories, I am sure that you will find there a huge variety of buttons, tubes, bobbins of thread. If you can get a bell or bells that will jingle merrily when you play them, then your beads will not be worth the price. For a change, you can knit small round balls of different colors. The more varied the materials, the better.
These beads will be useful not only for the baby, but also for the grown-up child. They can be used to study colors.


Mommies know that very beautiful packaging from children's toys, juices and other things fly into the trash. Sometimes you really want to preserve the picture, but it is not hygienic and not practical to store garbage in the house where the child lives. But if you cut out only an animal, a picture, then you get a small and very bright card that the baby can consider and learn new things. Ideally, if the picture has a signature of what is drawn on it. For example, when cutting a juice container, try to capture the word apple, if there is one in the picture. This opportunity must not be missed, so we take scissors and start cutting.
We cut out and put the cards in a box, and when we have accumulated enough, we will strengthen them. The child still does not understand that they cannot be torn apart, and if they get into water, porridge or soup, they will deteriorate forever. Therefore, it is necessary to protect them from destructive actions. If you have a laminator at home, wrap the cards in laminate. However, this is rather an exception to the rule. For the rest, there is another way to reinforce the cards. Take a wide tape and glue the card on both sides. Such a defense is not a country any action. If everything is done accurately and accurately, then the card can even be bathed.
It is better to store cards in a beautiful box that will stimulate the child to look inside. In order to create it, you need to take a base. A shoebox is great for her. A shoe box is enough to hold a huge amount of cards. Try to decorate it with children's drawings, not only outside, but also inside. If you stick the animal on the inside of the lid, you can play hide and seek. The animal will appear and hide in the box. The kid will definitely like this game.
Try to hide all toys in bright, beautiful boxes. It has a beneficial effect on the baby's memory. He knows for sure that the cards are in a red box with an asterisk, and the stones are in a blue one with a chanterelle.


Another educational toy is pebbles. Plain stones collected in a sandbox can be incredibly useful at home. If you have the opportunity to collect river specimens with a smooth surface, then be sure to take a walk to the river. This will make your work easier in the future.
To create a useful toy for a child, you will need gouache, clear nail polish and a little imagination. Draw different animals on the surface of the stones with the help of multi-colored gouache. If they are beyond your power and you are so-so artist, then draw flowers, berries, snails, hearts, cars and vegetables. For those who are not friends with a brush at all, we can advise plain stones with stripes, dots, dotted lines and squiggles. For children who are already able to remember numbers and letters - write them. Use contrasting colors to make them eye-catching and memorable. Even if you do not know how to draw at all and just paint them in different colors, this is already a huge plus for the development of the child.
So, let's say everything is clear with the picture. They painted the stones, applied everything they could. Now the image needs to be fixed so that it does not smudge or wash off, we use ordinary nail polish. Instead, it can be coated with any other - yacht, acrylic.
First, your baby will be able to sort through them, then arrange them by color, and then sound the pictures.
To make it easier for him to remember numbers and letters, learn a few rhymes and accompany the pictures with funny jokes. So the child will remember not only the count and learn to read, but he will also tell the rhymes himself.


Create a racing, layered track
Creating a track on which a ball, a car or an egg from a kinder will roll is a very exciting activity not only for kids, but also for their parents. Every child will want to ride and see what intricate moves the ball jumps.
In order to create such a toy, you will need several planks, corners (depending on the number of tiers), scissors and glue. You can do with ordinary cardboard. As a base, you can use any board (you can find it after renovation in your apartment or ask for a small piece from neighbors or relatives) or an empty box.
You should not make very high stands, the child should easily reach the upper tier and see what is happening there. Corners can be easily found in hardware stores, they are not expensive, weigh little and can be easily cut with a knife or scissors. Plus, they are very lightweight, allowing them to be glued to liquid nails, moment or all-purpose glue.
The biggest challenge lies in the technical execution of the toy. It is necessary to calculate the slope, the distance between the beams, so that the rolling ball or car does not fly out of the track. There is no specific calculation formula. We'll have to test everything in practice. Pick two items of different weights that you can roll and start experimenting. If the angle is more than necessary, the machine will turn over and no longer move from its place, and the balls will spring and jump away from your child.
The best toy for a child is one that has a soul. Even in the store you can find something extraordinary that will win the baby's heart for a long time, but a toy made with your own hands is a real treasure. She is unique, no one else will have it.
You can independently make a toy made from natural materials, harmless to children's health. And most importantly, a homemade toy develops children's imagination a lot!
These ideas for children's hand-made things cause tenderness. Look, maybe you would like to please your child with such delight!
How to make toys for children
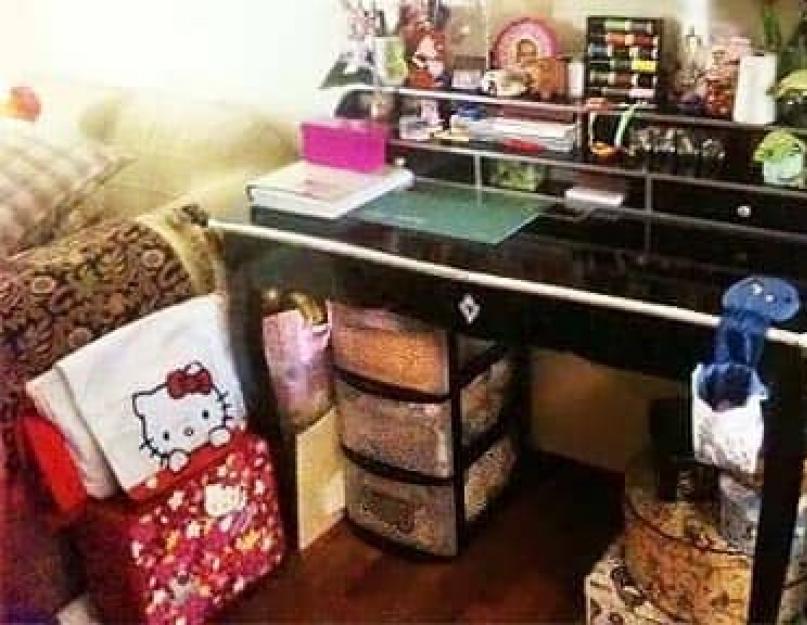
- The dream of a little mistress
Such a unit for a toy kitchen will come out of an old nightstand. What a nice color ... - Convenient shelves
The shelves for containers with spices can be adapted as supports for small children's books made of thick cardboard. They will no longer lie all over the kitchen! - Original dress
You can sew a pretty dress for your daughter from dad's old shirt. Or for her doll. - Pencil cups
The old phone book will well accommodate various drawing supplies. - Interior decoration
An interesting way to store children's drawings so that they are not lost and are in plain sight. - Tic-tac-toe
Even an adult will not refuse such a toy, the design is magnificent! - Kitchenette
Another option for a small kitchen - the girl will be delighted. - House-suitcase
You can arrange a dollhouse in an old suitcase. Great idea! - Storing toys
Storing toys under a children's bench is a classic! Plastic containers are very handy. - Funny bib
A bib made from a shirt is brilliant! - Secret box
You can build a whole game world from the bedding drawer! Which fits very comfortably under the bed. - T-shirt bodysuit
Old T-shirts are perfect for making baby bodysuits. - Toy baskets
Such baskets on the walls will keep the house from clutter and will interest the child. - Gift sock
Such a sock, made of jeans, will definitely be great gifts! - Pig from a bottle
The piggy bank from a plastic bottle is amazing. - Cars of the future
These are the cars made from ordinary plastic canisters! Super idea. - Entertaining maze
A maze of cardboard boxes is a place for frantic entertainment. - Raising a climber
Such a fun slide made of old tires will become an island of children's happiness.


If you think that making toys from improvised means is the lot of those who are unable to buy the best for their child, you are deeply mistaken! DIY toys from scrap materials are a great way to awaken even the smallest children interest in design, and therefore, contribute to the development of mental activity in babies. When in front of a child's eyes an ordinary object suddenly turns into a fascinating toy, you look like a real wizard, endowing a seemingly completely unadapted thing with a new meaning.
You can play with anything. There are many versatile ways to turn simple household gizmos and household waste into something useful and fun. Take your time to get rid of the empty bottle-boxes, because they can do you a great service. You can find out how to make toys from scrap materials by reading this material.
What toys can be made from small boxes
This section of the article is devoted to what toys can be made from shoe boxes, candy, milk, pizza, etc.
Box Is an object that can be anything. They can be easily pasted over or painted, and then turned into a variety of toys. There are several options below, although there are actually many more.

Doll bed - put a mattress and a pillow made of pieces of fabric on the bottom of the box and cradle the little pads.

Typewriter (trolley) - make a hole in the end of the box and tie a string. The kid will "carry" his important "loads" from a small box in this toy.

Car garage - cut a part of the side wall of the box so that the door is formed, turn the box upside down. Now the small cars will have their own "house".

House - take bags of milk, kefir, juice (do not forget to wash thoroughly from the remains of the contents!), etc. You can even build a whole city, you just need to draw or glue windows and doors. And you can make skyscraper toys from scrap materials if you put the bags on top of each other.

Cubes - from the same packages you can make light cubes and use them in "building" games.

Puppet show - take a pizza box, open it completely. To make such a toy from scrap materials with your own hands, in the resulting screen, cut out the opening "windows" with curtains from pieces of fabric. Now you can act out performances or simply raise any toy over the "screen" and talk to the baby in a "toy" voice.
How and what toys can be made from plastic bottles
You already know that plastic cups help in games. How to make toys from plastic bottles (washed and dried)? A small note: if you need to cut a hole in the bottle or cut it into pieces, treat the edges with tape so that the baby does not cut himself. Or you can iron the edges through the paper with a hot iron, they will easily melt and become smooth.

Animal toys - the most diverse! Usually the bottle serves as a "body", rolls of toilet paper will completely replace the "limbs", and the "muzzle" can be drawn and glued. By the way, you can paint such handmade toys from bottles in any color.

Transport - not only a machine, of course. You can make a toy plane and a rocket for children from improvised material. Add the necessary "details" (wheels, tail, wings can be cut out of cardboard and attached with tape).


House for the "fairy" - dwelling for small dolls. Well suited plastic bottles of an unusual shape - from under the foam for the bath, from under the shampoo, as well as white opaque bottles. Cut out the "door", decorate the walls (you can paint with paints, stick sparkles, beads). Place matchbox furniture inside the house.


Robot: the body is a two-liter bottle, legs and arms are half-liter bottles, the head can be made from any round plastic jar. Fasten with tape, paint your face with paints - the robot is ready.

Catamaran boat - cut out a part of the wall for two bottles, these will be the “sitting places” for the dolls. Use tape or electrical tape to secure the bottles (holes should be on top). Attach a sail stick between the bottles. Now you can send such a toy made from plastic bottles, made with your own hands, for swimming.

Raft - on rafts made of plastic bottles, some adults even manage to build islands and dwellings, this plastic container has such good buoyancy. The main thing in the construction of such a raft is that the bottles must be tightly closed and well fastened together. If you make two layers of bottles, the buoyancy will increase, and the "area" of the raft depends on the number of bottles: the more there are, the more "carrying" the raft.

Trough - cut out a part of the side wall from a large bottle, attach a rope to the twisted lid so that the feeder can be hung. Add feed and hang it somewhere in the park. Or you can install a feeder opposite the window and watch the "feathered guests". Just remember to add food regularly.

Bowling alley - empty bottles will completely replace bowling pins. Such children's toys made from scrap materials can be knocked down with a ball, as in a real bowling alley, by rolling the ball on the ground.

Target - and in winter you can arrange a competition for accuracy, who will knock down more bottles by throwing snowballs at them.

Vase, pencil holder - from the lower parts of the bottles you can make vases, or pencil holders, or containers for small things. You just need to decorate them, paint or make an applique from paper, beads, pebbles, pieces of fabric - the child can handle the decor himself.

Bilbock - the easiest toy to manufacture, developing dexterity and coordination. Cut off the top of a large plastic bottle to form a "cup", insert the end of a string or string about 40 cm long into the neck and screw the cap tightly. To make such an educational toy from scrap materials, insert the other end of the rope into a small plastic case from under shoe covers or a kinder surprise and close tightly. Now toss the "ball" and try to catch it with the "cup". You can play in turn, each hit is a point. Agree on how many points you play. Whoever scored the required number of hits first won.


Nesting dolls - cut several bottles of different sizes in half (for example, 2 liter, 1.5 liter, liter and half liter), take only the tops. They should be easy to stack on top of one another. Draw the “faces” of the nesting dolls with acrylics.

Ded Moroz and Snegurochka - from small opaque white bottles (0.5 ml, 0.3 ml or 0.2 ml from under children's dairy products) you can make fairy-tale characters. "Put on" such toys, made with your own hands from improvised means, paper coats, draw or glue faces, a beard, a pigtail.

Sea in a bottle - a self-made sea can be made from a transparent small smooth bottle, for example, from under mineral water. Pour about half the amount of water into the bottle, add a drop of blue food coloring and stir well. Collect a handful of small beautiful pebbles, shells, starfish and other "sea" little things, pour them into a bottle. If there is, add a little glitter. Now the most difficult thing - you need to carefully, slowly add any vegetable oil to the very top. Tighten the bottle tightly and put it on its side - the sea is ready. Water and oil do not mix, so the border between the "sea" and the "bottom" with shells and pebbles will be clearly visible. And if you move the bottle a little, you get waves, and then you can see the "storm at sea."
Now you know what toys can be made from a bottle, and what are plastic caps useful for?
What toys can you make with your own hands from plastic bottle caps
The first thing that comes to mind is to make wheels for homemade cars from the covers. But that's just one idea! Plastic bottle caps of various sizes and colors are used for countless interesting crafts and games, so many mothers collect them.
If there are a lot of caps, you can:
- sort them by color, size;
- give the child a couple of empty bottles with different necks, let him pick up suitable caps for each;
- count, compare, which are more, which are less;
- lay out a path, starting with large covers and ending with very small ones, and "drive" along the path of pups, "drive" on little cars.
Labyrinth - you can lay out a small labyrinth from the covers and lead a small machine, trying not to touch or move any cover.
Ski Track - turn the maze into a ski track. Give the kid-"skier" inventory - two caps. Have him put his index and middle fingers in the inverted lids and, moving his fingers, like feet on skis, go along the track. You cannot knock down other covers, otherwise the baby will go out of the way!

Spider bugs. To make such a toy, draw black dots and antennae-like eyes on the red lid - here's a ladybug for you. You can also arrange other covers with bugs, spiders, bees.

Refrigerator magnets - paint the lids with funny faces, muzzles of animals or write letters, numbers. Attach a magnet inside (using plasticine) - and act out performances on the refrigerator stage. Or, while you cook dinner, your toddler will learn to read and count by laying out cover letters and examples.
Projectiles - Arrange a competition for hitting the lids into a small plastic container. Who will make the most successful throws from one meter? And with two or three?
"Let's blow" - the lid can play the role of a ball or a puck in an "air match" - blow it out with a straw from a juice or a cocktail into the "gate". Such a toy made of lids, made by hand, can also be simply "blown" over the table to each other - this is a good exercise for ventilation of the lungs and development of breathing.
Walls, towers, pyramids - you can build walls, towers, pyramids from covers of different sizes. If there is a lot of "building material", give a task related to a certain color (for example, to build a "blue tower") or size (for example, to assemble a pyramid of three large, four medium and five small covers). Such educational toys, made by hand from scrap materials, perfectly train fine motor skills.
Bulldozer - using a toy truck, or a scoop (shovel), or even just a flat cardboard, quickly collect all the lids in a box. The game can be played "for a while" when you need to collect a lot of small toys, including removing the caps in place.

Spinning top - a simple top can be made from a lid and a toothpick. Make a hole in the middle of the plastic lid so you can insert a toothpick. Make sure that the hole is not wide, otherwise the toothpick will not hold and will fall out. Insert the toothpick so that the small tip "sticks out" from the flat (outer) side of the lid, and the long one is from the inside. Now place the top on the small tip and use your fingers to twist the long part of the toothpick. To make this toy from a plastic lid spin for a long time and evenly, experiment with the length of the "leg" on which the toy spins.


Laying out figures - a variety of shapes can be laid out of the covers on a flat surface. For example, geometric or animal silhouettes, transport. It turns out very unusual and interesting, a kind of mosaic of covers.

Painting (mosaic, panels) - if you like the patterns laid out from the covers and want to keep them, glue the "picture" on a thick sheet of cardboard. Such a mosaic toy for children, made by hand from scrap materials, looks very good and delights not only the child.

Tic-tac-toe - the rules are usual, but instead of drawing tic-tac-toe, two-color covers are used. And you can even play on a checkered tablecloth.
"Remember" - lay out several different covers, let the child remember the location, color, sizes. Then ask the baby to turn away and change something: remove, move or add some covers. The task is to make it “as it was”. Such an educational toy made of lids perfectly trains visual memory.
"Find differences" - lay out the lids in two equal rows and make one or two differences (in color or size). Let your toddler determine how the rows of lids differ. For very little ones, start with three or four lids in a row; for older children, you can lay out not only rows, but also supposedly "identical" patterns, pictures. In this case, playing with such a toy made of plastic bottle caps will be more difficult, but also more interesting.

"Small and Big" - ask the child to lay out several large and several small lids - the amount depends on his age. Can be laid out in a row, can be scattered. Give your baby a box or jar with the rest of the lids not laid out. Now turn on the stopwatch! On command, the child must find other suitable-sized lids in the box: cover the small ones with large ones, and put small ones on the large ones. How many seconds did it take to complete the task on the eye, attention and coordination?
Below is a description of what else you can make toys with your own hands.
DIY toys from improvised tools at home
Remember how in childhood you sometimes wanted to climb into your own house. Below are the options for a "home" in which your baby will play with dolls or soldiers, arrange "darkness" (subconsciously relieving himself of many fears), and just be able to be alone for a moment with his thoughts, relax, dream and even sleep, if tired. For such a rest in the "house", lay an old blanket or thick blanket or bedspread on the floor.
The easiest option for such a toy made from improvised means, made at home, is to throw an old sheet or blanket on the table so that the fabric reaches the floor. But this is not always convenient, since the table is usually used often.

Another option is a cardboard box from under some large household appliance or equipment. In it, you can cut through "windows", make a "door", decorate the walls with drawings. Do not forget to only strengthen the corners and joints of the box so that it does not accidentally collapse and fall on the child.
If there is no box of a suitable size, you can make such a children's toy with your own hands from such improvised materials as pieces of cardboard, firmly fixing them with tape and PVA glue. And by folding a large sheet of cardboard in half and putting it on the floor with the fold up, you can get a cozy "hut". Just strengthen the walls so that they do not "parted".
Another "budget" version of a toy made from improvised means is to throw a blanket with one edge on the back of a chair, and with the other, for example, on the arm of a sofa. For a kid, even the narrowest space will seem cozy, because this is his "real house".
You can use a regular ladder by putting it in working condition and covering it with any cloth, the same sheet. The stepladder is good in that it has ready-made "shelves" for toys - steps.
What else can you make toys with your own hands?
The "soft" version is a "house" made of a large piece of rectangular foam rubber or a propylene tourist rug. It is advisable to cover only foam rubber with a fabric cover. Bend the foam rubber in the form of an arc, here is the "house". To prevent the “dwelling” from straightening, attach the “walls” to the “floor”.
If dad makes a frame of four lightweight aluminum tubes of sufficient length, fasten all four tops together, and fix the legs firmly on the floor or on the base of the same aluminum tubes, you get the "skeleton" of an Indian wigwam or northern yaranga. Mom will only have to make the walls with the help of fabric. By the way, the frame can be made from tightly rolled and glued old newspapers! However, if dad is a master, he can make a wooden frame from processed blocks or planks.

An old playpen can be covered with a blanket and cut out in one of the narrow side walls, a "door" - a beautiful "house". But this option is possible if you no longer plan to have babies and use the playpen for its intended purpose.
Even a sheet, hung on a stretched rope, can be a hut. To do this, simply pull to the sides and secure the edges of the sheet so that they do not "collapse".
Your kid will be happy to hide and play in his "house", and sometimes invite you to visit!
Look at a selection of photos showing toys made with your own hands from scrap materials:


Article read 13,714 times (a).


