Cats are very beautiful and graceful pets that children adore. And little artists often ask mom or dad to draw their favorite pet on paper. And even if adults themselves do not have the talent of a painter, step-by-step drawing will come to the rescue. Based on consistent patterns, even a five-year-old child can create in the picture the image of an adult cat or a small mischievous kitten. At school age, children should be offered more intricate options, for example, images of realistic cats and popular cartoon characters.
Age features of drawing a cat
It is advisable to teach a child to draw a cat from the age of five: it is at this age that the child is already able to create a more or less believable image, so there is no need to rush things.
Before starting the creative process, it is advisable to reinforce with your son or daughter the knowledge of basic geometric shapes (this will be needed in the process of work) and teach them to depict them correctly. These are circle and oval, triangle, square and rectangle.
To draw an animal well, a child must be able to correctly depict geometric shapes
You should definitely consider a live cat with a novice artist (a ceramic figurine or a realistic soft toy would be an option).
In this case, the adult focuses on the proportionality of the body, the ratio of the sizes of the head and torso, the location of the eyes, ears on the face, etc.
If there is no real cat at home, then you can consider a realistic soft toy with your child. Because children preschool age
If you don't yet understand proportions very well, you can start drawing with cartoon cats.
They often have a disproportionately large head, a cheerful coloring, a funny facial expression (smile, wide eyes, protruding tongue), and are dressed in bows and other accessories. Cartoon cats are distinguished by irregular proportions, cheerful colors, smiles and other features. WITH Children already understand that the head of an animal cannot be too big or small, the tail must be long (practically full length). An adult and child should look at photographs of cats in various poses: lying, sleeping, sitting, jumping. At the same time, attention is drawn to how the animal arches, how it folds its legs and tail.
An adult first discusses with a schoolchild what pose to draw a cat in
The images of cartoon animals become more intricate: an adult teaches a child to give a cat a mood: surprise (mouth wide open), sadness (corners of the mouth slanted down), thoughtfulness (pupils shifted to the side), fear (eyes wide open). There are a lot of options here, since children's imagination knows no bounds.
Selection of tools and materials
Since a cat can be drawn in various techniques, then for work the little artist will need various materials. These are colored pencils, wax crayons, felt-tip pens (many children like to trace outlines with them and emphasize details), gouache (since drawing a cat in watercolor already requires higher skill). In any case, you will need a sharpened pencil and an eraser (to correct defects and erase auxiliary lines).
As a base, you should prepare white A4 paper or colored cardboard (if your child draws with gouache).
How to draw a cat with a pencil step by step
Introduction to the animalistic genre of painting should begin with simple circuits drawing animals. One of these options is a cat made of circles. The adult shows the child a funny picture where the animal’s body mostly consists of round shapes (there are also triangles - ears and nose).
The cat in the picture has a round body, head and cheeks, the rest of the details complement them
Then follows the imaging process according to the diagram. For example, to depict a sleeping cat, you need to draw a large circle, inside it - a small one (in the lower part, in contact with the large one, the ratio is approximately 1:2). Next, the image is complemented by the ears, nose, closed eyes and mustache of the animal. Completes the look a long tail, enveloping the body of the animal. All that remains is to decorate the animal to your liking.
The circles in the drawing are the main parts of the cat’s body, which are simply supplemented with the necessary details
When the child masters drawing round cartoon cats, you can move on to the next stage of mastery - a realistic image of an animal, for example, a sitting one. First, the cat's head is indicated in the form of an oval. The oval will also be the basis of the body shape. Here you need to maintain proportions: vertically, the oval is slightly longer than the length of the twice-taken oval of the head, and horizontally, the width of the body is slightly less than the double-taken oval of the head. In this case, the head and torso slightly overlap each other. The next stage is drawing the ears, front and hind legs of the animal.
At the first stage, the main parts of the animal’s body are schematically indicated in the form of ovals, paws and ears are added
Then, using auxiliary lines, the child depicts the cat’s face: nose, mouth, eyes and mustache.
Eyes, nose, mouth and mustache are depicted with oprah on auxiliary lines
Auxiliary lines are combined into the final drawing, which remains only to be colored.
At the last stage the cat is painted
Drawing a lying kitten is also not a very difficult task. Again, the head and body are indicated by ovals, and then the muzzle, ears, paws and a beautiful tail are drawn. In this case, the head can be positioned in profile and full face (this does not affect its shape). The child needs to be explained that in the first case, only one eye is drawn (the second one is not visible).
A lying kitten is also drawn based on ovals
Photo gallery: diagrams of step-by-step drawing of a cat
A kitten made from semicircles turns out to be very funny. The cat’s character is conveyed by the eyes. The most important stage is drawing the face. Thanks to the observance of proportions, the cat turns out to be very realistic. This kitten resembles the cartoon character Smeshariki. The cat’s body is made up of circles. different sizes The body of a cat is made up of ovals Drawing a cat begins with a heart The shape of a cat is the most elementary, the task is to color it beautifully A cartoon cat is drawn very simply The body of an animal consists of circles, ovals and rectangles
Draw a face
After the child learns to depict cats in different poses, you should dwell in more detail on drawing the face (full face, profile and three-quarter turn).
- First, an auxiliary shape is drawn - a circle, auxiliary lines are outlined (vertical and two horizontal). Large slanted eyes are depicted and there must be hairs above them - this will make the cat portrait more charming. The nose can be made to look like a heart. At the bottom of the circle there will be cheeks in the shape of semicircles.
Auxiliary lines will help make the muzzle proportional
- To make the cat more cute, you should shade the corners of the eyes. After this, the head is drawn to the desired shape: expands on the sides of the circle. Ears are added.
The muzzle increases in width and ears appear
- For maximum realism, all that remains is to shade the ears, sketch out the lines of the neck and draw the mustache. The cat has twelve hairs on each side (although this is not important in the picture).
An indispensable attribute of any cat is long whiskers.
- A cat's face can also be drawn based on a square. Draw a figure and divide it into four equal parts.
The square is the basis of the muzzle
- Focusing on the grid, we depict the ears, eyes, mouth, cheeks and nose in proportion.
The grid allows you to maintain all proportions
- Erase the auxiliary lines.
We remove the auxiliary lines, and the muzzle becomes lifelike
- Now let’s give freedom to imagination: paint the cat in natural shades or create an unexpected fantastic image.
Why not paint it with a fantasy pattern?
Photo gallery: diagrams for drawing a cat's face
The muzzle is drawn based on a circle and auxiliary lines. The eyes, nose and mouth are drawn in any order, without auxiliary lines. Using the eyes and mouth, you can give the cat a certain character. The image is made up of segments, which are then smoothed into smooth lines
Drawing an anime cat
Anime is a popular Japanese animation. This is not just animation, but a special perception of life, a cultural layer with its own unique symbols and types.
For children of different ages I like playful and charming anime cats. These are fantasy images with huge expressive eyes. Its head is often larger than its body. Of course, the child will take on the image of this cute animal with great enthusiasm.
Anime cats are charming and playful, their indispensable attribute is their huge expressive eyes.
You can offer the young animal artist the following algorithm:
- First, the body of a sitting cat is depicted: a large head with ears, a body (drop-shaped oval), paws in the form of ovals and circles, and a neat tail.
The head is almost the same size as the body
- The most important task is drawing the face. For this you will need auxiliary lines. We depict huge eyes (the size of ears, and at the same time we denote pupils and sparkles in the eyes) and a wide open mouth. At this stage we also add a mustache, ear pattern and toes.
It is the muzzle that gives the anime cat a unique playful character
- At the end of the work, erase the auxiliary lines and color the kitten to your liking.
You can color the anime kitten as you wish.
Photo gallery: diagrams of step-by-step drawing of anime
A simple diagram for drawing - an almost symmetrical figure. The drawing is based on circles and ovals. The highlight of the image is a tousled forelock and cheeks.
Drawing Angela
A popular game for tablets and smartphones with talking cats - Tom and Angela - is popular among modern children. Cute fluffy cat with anthropomorphic features (in beautiful dress) may well become an object for drawing.
Her distinctive feature is her huge slanted eyes.
Children love to draw characters from their favorite cartoons and games. The child can portray Angela in full height
- in one pose or another, or draw her portrait. Let's take a closer look at the last option.
First, draw a circle with guide lines. Let's transform it into a cat's face, slightly pointed downward.
- Angela's muzzle is slightly pointed downward
We draw neat (also pointed ears) and outline the eyes, nose and mouth.
- We make the eyes very big
Now we draw in detail the eyelids, pupils and iris of the eyes. Making the nose and mouth more expressive. Don't forget about the flirty mustache. We denote the neck and shoulders.
Draw the eyes, nose and mouth in detail
Drawing with gouache To draw a fluffy beauty, you can use gouache.
This material is suitable even for very young artists: the paint does not need to be diluted with water (like watercolor), but simply dipped into it with a brush. The compositions are saturated, the color is perfectly visible even on colored paper. When working with gouache, it is easy to correct any mistake. In addition, the paint dries quickly, so you can paint one color over another without them mixing.
Using gouache you can get interesting colors of cat fur - for example, a mixture of shades of gray, pink and orange.
- The adult reminds the child that it is better to use a thick brush to draw the silhouette of an animal, and a thinner one to draw details. Younger schoolchildren can be asked to depict a charming cat in the grass in gouache.
First, using a simple pencil, outline a simple silhouette of the animal at the bottom of the sheet (it is located vertically). Then we draw the muzzle.
- At the bottom of the sheet we outline the silhouette of a cat, draw a face
Using broad strokes we draw the background - grass and sky. We paint the cat itself gray.
- We paint the eyes and decorate the fur with a dry brush: we use different shades of gray (mix it with black and white paint). When drawing the face, we use the poking method with a wet brush.
When drawing fur we use different shades of gray
- We draw a mustache with white gouache and make final adjustments to the cat. Next, we finalize the background: we depict a forest in the distance and grass in the foreground. The composition is complete.

Cat eye makeup is a sensual, expressive and eye-catching make-up, timeless.
This makeup suits absolutely everyone - thanks to the ability to choose the type of arrows and color palette He universal.
Learning how to do “Cat Eye” makeup is not at all difficult if study the technique carefully and get some exercise.
You can learn how to do eye makeup using black shadows from our guide.
What is it?
Can be used to apply makeup different shades pencils, eyeliner or shadows - the main thing is that the eyes acquire oblong, slightly elongated shape with slightly raised corners.
This make-up technique has been known for a long time - since Ancient Egypt, and the special peak of its popularity came in the middle of the 20th century, when the most popular ladies - Sophia Loren and Brigitte Bardot - were transformed in this way.
This makeup technique is no less popular now - it’s not uncommon to see “cat eyes” on Eva Longoria, Angelina Jolie and other beauties from Hollywood.
The process of applying makeup itself is no different - it is not at all difficult to master it yourself at home.
Basic principles

There are quite a few options for applying such makeup, but the main principle is in narrowing and lengthening of the eyes, remains one. You can achieve this effect using:
- drawing arrows with a pencil or eyeliner, and you can draw them only on the upper eyelid or on both;
- shading of shadows- this option resembles “smoky” makeup, but is more clear and expressive.
“Cat eyes” can be applied both as a daytime and as a formal or evening makeup- in any case it will be appropriate, beautiful and attractive.
Important advice from the editors
If you want to improve the condition of your skin, Special attention It’s worth paying attention to the creams you use. A frightening figure - 97% of creams from well-known brands contain substances that poison our body. The main components due to which all the troubles on the labels are designated as methylparaben, propylparaben, ethylparaben, E214-E219. Parabens have a negative effect on the skin and can also cause hormonal imbalance. But the worst thing is that this nasty stuff gets into the liver, heart, lungs, accumulates in organs and can cause cancer. We advise you not to use products that contain these substances. Recently, experts from our editorial team conducted an analysis of natural creams, where the first place was taken by products from the company Mulsan Сosmetic - a leader in the production of completely natural cosmetics. All products are manufactured under strict quality control and certification systems. We recommend visiting the official online store mulsan.ru. If you doubt the naturalness of your cosmetics, check the expiration date; it should not exceed one year of storage.
What will you need?
To draw “cat eyes” you need a certain set of cosmetics. You can't do without:
Having a set of such products in your cosmetic bag, you can easily create new image and make your own face attractive and attractive.
Step-by-step technique
As with any makeup, apply “Cat Eyes” should start with preparing the skin- it needs to be cleaned and lubricated suitable cream and wait until it is absorbed.
If your skin looks sallow or sloppy, all your efforts to create a cat-like look will be in vain.
Next stages are:
- Base overlay. Matte ones are suitable as a base. foundation creams and powder.
- Shadows are applied and thoroughly shaded.
- Arrows are drawn.
- Artificial eyelashes are glued on or natural eyelashes are colored.
“Cat look” makeup option – photo:

Algorithm for applying shadows has its own characteristics:
- Initially, shadows of the darkest shade are applied along the eyelashes on the upper eyelid; their color can vary from deep black to brown or blue;
- shades of a lighter tone, but identical color range applied over the entire eyelid so that the eyes retain their natural shape and shape;
- from the middle of the upper eyelid, darker shadows are applied to its edge; they must be carefully shaded so that sharp transitions of shades are not noticeable;
- To make the look more expressive and open, before shading the shadows, you can apply a small light spot to the middle of the eyelid.
Feature of drawing arrows
Rich and expressive arrows can be created using.
So, The arrows should be drawn like this:
- Apply a thin layer of dark shadow along the intended application line (you can use powder).
- The outer corner of the eye is slightly pulled up, and eyeliner is applied towards the temple.
- If you intend to draw a thick arrow, it is recommended to first draw a thin arrow, and then build it up by painting in several layers.

To draw arrows using the pencil technique, it is recommended to use waterproof cosmetics. The arrows are applied simply - small dots are drawn on the upper eyelid at a short distance from each other, and they are connected with neat and even strokes.
The arrow extends beyond the outer corner of the eye and rises towards the temple. When creating “cat eyes” on the eyes round shape pencil applied on the inner line of the lower eyelid and connect to the arrow.
Should you focus on your lips?
The “Cat Look” makeup itself is quite bright and daring. His main task is focus on the eyes, give them expressiveness and attractiveness.
For this reason, you should not paint your lips bright colors- this will make the makeup look tacky, shift the emphasis from the eyes and you will not be able to create the image of a beautiful and alluring lady.
But, nevertheless, sponges must be well-groomed, before applying makeup, they can be lightly rubbed to make them brighter and more delicate.
If you consider makeup without colored lips to be incomplete, then use gloss or lipstick not bright colors, applying them in a thin layer.

What mistakes should you not make?
It would seem that everything is simple when creating cat eye makeup. However, there are several mistakes that, if made, will ruin all your efforts. These include:
- Wrong choice of length and width of arrows- for and without that narrow eyes Thin lines are absolutely not suitable, and with round eyes the tail of the arrow should protrude noticeably beyond the outer corner.
- When drawing arrows close their eyes- because of this, instead of the open, sly look of the cat, you get a tired look, the arrows turn out to be asymmetrical and not at the right angle.
- Shadows are applied after eyeliner- this mistake can lead to having to redo the entire makeup, since even a small amount of crumbled shadows will change the color of the eyeliner, which will be very noticeable.
- The mucous membrane of the lower eyelid is drawn with a regular pencil- this should not be done, since the texture cosmetic product excessively hard and can injure the most delicate tissue; if you need to line the lower eyelid, use kajal (a special pencil).
Properly applied cat eye makeup suitable for absolutely all women. It helps to give the face sophistication, and make the gaze charmingly languid, attractive and exciting.
Use for makeup only high-quality cosmetics, apply the products with gentle movements and then your image will be excellent.
You can learn how to do cat eye makeup step by step from the video:
Cat eyes are adorable, aren't they? Makeup cat eye is a trend this year and has not lost popularity for many years.
That slender shape and outline - there's just something about those cat eyes! Cat eye makeup has been quite popular in the makeup world for a long time.
From Cleopatra to Hollywood actresses, cat eyes have been flaunted by all women who are at the top of their fashion game. This makeup look will always be in fashion, so it's best to try and perfect it now. It's never too late to start!
What will you need
- Primer
- Eyeliner
There are a few things you should take care of before you start your makeup. Pay attention to the following steps, they are important!
Step 1: Prepare your eyes
The very first step is to create a good base for the cat eye. Be sure to thoroughly cleanse, tone and moisturize your skin. If you have redness around your eyes, dark circles or puffiness, use an eye serum or eye cream. They work wonders! To make sure your makeup sits well, apply an eye primer.
Step 2: Choose your eyeliner

Now that you've made the base, it's time to choose a product that works for you. you can use liquid eyeliner, which comes in a tiny bottle with a thin brush applicator or felt brush. You can also use a gel eyeliner that comes in a tube.
For this you will have to use an angled brush or an eyeliner brush. For simplicity, let's use eyeliner. It is convenient and easy to use if you are a beginner. I really love using it! It is also convenient to apply arrows with gel eyeliner, which comes in the form of a pen. The applicator is the best part of it since it is located at an angle.
Now, without further ado, let's start applying cat eye makeup!
How to do cat eye makeup - step by step

Step 1: Line your upper lash line
Line the upper lash line with slow strokes. Start with small strokes as you don't want to rush too quickly and ruin everything. If you are doing small strokes then you can gradually increase the thickness as per your requirement.
Step 2: Find the right angle
It is very important! Follow the natural shape of your eyes to direct the arrows to where the extension of your eyes is. Imagine your lower lash line is extended. This should be the angle at which you create the line. You can use eyeshadow and an angled brush to roughly outline the shape.
Step 3: Create an Arrow
Once you've determined the angle, use stippling movements with your eyeliner to create a line. Using small dots will help you figure out what the final arrow shape will be. Once you are satisfied with this, connect the dots and fill them in to connect to the line you drew above your lash line.
Step 4: Cleaning Eyelids
If the shape is a little crooked, you can always use a cotton swab or corrector to correct it. Voila! One perfect cat eye, ready to see the world!
Experiment with your makeup

Feeling a little brave? Make the line above the eyelashes thick. A rounder, thicker liner will make your eyes appear larger. If you want to lengthen the shape of your eye, then create a thin line. A thinner cat eye will give the illusion of longer eyes.

You can also play with the length of the arrow, but not too much. If you want to keep it simple, you can create a tiny extension beyond the eye line. I call it the cat's eye. When you want to go for a dramatic look, you can afford to make the arrow a little longer. Avoid both extremes as it may look inappropriate.

Another thing to consider is what kind of shape you are looking for. A straight sharp line will give you a sharp look. Draw a curved arrow and you will have a very graceful aura.
Types of cat eye makeup
The classic cat eye is great, but you can also play around with it once you get tired of it.
Take a look at the different styles you can choose from:
1. Smoky cat eye
Who doesn't love a smoky color? They are always in trend. I love my black liners so this is one of my favorites. What's more, it's really easy to create!

- Step 1: Create a cat eye with a smudgeable pencil.
- Step 2: Use a dab or brush to smudge it out and create a soft look while maintaining the winged shape.
- Step 3: Apply the pencil to the lower lash line and smudge it as well.
- Step 4: Use concealer under your eyes to make them stand out more. That's all!
2. Eyeshadow
Add a little extra. Draw a long arrow and apply some eye shadow.

- Step 1: Apply some eye shadow and blend well.
- Step 2: Create a cat eye. It's so simple!
3. Vivid image
- Step 1: Create a cat eye.
- Step 2: Create a smokey effect by using brown eyeshadow near your lower lash line to create a base.
- Step 3: Select glitter pencil. If you don't have one, you can also use glitter and apply it with a very fine brush.
- Step 4: Apply under lashes to create a bright and shiny look.
These makeup looks are extremely easy and super fun to create. Now that you know everything there is about how to master the cat eye makeup technique, take a look at these tips on how to perfect it further.
Tips to Follow When Applying Cat Eye Makeup
- Do not pull the skin next to the eyelid when creating the wing. This is a huge no no! You will end up completely ruining the shape.
- Instead, look down to keep your skin smooth.
- Buy a makeup mirror. This will help you perfect these small details.
- Try using a vanity while applying eyeliner. This will make it easier for you to hold your body in good position. You can rest your elbow on the table, which will give you a steady hand and a smoother result.
I'm looking forward to the next time I can do this makeup look because I personally just love the cat eye and enhancing it with colors! Well then what are you waiting for? I know you will be excited to try and test it for yourself. Let us know how it turned out in the comment box below.
- Features of cat eye makeup
- "Cat's eye" for the impending century
- Step-by-step instructions for creating cat eye makeup for the impending eyelid
First, let's look at the features of cat eye makeup.
Features of cat eye makeup

© site
This is a cat eye in its basic version. However, such a make-up can be supplemented with various details that will make the image more expressive. For example, you can emphasize the inner contour of the eyelids with kajal - dark on top and light on the bottom.

© maybelline
Another option is to create a darkening in the crease of the eyelid. Or add a highlight to the middle of the eyelid. And in the summer, instead of eyeliner, you can use a pencil and add a bright shade of shadow.

© site
"Cat's eye" for the impending century
Due to the fact that cat eye makeup includes arrows, girls with drooping eyelids often refuse it.

© maybelline
Many people simply do not know that it is quite possible to adapt it to this specificity and ensure that the shortcomings are hidden and the advantages are emphasized.

© maybelline
To do this, in the process of creating makeup you need to follow several rules.

Step-by-step instructions for creating cat eye makeup for the impending eyelid
- 1
Preparation
The durability of makeup is very important for such features as drooping eyelids. Due to skin friction (which is inevitable when hanging), the shadows can become blurred, and with them the arrows. Therefore, you need to do everything in advance to ensure a reliable fixation of the makeup. Apply primer to the eyelids and the skin at the outer corners of the eyes and wait until it is absorbed. For example, the well-known Eyeshadow Primer Potion from Urban Decay will do.
Then apply a base shade of eyeshadow - for example, light beige.

© site
- 2
Smoky effect
Matte shadows - not too light, but not too dark - blend along the central part of the eyelids. It can be the color of coffee with cream or a light gray shade. Now darken the crease of the eyelid. Do this with a small brush, blending the shadows along the orbital line. Using the same brush, create haze at the outer corners of the eyes. It should also extend onto the drooping eyelid itself from the outer corners of the eyes.

© site
By the way, paper tape is often used in cat eye makeup. It allows you to clearly define the area where shadows are applied outside the outer corners of the eyes. But with the impending century, it is better not to use this technique.Most dark color It’s not suitable for smokey eyes - it should be left for drawing arrows. Make sure that there are no clear boundaries between the shades. They need to be carefully shaded, creating smooth transitions.
- 3
Arrows
When starting to create wings, first work out the contour of the eyes. Outline it with a pencil.

© site
And then finish drawing the tail. An angled brush will help you with this. Draw the line straight; there is no point in pointing it upward: if the eyelid droops, such arrows simply will not be visible.After drawing straight arrows, soften them slightly with a dense brush.

© site
If, despite the risks, you still want to use a felt-tip pen or liquid eyeliner, follow the same rules, only draw the arrows very thin.

© maybelline
- 4
Final touches
The final stage depends on what effect you want to achieve. To “open up” the look, line the mucous membrane with a light kajal pencil. To get an evening make-up, replace the kajal color with a darker one. And of course, coat your eyelashes with mascara, trying to position them towards the outer corners of your eyes in the process.

© site
A makeup artist presents his version of cat eye makeup Rita Streltsova.

© ritastreltsova

Review of cat eye makeup products
Pencil Tattoo Liner, Maybelline New York

©mayelline.com.ru
Tattoo Liner is among the pencils that are ideal for makeup with an emphasis on the contour, which is optimal for drooping eyelids. Its creamy-gel texture is very flexible, which means that with the help of Tattoo Liner you can draw graphic arrows and then shade them. The same quality will allow you to create haze along the eye contour, softening the lines using a dense brush with short bristles (these are called smudge brush). The pencil can also be used as a kajal, painting the inner contour of the eyelids with it. There are many options, but you just need to remember that the texture hardens quickly, which means you shouldn’t delay shading if you want to get a smoky effect.
Lid Lingerie Shadow Palette, NYX Professional Makeup

© nyxcosmetic.ru
Designed for nude looks, the Lid Lingerie Shadow Palette features six natural base shades with a matte finish. The products provide dense coverage - just what you need for an impending eyelid. Combining light beige and more dark shades brown, you can get the smoky effect that is necessary for cat eye makeup.
You can find out what our readers think about the Lid Lingerie Shadow Palette here.
Primer Eyeshadow Primer Potion, Urban Decay

© urbandecay.ru
The product will help out those who need super-long-lasting makeup. A thin layer of Eyeshadow Primer Potion evens out the micro-relief of the skin, is quickly absorbed and creates a base coat on which both shadows and eyeliner adhere securely. By the way, 24-hour durability is not the only thing this product can give to makeup. It also helps maintain color saturation.
Eyeliner Matte Signature, L’Oréal Paris

© loreal-paris.ru
This liner is suitable for girls who are ready to complement their cat eyes with graphic arrows. It has several important advantages: firstly, the formula is waterproof (this means that the arrows will not be erased due to friction of the skin of the eyelids); secondly, it has a pleasant matte texture - the lines acquire a velvety finish after drying. As we remember, it is matte cosmetics - the best choice for girls with impending eyelids. A thin applicator and a cap with a special ribbed zone that allows you to firmly hold the product are also significant advantages. All this allows you to draw lines without blots.
You can find out what our readers think about Matte Signature here.
Do you have a problem of the impending century? What kind of makeup do you choose when you want to highlight your eyes? Write a comment.
Not many amateur artists take the risk of drawing a furry model. In fact, everything is quite simple. All you need is a little patience, a lot of desire and just a little ability to draw basic geometric shapes. Don't believe me?
How to draw a beautiful lying cat step by step with a pencil for beginners and children?
If you have already read previous articles on the topic and, you know that any image, even the most complex one, should be decomposed into simple shapes: circles, ovals, rectangles, triangles. This technique will greatly simplify further drawing.
Once you apply a similar technique to the image of a cat, all you have to do is draw auxiliary and main lines.
Option 1
- Conditionally divide the field of the drawing sheet into two parts: right and left. On the left side, draw a circle, slightly flattened at the top and bottom. This will be the cat's head. Draw two auxiliary lines in the inner part of the circle:
- vertical axis (strictly in the center of the circle)
- a horizontal line that divides the vertical axis into two parts: the upper (2/3 of the axis) and the lower (1/3 of the axis)


- Using the lines as a guide, draw the following auxiliary shapes:
- two ovals for eyes
- one large oval for the nose area
- two intersecting ovals for the upper lip
- isosceles triangle for nose

- Since our cat is in a sweet slumber, her eyes are closed. This greatly simplifies the artist’s task: closed eyes can be drawn with two smooth lines going down to the nose. For the nose, round off the already drawn triangle. Draw the ovals of the upper lip.


- Look carefully at the drawing, if the result completely satisfies you, erase the additional lines of the animal’s eyes, nose, and lips.

- A cat's ears are triangular in shape. Place two auxiliary triangles at the top of the head. Focusing on them, draw the relaxed ears of the animal. Use a smooth line to mark the line of the cheeks.


- Be sure to erase the guide lines as you progress.

 How to draw a beautifully lying cat: drawing the lines of the ears and cheeks (step 6).
 - Before you start drawing the body of the lying animal, draw two auxiliary ovals. Look at the picture below for their location relative to each other and the auxiliary oval of the head.


- Draw the body of the animal, the elbow of the tucked paw, its tail.

- Add to image small parts: pursed paw, mustache, eyebrows.

- Color the drawing.

Option #2
Another sleeping cat. Monochrome technique does not limit your imagination if you decide to make a drawing in color.

- Sketch a few auxiliary shapes and lines:
- large oval (for the body of a lying cat);
- a small, slightly flattened circle (for the head). To make the image as natural as possible, take into account the following rule: the cat’s body along the long axis is slightly larger than twice the diameter of the animal’s head;
- draw the axes of the small oval; they will become auxiliary lines when working above the animal’s head.


- Sketch the animal's head. In this work we will take the path of least resistance: the cat's eyes will be closed. To outline them, simply draw two light lines at the bottom of the small oval. Animal's nose: an isosceles triangle located on the vertical axis of the oval. Just below the triangle, draw a slightly curved line for the mouth. The animal's ears are located quite far from each other and have a triangular shape.


- Draw the auxiliary lines of the body. To do this, connect the arcs of the large and small ovals with a smooth line. Draw two convex lines just above the cat's head, indicating the convexity of the shoulder blades. Draw another circle for the tucked paw.

- At this stage draw the two front legs. Add a small auxiliary circle to make it easier to draw the back paw. Draw the animal's ears in more detail. Work on the outline of the muzzle.

- Continue working on the details of the image:
- using two auxiliary lines sketch out the tail. Draw the outlines of the fur along the sketch lines;
- draw the toes of the hind paw;
- above the eyes, mark the lines of vibrissae (three above each eye);
- do not forget to draw the contours of the fur in front of the animal’s ears.

- Don't forget to draw your cat's mustache and the pillow on which the cat sleeps.


- Pay attention to the shadow around the nose. By applying a denser color to this area, you will achieve a three-dimensional and realistic image.

- When working on an image of an animal's fur, keep in mind that a cat is a living creature whose fur does not grow perfectly evenly. The fur shading may look something like the photo below.

- Carefully draw the animal's fur


10. Don't forget to mark the shadow and folds on the pillow.


Option #3
The diagrams below show several more options for depicting a lying cat. Before you start drawing the drawing you like, learn the tips for drawing a cat's face and eyes.


How to draw a beautiful cat's face?
If you're tired of drawing sleeping murks, you'll find exciting activity: drawing a cat's head in frontal view (front view), profile (side view) and three-quarter turn.
Tip: in fine arts maintaining proportions is very important. To depict a cat, many artists use the formula: the length of the cat is equal to 5 heads (counted from the animal’s nose towards the tail).
Face of a cat from the front
- The beginning is quite predictable: draw a circle and divide it into four parts with two mutually perpendicular diameters. Please note: one diameter must be strictly vertical, and the second must be strictly horizontal (see picture below).


- The point of intersection of the horizontal and vertical diameters indicates the bridge of the animal's nose. Divide the bottom of the vertical diameter in half and construct another auxiliary circle, the radius of which is equal to ¼ of the diameter of the large circle.

- Divide the vertical diameter of the small circle into 6 equal parts. Draw five auxiliary lines through the marked points. The lines are parallel to each other and parallel to the horizontal diameter of the great circle.


- Also divide the middle line of the small circle (horizontal diameter) into six equal parts.


- The cat's nose is an isosceles triangle (see picture below). Using auxiliary lines, construct a triangle, and just below mark the upper line of the animal’s mouth.


- Carefully study the drawing below and sketch the lower part of the muzzle, focusing on the auxiliary lines.

- Cat's eyes are a different story. This part of the article describes general rules drawing an animal's eye. To accurately determine the location for the eye, draw several auxiliary lines (see picture below)


- Based on the auxiliary lines, draw the eyes of the animal. Remember, in an adult animal the eye shape is elongated, while in kittens it is round (be careful: the auxiliary lines in this case are constructed slightly differently). Detailed recommendations on how to draw a cat's eyes are found further in the text.


- Construct auxiliary lines for drawing the ears and cheeks.

- Using parallel auxiliary lines and a circle, sketch out the cat's ear.


Draw the fur in the animal's ear. Please note that the outer part of the ear is not covered with hair!


- Draw the animal's nose.

- Don't forget to draw the mustache on your tabby.


Cat face in profile
Drawn using circles and auxiliary lines (see picture below)


Ears are also quite easy to draw


Below is another option for drawing a cat's profile.


Cat face in three-quarter turn
Since you are already familiar with the magic of auxiliary lines, drawing a mysterious purr will not be difficult. Study carefully step by step diagram and try to achieve perfection


The eyes are a detail that will require some work. However, the more often you draw, the more natural the cat will be in your drawing.
- So, you have this basic image of an eye (see the section “How to draw a cat’s face from the front”)


- Based on the basic shape, make a preliminary sketch (see picture)


- The shape of the pupil in felines changes depending on the lighting.

- Draw the halo around the pupil with short dark strokes. Fill the rest of the eyeball with strokes of a less saturated color.


- Be sure to mark the place for the eyebrow whiskers and draw the hairs around the eye.


- The eyes in profile will look like the picture below.


- The result is a very natural image of the animal.


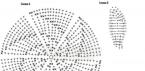
How to draw a cat by cells
Drawing by squares, which was first offered to children as a simulator for the development of graphomotor skills, is becoming an increasingly popular hobby for fairly old people.
The beauty of drawing by cells is not only the wonderful relaxing effect, but also the ability to create beautiful drawing, without possessing pronounced artistic talents. By and large, even those of us who can hardly draw a straight line on a sheet of paper can draw by cells.
All you need is squared paper suitable size, pencils and free time.
Samples for drawing by cells are presented below.

 How to draw a cat by cells: Hello Kitty

 How to draw a cat by cells: kitten Woof.


Video “Drawing silhouettes of black cats. Drawings and crafts for Halloween" will tell you how to draw mysterious and not at all scary silhouettes of black cats.
Video: Drawing silhouettes of black cats. Halloween Drawings and Crafts
How to beautifully draw a cat with kittens
Soft, purring cats and kittens are a favorite in fine art.
Even a 6-7 year old child can draw such a drawing on his own. The drawing is based on the simplest geometric shapes and a minimum of auxiliary lines.


Anime cats are charming and playful. Perhaps thanks to this, big-eyed creatures have gained worldwide popularity. We offer you several options for step-by-step drawing of these handsome guys.
Carefully study the proposed algorithm.


Step 3 How to draw a cat for a child easily and simply: drawings for sketching. 


Video: How to draw a Cat: Drawing lesson for children from 3 years old