It is better to start getting acquainted with the unique origami technique with simple paper models. This will allow you to understand all the intricacies of the craft and feel how deeply it is connected with the philosophy and worldview of the Japanese people. Origami attracts affordability combined with a wide range of applications. A simple sheet in skillful hands can turn into trendy jewelry, eye-catching packaging, an educational toy, or a budget but stylish decor for any occasion.
Start
As a rule, simple origami models are chosen for children to gradually discover with them Magic world Japanese papermaking. And since this type of applied art promotes general development, it is important to form in a child positive attitude to work and self-confidence. There are several rules that help you quickly master the initial stages of origami:
- You need to stock up on square sheets of paper in advance, at least 15x15 cm in size. Let there be a lot of them so that the child is not afraid to make mistakes and then start all over again.
- It is better to choose paper that is colored on only one side; it is easier to navigate when folding.
- The first schemes should consist of no more than 10 steps. Children usually repeat the same algorithm several times, trying to think through and remember it down to the smallest detail. If a child folds the same figure twice or three times, there is no need to try to “switch” him to another object. Painstaking work simultaneously develops fine motor skills, and with it creative and logical thinking.
- It is recommended to start with easily recognizable and familiar to children younger age objects: flower, boat, airplane, pets. As they grow up, young origamists will become interested in applied models: jewelry, boxes, phone stands, and so on.
- If possible, the child is provided with a calm environment that allows him to relax and immerse himself in the process. Origami has been proven to act like meditation, relieving stress and restoring inner balance.
Examples of models for beginners
Children aged 5–7 years are most interested in simple origami crafts, which they can later play with. It’s good if the model encourages the child to write a story. For example, having folded a boat known to everyone, you can “travel” on it to distant countries, because sailing on the waves of fantasy is no less exciting than on the real sea.
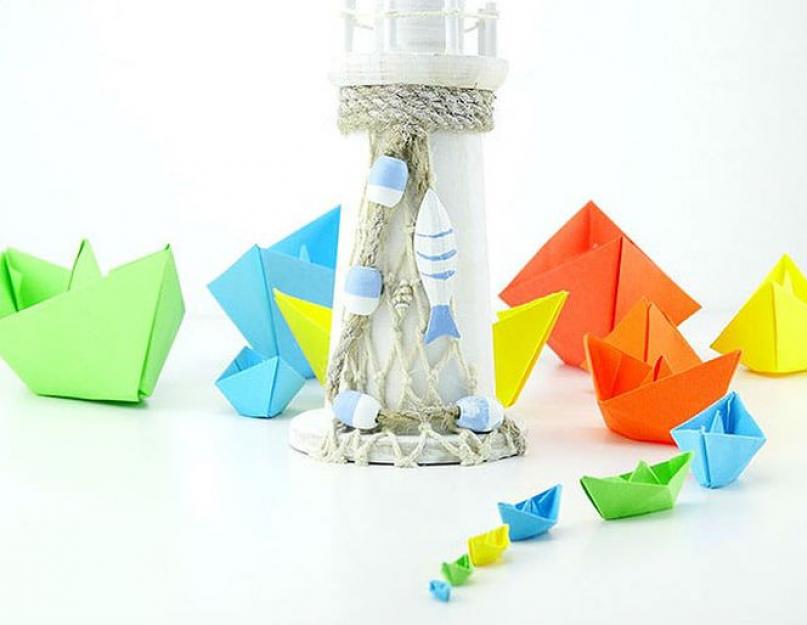
Paper Flotilla
The boat is one of the simplest models that you want to fold over and over again. Having made a whole flotilla, it costs nothing to send it sailing around the bathroom or the nearest body of water. A properly folded origami boat will not sink and can even participate in races.
Step-by-step instruction:
We use several rectangular sheets of different sizes. The largest is A4, the next one is half the size, and so on. It is desirable that they differ from each other in color.

- Fold the sheet in half along the short side.
- We repeat the same step for the new shape, but only outline the fold, marking the center.
- Bend the two upper corners towards the middle.
- We open the lower part under the triangle, “raising” the purple dots. Turn the workpiece over and do the same on the reverse side.
- We take the model by the area below, indicated by a red dot and the same on the opposite side.
- Stretch until a diamond forms.

- We bend the layer closest to us, connecting the lower point with the upper one. We repeat the same step on the reverse side.
- We again take the middle of the triangular figure and stretch it to the sides. We get a rhombus.
- We open the “folds” of the model to the sides. The ship is ready to set sail.

Mushroom garland
Bright mushrooms are suitable for any decor - you can use them to make an autumn bouquet, and festive garland. The nursery will turn into a fairy-tale forest, and the child will enjoy creating a beautiful and simple origami model.

You will need 2 sheets: red and white, size 15x15 cm.
Step-by-step instruction:
- Connect the red and white squares together. At the same time we make diagonal folds on them.
- Fold the top corner of the figure towards the center.
- We do the same with the right one.
- And left.

- We bend the upper half of the model into a “valley”.
- We move the left corner back.
- Right.
- Turn the workpiece over.
- We iron all the previously made folds well so that the mushroom does not fall apart.
- Bend the right corner to the center line.
- We do the same with the left one.
- Straighten the folds made in steps 10 and 11.

- Open one half of the mushroom cap.
- We bend the adjacent “leg” to the center line.
- We do the same with the left half.
- Fold the bottom corner as shown in the picture.
- Fold the top triangle of the “hat”.
- Turn the mushroom over to the front side.

The worms that will be found in the “forest harvest” are made according to the anti-stress snake principle.
Rabbit
Simple origami “Rabbit” for beginners will sparkle with new colors if you make it from special textured paper with a pattern. This is what they often use in their works. Japanese masters. The variety is called "Washi", it is still produced by hand according to unique technology VIII century. There is also a cheaper analogue - Chiyogami paper, but due to its dense coating it is only suitable for simple models with a minimum number of folds. You can purchase both varieties in specialized stores or online.
Japanese origami artists do not skimp on paper. Of course, a figurine can be made from any piece of paper, be it a used notebook or inexpensive material for children's creativity. But it is unlikely that you will be able to feel the joy of the birth of a miracle, as it should be when creating origami. It is worth learning from the Japanese a reverent attitude towards paper, which in Zen philosophy is associated with life: just as fragile and at the same time diverse, taking on many forms, but at any moment capable of destroying illusions and forcing you to start the path with a “clean slate”.
It is enough to compare the face of a rabbit made from ordinary office paper and a sheet of Chiyogami to understand what we are talking about:

This model is considered one of the simplest. Even a 4-5 year old child can create a funny pet animal. If you use professional paper, it is not necessary to draw a face for the rabbit, it will look impressive anyway. Especially in a garland or as a Christmas tree decoration.
Step-by-step instruction:
- We use Yuzen Washi paper, size 15x15 cm.
- Fold the square from top to bottom diagonally. We get a triangle that “looks” at us with its apex
- We turn the base of the figure up to about ¾ of the height.
- Fold the right corner to the center line.

- We do the same with the left one.
- Turn the workpiece 180°. Bend the bottom corner.
- We put the rabbit front side to yourself.
- We tuck the top layer inside, as shown in the photo.

If desired, draw the animal's face with a marker. Or we make an applique from a voluminous nose and eyes.

Having collected one rabbit, few people can resist the desire to continue, soon receiving a whole family. Eared faces of different sizes can be used to make cute refrigerator magnets or interior pendants.
The best "children's" options
Collection simple schemes origami is constantly updated with new models. If papermaking has grown into a serious hobby, you can make thematic collections: domestic and wild animals, marine life, interior items, vegetables, fruits, flowers, and so on. It seems that the creators of the diagrams managed to reflect in origami all the richness of the surrounding world.
horse

Pigeon

Piano

killer whale

Crab

Penguin

Sunflower

Seal

Fish from modules
Modular origami can also be simple and quite accessible for beginners. In this case, it is important that the number of elements is kept to a minimum and the dimensions of the product are compact. Then the assembly will not cause fatigue and the desire to quit work halfway.
One of suitable options for children's creativity - modular angelfish fish, from which you can later make a picture or postcard. For them you will need only 80 triangular parts, 1/32 of a landscape sheet in size:
- 37 red;
- 30 salad;
- 12 white;
- 1 dark purple.
Origami is a technique of folding paper in a specific order that originated in China. Today, origami is popular all over the world and has millions of fans.
Initially, origami was used for religious rituals: ladies from high society were engaged in folding paper in a certain way, while thinking about something, and engaged in philosophy.
At the very beginning, origami was made exclusively from paper. There was no talk of such auxiliary means as ordinary glue or scissors. Today, the technique has changed and origami has become easier to do, and origami masters have learned to combine it and combine it with similar work techniques, for example, patchwork.
There are several different directions in origami that differ in execution techniques. We'll tell you more about them below.
Simple origami. Simple origami can be done by anyone who has the desire to learn it and a little time. As a rule, such origami is obtained by folding paper into a hill or valley.
Modular origami. This type of origami is popular all over the world. It is a separate figure, which is assembled from several specially prepared parts, each of which, when unfolded, is an ordinary square sheet of paper. All parts are held together by nesting into each other. It must be said that such origami is very durable and may not crumble for a long time.
Wet folding origami. This type of origami is considered unusual. The result is a figure with smoothly transitioning lines, which is why, at the end of folding the figure, the model looks exactly like the declared original. Most often, details such as flowers or animals are created using this type.
In order to make origami, you need to have special paper on hand. As a rule, paper for creating origami has a square shape, it can be classic white, but is also presented in color. Origami paper feels thinner and lighter to the touch than a regular sheet of writing paper.
Masters who have mastered the origami technique use special paper for their work, called washi. It is made from wood with the addition of rice and bamboo fibers. It is made from wood with the addition of rice and bamboo fibers. Tearing such paper is not an easy task, which means that the model created by the master will be durable and strong, and the chance that it will deteriorate is minimized.

Paper origami for beginners
The oriental art of conquering paper origami has found millions of fans all over the world. It came to us from Japan. Many people like to make funny paper figures, do crafts with children, come up with compositions of extraordinary beauty, and simply relax, indulging in their favorite pastime.
The fact that in Japan ladies of high society practiced paper origami deserves special attention from the readers of “Umelitsa”. During classes, they studied philosophy, thought about life, in a word, developed spiritually.
If you decide that it's time to learn something new in life, let that new thing be learning how to make origami. This worthy hobby will teach you patience, delight you with excellent results and give you many joyful moments.
Today we live in amazing times, so much is open to us useful information! All that remains is to take the knowledge gained and apply it in practice! We have collected simple and interesting origami patterns for beginners and experienced craftsmen.
In our publications, we offer step-by-step instructions for learning origami for beginners. The execution technique may be simple, modular or wet. We dwelled in detail on modular technology. It is an assembly of a figure from individual parts that are attached to each other.
To make origami you need step-by-step instruction. It reflects all the sequential steps. Special attention are devoted to assembling the main part. It is made from paper in the shape of a square.

Before starting work, it is important to prepare the necessary tools for origami:
- paper;
- ruler;
- pencil;
- scissors;
- glue;
- available materials - beads, rhinestones, seed beads, ribbons.
Those who are interested in making high-quality and durable origami should take care of purchasing special paper consisting of wood fibers, rice and bamboo. Its characteristics differ from ordinary paper. It is not easy to tear, but at the same time it is light and thin.
If you don’t have such paper, you can use regular or colored office paper. It is tough and durable, so it is good to work with. It is also convenient to use square stickers, pages of glossy magazines, and tracing paper.
You won’t be able to make origami with your own hands from colored paper, since the paper tears and white stripes remain at the folds.
Sometimes glue is needed to connect parts. It is best to choose PVA with a liquid or dry pencil brush.
We have prepared interesting selections how to make origami from paper.
Training should begin at simple circuits, and then complicate the task. When performing each step sequentially, you should check your result with the photograph. We have written a detailed description and simplified each step as much as possible.

By devoting one evening to mastering new knowledge, you will discover interesting technology, which will allow you to create three-dimensional figures. You can make paper blanks for volumetric triangles by folding an A4 sheet. If the origami should be large, the sheet is divided into 4 equal parts with side sizes of 53 and 74 mm, if you choose a standard small one, then it is divided into 16 rectangles with sides of 37 and 53 mm. The secret to creating a triangle is to maintain the proportions of the sides. So the ratio of length to width is 1:1.5.
To master origami technology, you should strictly adhere to the algorithm:
- fold the piece in half from the top edge to the bottom, along the longer side;
- fold the workpiece in half;
- wrap the free sides into a triangle;
- twist the lower edges of the part in the opposite direction;
- fold the resulting triangle in half.
The result should be a finished module with two pockets and two corners.
Each publication describes in detail how to create triangular module made of paper, which is a kind of brick in building an unusual figure.
On average, creating modular origami requires 10 to 20 steps. How many beautiful shapes can be created by connecting small modules!

The paper origami for beginners proposed in our publications will be a great idea for creating a delicate photo frame or a beautiful figurine made using the modular origami technique. To get a good result, we provide information on origami step by step. Step-by-step instructions will help you make origami.
With us you will make easy origami strawberries or fish. To make them you need to assemble about 40 modules from colored paper. The most difficult thing is to correctly fold the first square. Then things will go much faster! It is interesting to do this kind of work together with a child. Working with paper develops fine motor skills of the hands well, which means it contributes to the development of the baby. The modules should be connected strictly following the instructions. The result is a cute figurine that will decorate your shelf.
You need to spend time with your child. Both of you will remember these minutes with special warmth. Simple but fascinating origami crafts will decorate your home or take their rightful place in a competition in the garden or school. We suggest making paper fish, ice cream, and an owl. A simple origami bookmark for a child will become a good helper, because you made it together.
The best origami collections are displayed on the Internet and are pleasing to the eye. But what's really exciting is that you can build any of these amazing figures. Pay attention to the exquisite vases and baskets, Easter eggs and figures of animals, snow-white swans and delicate flowers.
By following our tips, you will quickly master modular technology, learn how to make connections and work according to the diagram. By gradually complicating the figures, you will reach a high level.
The ability to work with paper brings a lot positive emotions, because the result will certainly please you! Perhaps over time, interest will develop into a hobby and the love of your life. Anyone can create beautiful things, the main thing is to find your calling and choose something you like. This ancient oriental technique is filled with calm, it will help you find harmony and peace, and teach you to see the beauty in everything that surrounds us.
Origami is also an art that began to develop in Japan, and now funny cranes, frogs, and boats are known in many countries.
The name “origami” itself is a derivative of two words “ori” - “folding” and “kami” - “paper”. Often, one sheet of paper is used to fold origami, and then different folds are used in a certain sequence. Classic origami is the art of creating various figures from paper without using scissors or glue. He has a type of kirigami - paper sculptures.
In Japan, origami was associated with religious symbols, each figure was assigned special meaning. Initially, paper was very expensive and valuable, so only rich people could afford to do origami: beautiful figurines were presented as gifts, they were used to decorate homes and temples. Over time, the complexity of the figures increased, and real masters of their craft appeared who created real masterpieces.
Of course, it’s difficult to make a work of art with kids, but it’s better to start as early as possible. For a child to master the process of making paper crafts, it will take time and a little patience. It is best to start classes at the age of 4-5, first you can make this or that figurine, and the child will observe, then you can involve the child in this activity. Moves from elementary and basic figures to more labor-intensive and complex ones.
Video: Origami paper sweets
Origami is not only an interesting pastime, but also significant benefits.
Fine motor skills, coordination of movements, spatial and creative thinking develop. With the help of origami, you can instill in your child patience and perseverance, and help you realize the capabilities of your hands. Even elementary geometry can be studied with the help of figures: tell your child what an angle, vertex, square, circle, and so on are. By the way, it is also useful for adults to take a break from the usual hustle and bustle and do something creative and interesting.
In this article we offer you origami schemes for the little ones, but the little ones will have to work hard to create their first independent masterpiece.
Ship
.jpg)
This is probably one of the most famous origami crafts. To make it you will need a rectangular sheet of paper. It needs to be bent in half, and then the upper corners are bent inward to form a triangle. We bend the remaining part of the rectangle, and then slightly stretch the figure until a diamond is formed.
Now the final stage: we bend the protruding corners on both sides, you get a kind of pyramid. It needs to be bent a little and sides made for the ship. The ship is ready to sail! Now is the time to try it out in the stream or even in the bathtub!
Basket
.jpg)
.jpg)
A paper basket for storing writing instruments or picking berries can be made from simple sheet paper. We bend the sheet diagonally, the strip at the bottom needs to be cut off or carefully torn off, and then fold the sheet again, but along a different diagonal. We bend the corners of the square inward, towards the center of the figure. We turn the workpiece over, bend one quarter of the square towards the center and take out the corners, and do the same with the other side. The result is small triangles, they need to be bent inward, the ends with right angles are also bent inward. We turn the workpiece over again, bend the ends with right angles to the sides, turn it over, form a basket by pulling the inner edges and give it a square shape. The product is ready!
Video: Paper emoticons that change faces
Airplane
Take a regular sheet of A4 paper. Now bend it in half, the upper corners should coincide with the vertical. Now we bend the side edges inward again. The resulting triangle also needs to be bent in half and you get airplane wings. Now let your child arm himself with paints or markers and paint his work, and then you can practice flying!
.jpg)
Cat
.jpg)
Take a square piece of paper and fold it in half to form a triangle. The top and bottom corners need to be folded evenly.
Now we bend the diamond in half, bend the corners-ears a little inward, and then straighten them so that they stick out slightly. Now take a felt-tip pen and add the missing details: eyes, nose, mustache, cat's mouth.
Your child will definitely enjoy making these fun little things with mom or dad.
Cobra
To make a cobra like this you will need a square sheet of paper. We bend it diagonally, then unbend it again, folding the sides towards the diagonal.
.jpg)
Then bend the sides again towards the center of the figure, fold the sides from the bottom to form two triangles, and then lower the top corner, turning our figure inside out. Now is the time to color the resulting cobra.
.jpg)
.jpg)
Bird
You will need a square sheet of paper. Conditionally mark the middle lines on it and fold along them, bend the corners towards the center of the figure.
.jpg)
Now fold the corners diagonally.
.jpg)
The workpiece must be folded in half again.
.jpg)
Bend the corner inward.
.jpg)
.jpg)
Now we take felt-tip pens and finish drawing the bird’s eyes and wings.
.jpg)
Owl
We take a square sheet of paper, roughly divide it in half and fold it diagonally.
.jpg)
We bend the corners along the lines.
.jpg)
The top corner now needs to be folded forward.
.jpg)
We draw big eyes, maybe a beak, paint the wings. The owl is ready.
.jpg)
Bunny
We take a sheet of square format, fold it diagonally, then fold the bottom part along the line.
.jpg)
We bend the top corner, bend the bottom corners along the drawn lines towards the center of the figure. We bend the bottom corner up.
.jpg)
Now we draw (or glue paper cut-outs) eyes, nose, teeth. Funny rabbit ready!
.jpg)
little penguin
We bend the square sheet diagonally, then step back a little from it and bend the corner, bending it forward.
.jpg)
We turn the figure over, bend the corners along the drawn lines.
.jpg)
We bend the corners again, and then turn the workpiece over again.
.jpg)
We bend the corners on the sides, and bend the top corner down.
.jpg)
Draw the eyes, you can color the body. The little penguin is ready.
.jpg)
Your children will definitely enjoy simple crafts, and origami will become a new family tradition!
Origami is the ancient Japanese art of folding various figures from paper. To get 7-8 year old children interested in this activity, you will need to prepare thick paper, maybe multi-colored. In addition to good leaves, you will need scissors, glue, a ruler, a pencil, as well as elements for decoration. To start assembling origami, you will also need to choose suitable patterns for beginners.
- Folding paper figures trains fine motor skills of children 7-8 years old.
- Promotes the development of non-standard thinking, logic and memory.
- Develops mathematical abilities, spatial thinking, logic and the ability to find solutions to complex problems.
- Origami has a calming effect and develops perseverance and concentration.
Swan diagram
In order to make an origami swan out of paper, for children 7-8 years old, you will need to use step by step diagrams. If you use the most common and common paper patterns, you can easily and simply make a swan with your own hands.

- Fold the square sheet in half, marking a fold diagonally.
- We fold the two sides of the sheet to the resulting fold.
- The sides will need to be folded one more time.
- Let's fold our craft in half.
- Bends the swan's neck inside the craft. The bending point should be approximately in the middle of the craft.
- At an arbitrary point on the tip we bend our head and our swan is ready.
Modular origami in the shape of a swan looks good; it is just right for beginners, since the patterns are very simple and making such a toy from modules with your own hands will not be difficult. A craft made from modules is put together quite simply, it is lightweight if you correctly understand how to install the modules one into the other. Very quickly you can fold a swan that will beautiful decoration exhibition, children's or a great holiday gift.
Origami swan. How to make an origami swan
Animals
It will be very easy to make origami for beginners and children 8 years old in the form of animals. You will need to use the patterns to fold the cats and dogs yourself. These easy and step-by-step diagrams will help you make amazing toys for children, because you can use not only white paper, but also colored paper.

To make the dog's face, you will need to take a square piece of paper:
- Bend the sheet diagonally along the floors.
- Fold the edges of the resulting triangle towards the center, but the top lines should not overlap, lower them a little lower.
- Now the bent triangles need to be bent again and laid in the shape of dog ears.
- Turn the craft over and grab it on the bottom corner.
- Unfold the corners and fold them inward, forming the lower part of the dog's muzzle.
- Draw the eyes and nose, and your do-it-yourself dog is ready.
This simple instructions even for children 8 years old, they can make such a toy with their own hands if they stick to the diagram.
Simple instructions for folding a paper toy are suitable for folding a fox's face with your own hands.
- Fold the square sheet in half.
- Direct the corner of the resulting triangle upward and bend the corners upward, forming the ears of the fox.
- Turn the craft over and fold the corner.
- Turn it over again and draw the eyes, nose and antennae of the fox.
When the child masters the most simple crafts, then you can try to start making modular origami with it. For example, you can collect a bunny for children. There are different schemes, but the simplest is this:
- We begin to fold modular origami from three rows of 24 standard modules.
- We turn the craft inside out and make 6 more rows, this will be the modular body of the bunny.
- The head will be made up of thirty modules, which are inserted on the other side towards the body.
- Next, we place 7 rows as standard, just as we did when assembling the modular body.
- The ears are assembled from modules that we install in reverse. We form a modular ear from 6 modules, then 5, then 6 again, then 5, again 6, 5 modules and 4. Now the modular ear is ready.
Origami dog
Ship
Using clear diagrams, it will not be difficult for children 8 years old to make a boat with their own hands.

- To assemble the boat, you will need to bend a rectangular sheet in half.
- After this, bend it in half again vertically, marking the middle.
- The upper edges of the resulting sheet will need to be folded towards the middle, forming an angle at the top.
- Fold the remaining part from the bottom to the top, folding the edges over the triangle both in front and behind.
- Slide your fingers under the edge and unfold the triangle to create a hollow cone.
- Fold the paper so that those edges that are not touching, but opposite, touch.
- Fold the corners up.
- Turn the craft to the sides, and your boat will be head.
After the child masters such a boat, you can offer him modular folding of the boats.
Easy ORIGAMI. Paper BOAT for beginners
Rocket
Boys are always interested in technology and a wide variety of rockets and machines. We offer you an origami rocket, which comes with instructions telling you how to make such a craft with your own hands from paper for beginner children who are not yet at all experienced in the folding technique.

- Bend the square sheet so that you form a fold dividing it into four equal parts.
- We work with the upper two parts; to do this, they need to be divided in half. Fold the top parts in half.
- Turn the sheet over and fold the corners towards the middle, forming a corner at the top.
- Fold the sides towards the middle.
- After this, we bend them so that a fold is formed closer to the outer edge.
- Turn the craft over and your rocket is ready.
You can try modular folding of rockets, but first you should master easier and simpler options.
Flower – Rose
For children 8 years old it will be interesting to make a rose flower out of paper with your own hands. Using step-by-step diagrams and exactly performing all the prescribed movements, the child himself will very quickly be able to fold with his own hands beautiful rose. Later you can try modular rose folding.

We offer origami for children with diagrams. You can watch a video assembly to see how the crafts are put together. All this simple models and you can engage in production with your children beautiful crafts from paper. This is useful for finger motor skills, and kids always like to do something with their own hands, create and then proudly declare that they did it themselves. This great gifts for any identity - New Year. It's always better when original things are made with your own hands.
Circuit examples
We offer a lot different schemes. But, of course, kids cannot complete crafts the first time. It takes skill. It's like puzzles - it requires perseverance and careful handling of the material used. You can fold a lot of different origami from plain paper for children 3-4 years old, useful little things, valentines, hares, animals, birds, thereby creating comfort in the house. The admiring glances of the guests will definitely appreciate such painstaking work.
Valentine cards are also a kind of individual crafts. These are not simple paper hearts, but rather complex models neatly folded into modules.


All the most best schemes origami can be viewed at the links below for children 5-6 years old. Children can make a seal, a fox, a camel, a hare, a bird, autumn leaves, a cat, a flower.
Origami is a real art and all you need to do it is colored paper and scissors. You should definitely study the diagrams first in order to put the model elements in the right order. It relaxes well, concentrates attention, and develops finger motor skills.


Modular technology is a new phenomenon for children today. You can create truly mesmerizing crafts that amaze with their beauty and variety. Examples already finished works for children 7-8 years old, look at the photos and videos.
What is the difference?
What is the difference between modular origami and classic? And since you will need at least 6 identical modules in each row, there are also quite a lot of sheets of colored paper. But the result is worth it. A little perseverance and patience and you can make real masterpieces that will be the envy of others.
The origami method consists of connecting all the modules to each other, connecting the structure, giving it various shapes.
You can use PVC glue in your work and thereby create any figures. different colors and sizes. The more sheets of paper are used in the work, the more difficult it is to come up with a design structure from triangular elements, which is suitable for older children: 11-12 years old and 13-14 years old.
Origami schemes:


Let's start working
- In Russian folklore, the birch tree is compared to a slender and beautiful girl. But indeed, there is something equally naive, pure, attractive in the birch tree;
- Swan made of modules. Assembling the figure is not difficult, the only thing is that it takes a lot of time. This swan is suitable as a gift for both birthday and wedding celebration, wedding anniversary;
- Vase with rose. For this work, a diagram of a modular painting was taken, only made in a circle. They put a glass inside - you can already put flowers;
- Cat made of paper modules. This cat looks beautiful in any home! Everyone likes her. This craft required more than a thousand triangular modules;
- "Russian beauty". IN this master class We suggest you assemble a girl's figure in Russian folk costume: sundress, shirt, headband. In a similar way, you can collect figures in other national traditions;
- Transformer. An interesting variety of crafts from modular origami- transformers. They can be collected in various ways and obtained different figures. Try creating a transforming craft.


Today on the Internet you can find various schemes origami from modules in Russian for children 9-10 years old. Many of them contain video tutorials. The level of proficiency in this art can be improved through ordinary practice. Perhaps in the future you will be able to create your own designs for your own figurines of animals or flowers, or maybe something more complex.
Video on the topic of the article
A selection of the best videos on the Internet.

Paper origami for children
Simple origami for children: diagrams

Origami “Bunny” for children 1) Take a square sheet of thick paper2) Fold its two sides diagonally so that you get a shape similar to a diamond, but one side should be slightly shorter than the other3) Make a small cut in the center of the sheet, starting with the longer side of the diamond4) Fold the sheet in half so that the cut is on top5) Bend one of the triangles formed from the cut upward (this will be the ear)6) Fold it in half so that the ear becomes half the size, and the remaining part turns into a bunny's face, on which you can now draw an eye7) Do the same with the second side8) Now your bunny’s body looks like a triangle. Mentally (or with a pencil) draw a line from its top (located at the bottom) to the center of the base (located at the top) 9) Fold the far part of the triangle (the one that is further from the muzzle) inward. Ready! If desired, the bunny can be painted in any colors.

Origami for children "Fish" 1) Fold a square piece of paper in half to make a triangle 2) Fold its edges towards the center so that you again have a square (but keep it in the shape of a diamond, that is, with the angle down) 3) Fold the triangles from which you now have consists of the surface of the square, twice 4) Now fold each of the triangles on top twice more, bending down only the top layer of paper 5) Fold the smallest triangles twice more, mentally drawing a line from their vertices, located in the center of the square, to the bases, located on its sides 6) Now let’s take care of the bottom part of the rhombus: fold the top layer of paper “valley” (that is, towards you) 7) Turn the strip formed in the center “mountain” (that is, away from you) 8) Fold the topmost triangle again “valley” 9) Bend its upper part into a “mountain” 10) On both sides, cut one layer of diamond paper along the line that is the base of the largest triangle 11) Turn the bottom of the triangles “mountain” 12) Turn the result inside out.

The fish is ready! All that remains is to draw the eyes and decorate it! Both proposed schemes are origami for children 9 years old and older. In any case, at the first stage of a child’s acquaintance with a new hobby, parents are recommended to be present nearby and even actively participate in the process. Most likely, origami will captivate not only the child, but also the parents who started it all. So origami has every chance of becoming a real family hobby!

Origami for children is a quick and budget-friendly way to keep your child busy in his free time or while traveling. Children are delighted with paper cranes, flowers and jumping frogs and want to learn how to make the same shapes.
But paper figures can become not only funny toys for children. Origami is given as a talisman gift or used to decorate a home. Moreover, the art of paper folding is useful activity for children of any age.
What are the benefits of origami for children?
The first to use origami in children's creativity was the 19th century German teacher Friedrich Froebel. He created a paper origami course for children to help them better understand geometry.
But this is not the only practical benefit of origami for child development. Teachers and psychologists have noticed that folding paper figures helps children:
- develop fine motor skills and precision of movement;
- learn to concentrate;
- train memory and logical thinking;
- develop a sequence of actions.
When can you start practicing origami with your child?
It all depends on the desires and capabilities of the child. At 3-4 years old you should try to fold a square of paper in half evenly, from 5-6 years old - do simple figures with the help of an adult. If the child shows interest, the lessons can be gradually made more difficult. In any case, origami classes have a positive effect on development fine motor skills children, which means the crafts will turn out better and better.
Origami for children: 12 useful videos
To practice origami with your child you will need: paper (white and colored), scissors, pencil, ruler, glue. The most important thing for the first lessons is to choose accessible schemes. To make things easier for you, we have made a useful selection of video tutorials on paper origami for children.
cat
Fish
Dog
Ship
Butterfly
Bunny – bookmark
heart
Turtle
Pigeon
jumping frog
Crane
Tulip
History of origami
While folding figures with your child, tell him that he is engaged in a very ancient form of decorative and applied art. It is not known exactly where origami originated. History says this: when the secret of paper making, which the Chinese jealously guarded, came to Japan, a real origami boom began here. It was such a valuable material that it was used for religious ceremonies. Tearing a piece of paper was considered a sinful act.
The first paper figures began to be made in monasteries, where paper folding became a real art. But as soon as paper ceased to be a great rarity and became more accessible, the idea of origami was picked up by other classes. In medieval Japan, rich parents did not skimp on any money just to find a good origami master for their child.
Origami was used everywhere: lovers hid messages in them, aristocrats decorated their coats of arms with them, not a single festive event could not do without paper figures. But the secrets of folding were strictly kept within the family until the 19th century. With the development of industry, the value of paper fell and origami ceased to be an activity available only to the aristocracy.
A new surge of interest in origami occurred in the 60s of the 20th century. Origami master Akira Yoshizawa came up with a system of universal signs, which greatly simplified the understanding of the technique of folding paper figures. From that moment on, origami became a worldwide hobby for adults and children.
Was this information helpful?
Not really