We have already told you about it many times. Honestly, this is a very effective method of developing both hands and eyes. But, of course, if you start with simple shapes, and not try to immediately cut out complex or fanciful silhouettes.
Let's say we learned how to cut the leaves, it's time to take on the fauna. So, our task is to determine with the development of which animal you can start.
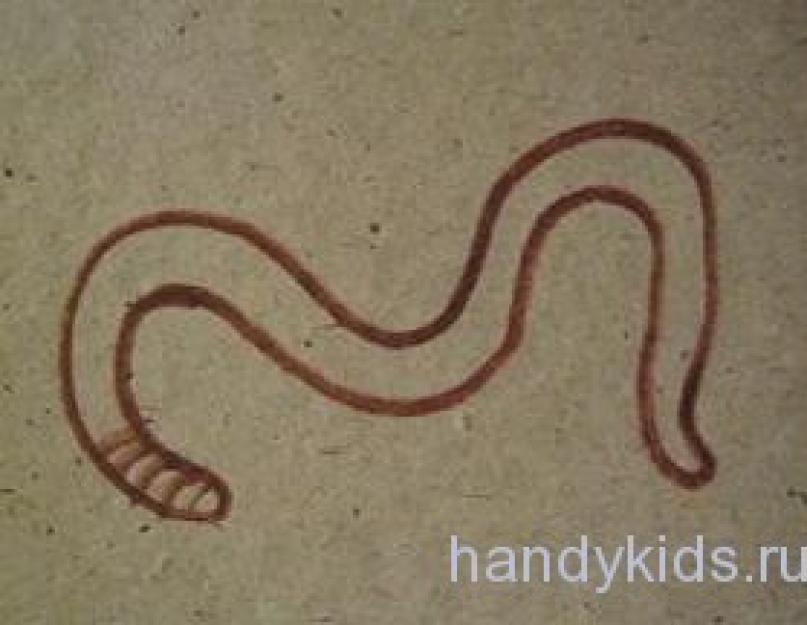
If you ask children the question "which animal has the simplest form and is the easiest and easiest to depict?", Children, as a rule, answer either "cat" or "bunny". This is partly understandable - children mean stylized cartoon images, which they really reproduce easily and confidently. However, if the task is set in line with realism, then real four-legged animals are far from being so easy to depict. Who then? Well, let me tell you ... do we have animals of a simpler form ... fish? ABOUT! It's already warmer. Snakes? This is really very close, but let's remember the WORM.
If we say so bluntly: we will draw and cut a worm! - then many children wrinkle their noses with disgust (associations are understandable), but, comrades, the earthworm is a completely respectable and useful member of society! Loosening the ground, it greatly increases the productivity of our gardens. That is how it is, but people still have some prejudices against its appearance.
And we will not cut from the shoulder, we will act politically: There is such a moment - a hedgehog, preparing for the visit of his friend - a crocodile, makes supplies: three grasshoppers, two worms and a lizard. So, if you tell a story with soulfulness and invite your students to illustrate it, they will joyfully and without prompts begin to draw these worm-like grasshoppers, and even beautifully served!
So the psychological obstacles have been removed. You can tackle the topic "Earthworm" closely.
Let's give a shading coloring.

First, let them paint. The goal is to secure the worm in pink, not bright crimson.
Then we need to apply a cross-ring pattern.

Since they cover the cylindrical body of the worm, we designate these rings with arcs, the direction of which changes in accordance with the twists of the body - also a task that requires thought, it develops spatial imagination well.
 We cut out the finished worm - training hands. Now we could offer to draw a worm on our own, but it’s probably too early to do it, we still need to practice drawing "parallel" arcs. That is, we will give the task - to draw the worm, observing a uniform body thickness.

 When it turns out well, children usually paint and draw rings themselves without the teacher's requests.
Now we give a coloring of this type:

Draw the same worm on empty space. That is, the task is complicated by the fact that you have to observe all the twists and also the dimensions. But how the eye trains!

Well, now we are ready to master carving a worm without a pattern. The first cut might look something like this:
 Or like this:

Let's say that the first tortuous cut is not so difficult to make, but the second - "parallel" will literally require calculations, it is better to first draw the proposed cut route with your finger - at least some mental representation will already appear.


9 193 208
When reading a book, it is important to remember and fix the page on which you stopped, in this case a bookmark will help. It is not at all necessary to go to a stationery store to purchase this simple accessory, we recommend making bookmarks for books with your own hands. Trust me, it's very simple! We offer you to make several original bookmarks for books from colored paper, felt, threads and paper clips. Take note of the ideas below.
So, first, let's look at a few simple ways and make a bookmark for a book with our own hands, using the materials at hand.
From paper
Bright and very beautiful paper crafts can be made with children. Bring unusual ideas to life.Option number 1 - Worm
You will need:- Template;
- Strips of colored paper;
- A sheet of colored cardboard;
- Glue stick;
- Scissors;
- Tape;
- Hole puncher.

Option number 2 - Heart
If you are looking for unusual ways to create bookmarks for colored paper books, then this option is for you. You will need a minimum of time to work.You will need:
- Template;
- Scissors;
- Glue stick;
- A sheet of colored paper.


Option number 3 - origami hedgehog
Let's start creating origami from paper, we get wonderful bookmarks for books. So, let's begin.You will need:
- A sheet of brown and light brown origami paper;
- White paper;
- Black marker;
- Scissors;
- Glue.
- Fold the light brown paper diagonally in both directions.
- Fold the sheet to form a triangle, fold the top of the sheet in half.
- Now fold the right side of the triangle in the middle, and then the left.
- Next, we unbend the edges, the left side of the triangle must be folded parallel to the central vertical line of the figure.
- Repeat the same for the second side.
- After that, you need to bend both ends into the pockets formed.
- Insert a sheet of dark brown paper into the corner of the bookmark, draw thorns on the brown sheet with a regular pencil, cut and glue.
- Make eyes, draw a nose. This completes the creation of origami bookmarks for your books.
Option number 4 - Origami Christmas tree
See a few more cool ideas that will come in handy when creating bookmarks for a book, check out the proposed master class. You will definitely delight children with such origami bookmarks for books.
You will need:
- Green origami paper;
- Brown paper;
- Glue;
- Scissors;
- Sequins.

Option number 5 - Bookmark with "tie" weaving

You will need:
- 4 strips of paper in two colors;
- Scissors;
- Double-sided tape.

Option number 6 - Bookmark - mouse

You will need:
- Simple pencil;
- Colored paper;
- Lace;
- Scissors;
- Stationery glue.

From felt
Quite interesting are not only paper bookmarks, but also felt. Let's try to make them together.Owl

You will need:
- Template;
- Pieces of felt purple, pink and white;
- Threads;
- Needle;
- Glue gun.

Dress
You will need:
Execution technique:

- Transfer the outline of the pattern to the fabric and piece of felt.
- Cut out these parts, glue them together, then you need to sew everything along the contours.
- Glue the dress to the elastic and you're done. This handmade bookmark will become a real decoration for your book.
From threads
Make an original thread bookmark using a simple manufacturing scheme. It's very simple.Pompon
You will need:- Knitting;
- Scissors.
- Wind the threads around your fingers as shown in the photo.
- Tie the resulting thread in the middle, leaving a hanging edge.
- Then cut the tied skein at the sides to make a pompom.
- Shape the pompom into a ball using scissors. You can make such bookmarks from threads of various colors according to your own taste.
From paper clips
Even ordinary paper clips can be the basis for a unique bookmark. It is enough to decorate this stationery with a bow, buttons or thread and you will get a funny bookmark. Another idea is to straighten a paper clip, bend it in the form of a heart, an asterisk, or a musical key. Isn't it original?
Try to make an exclusive bookmark yourself, it's very easy. Imagine and admire the results of your own work!


Use a variety of cool scrapbooking ideas, experiment and get creative.


Some more interesting ideas and master classes

Parents often complain: "My child is not interested in anything, he does not like to draw, or sculpt, or glue." However, in order for a child to fall in love with any kind of creativity, it is necessary to properly acquaint, interest, present this activity as a fun and not difficult pastime, and not as an obligatory duty.
A child, especially a young child, develops only when what he is doing is really interesting to him. How to make a child want to be creative? - It's not as difficult as you think. The easiest way to do this is by example. No lectures, teachings or lessons. Sit down and draw, sculpt or do the applique yourself. Invite your toddler to be creative together, rather than force him to follow your commands. So, if you want to develop your baby, you will have to spend much more of your personal time than buying a bright book or expensive felt-tip pens.
Start simple, even if you know and are confident that your child is able and capable of more. It is the simplicity and speed of the work that will become a reliable motivation for continuing the creative process.
Choose the types of creativity that are interesting to you, do with your child only what gives you pleasure. Children are like barometers, if you are really bored and not interested, you force yourself to conduct an activity with your child, he will definitely feel it, and your efforts will be in vain.
We bring to your attention the most detailed master class on making funny paper figurines "Funny worms". The worms are so simple and fast in execution that they are suitable for joint creativity for children from three years old, with the condition that the work with scissors will be carried out by the parents.
So, we need: colored paper, glue, plasticine, felt-tip pens, scissors, a ruler.
1. Cut strips from colored paper along the entire available length at least 3 cm wide. For each worm you need 2 strips. Glue the strips together so that the future worm is colored on both sides.
2. Use scissors to round one edge of the strip - this is the head, sharpen the other edge of the strip - this is the tail.
3. Cut out two identical eyes from light-colored paper. The eyes will be the same size if you cut them out of a folded sheet of paper. Draw the pupil in the middle of the eye with a black felt-tip pen.
4. Glue both eyes to the worm's head so that they protrude slightly beyond its body.
5. Decorate your worms. You can safely leave this type of work to your kid. Moreover, you can decorate worms using different techniques.
For example, one worm will be decorated with pieces of small stripes cut in any shape by your child; the second worm will have a color in the form of multi-colored spots made of plasticine, glued with a small finger directly to the paper. And if you want, make a shaggy worm by sticking pieces of cotton wool or woolen thread on the body of the worm. Now it’s not quite a worm, but a furry caterpillar. True, fun!
6. Grease the head and tail on the back of the worm with glue. Making a slight gentle bend, stick the worm to the base. It is important that the base on which the funny worms will crawl is solid, i.e. did not bend. A piece of cardboard covered with bright green paper is best.
7. The worms are glued and "crawl". Observe the baby, if he is tired, then the work is over, and you can praise the little workaholic. If the child wants to continue, then the cherished requests - more, more, you can satisfy by making an apple with the child for each worm.
8. Attach your apples in front of the little worms' faces and remember the funny song about worms from an old Soviet cartoon. “We are worms, we are worms, we love apples very much. And we all eat, eat, eat, eat ... ". Your little one will most likely want to taste the apple along with the worms, so be prepared.
The younger the child, the more primitive the work should be and the shorter the time period for its implementation should be. If the completion of work with an older child can be postponed to the next day, then it is not recommended to do this with a child of 3 - 4 years old.
Good day. Autumn comes, juicy apples are filled with blush. And therefore, in our today's article, we will do a variety of crafts on the theme of APPLE with our own hands. Here you will find interesting and simple crafts for children (for classes in kindergarten and school). And also art crafts on the theme of an apple in more complex adult techniques.
So let's start making apple crafts with our own hands. Let's bite, so to speak, our apple.

Note for craft applications with the photo above "Birthday of the Worm". On the figure of the apple, draw in advance with a pencil rounded lines-ropes to which the children will glue the flags. Without such a line, children cannot make even rows of flags - and they get upset about it. Help them - draw the lines in advance. And they will gladly stick the triangles of flags along this landmark.
Craft APPLE for kindergarten.
Idea number 1
Mosaic filler.
There is this type of DIY crafts, where you need to fill a cardboard frame with a mosaic of translucent paper. If you cut the filling frame in the shape of an apple, you get a good idea for an autumn children's craft. For such an apple craft, you need thick cardboard, an office transparent file and CREPE or TAPE colored paper.

Cut out a frame from cardboard - an apple contour frame. We put this frame on top of the office file. And right into the middle of the apple frame - we generously spread PVA glue right on the office file. And on this glue we put pieces of crepe paper (or paper table napkins). Again with a wide brush we spread them with glue and put another layer of napkins. We dry this structure directly on a polyethylene file. And then calmly peel it off from it. And we glue our craft-apple on the window in the kindergarten from the sunny side - so that the bright sun shines through the ripe apple side.

You can simply stick pieces of colored napkins on a cardboard whole silhouette of an apple without a frame.

But very beautiful and stylish applique apple in the technique of mosaic from fragments of cardboardand.

When you work in kindergarten, and you constantly cut out blanks for applications, after cutting there are many pieces of colored cardboard left. Usually, the cuttings are thrown into the trash (they are too small, narrow - nothing can be cut out of them).
I suggest do not throw away scraps, and put into boxes - in one all shades of red cardboard, in another all scraps of green, in the third blue shades, in the fourth yellow, etc. - so that the colors do not mix, otherwise it is unrealistically difficult to sort later.
And after a couple of monthswhen each box is full, it will be possible to cut these scraps into even smaller pieces and make such a craft apple... We cut out the TEMPLATE-SILHOUETTE APPLE from black cardboard and glue our fragments of colored cardboard onto it. Children really like this mosaic with their own hands. It is better to take pencil glue - since the liquid PVA is too wet, the cardboard fragments get wet and bend up like shards.
Idea number 2
Crafts-stubs
On the subject of an apple.
And here's another interesting perspective, a look at the apple theme. Craft in the form of a nibbled apple. Also suitable for the autumn theme.
You can make such a children's craft in the form of a mosaic of lumps of crepe paper. For small children, you can make lumps by yourself in advance so that they only stick them in the right places.

You can make an apple core out of a plastic or paper disposable plate. Cut it off the sides and let the child paint over the leathery places of the apple with a brush, draw seeds. And add a green leaf.

You can give your child a circle cut out of red cardboard. Tear it slightly from one side and then the child should quietly continue to break the circle into two parts along the middle line. These two halves of a red circle with an uneven break line will become parts of a flat cardboard apple craft (see left photo below).

You can also make such crafts from a roll of toilet paper. Paint it white, stick apple seeds. And add a round fan of colored paper at the top and bottom.
Crafts on the theme of apple.
Idea number 3
In punching technique.
If you take and buy a few of the smallest apples on the market and cut them in half with a knife, then we get a great seal for apple stamps. Pour PVA glue (2-3 tablespoons) into a flat bowl and add red gouache to it. And we get thick juicy paint. We smear it over the bowl so that the depth is not great.
Note. For such crafts, it is better to buy glue not in the stationery department of the store - but in the construction department - there the glue is sold in liter buckets and costs 10 times cheaper than in stationery: it says construction PVA, or universal PVA - but in composition it is exactly the same as and glue for schoolchildren
Now we slap the apple into the paint. And we make stamps on a picture of an apple tree. And a quarter of an apple (or potato) will make a good stamp for the leaves. A simple and quick children's craft on the theme of an apple - slap, slap and you're done.

You can dilute the paint of two shades of yellow and red in a bowl - but do not mix, but so that the puddles lie nearby. Then the apple prints will turn out to be irregular - yellow-red. And you can also make such a craft - apple compote. We draw seeds and cuttings by hand.

And also a seal-stamp for drawing apples can be made from a roll of used toilet paper. We crush the apple-shaped bell of the roll, and fix this bend with tape (so as not to straighten). Such a seal will give us only a contour stamp, and the middle will have to be painted by hand with a brush.

You can make stamps from large apples. And then it will be a separate piece of work. This apple print can be cut and pasted onto a beautiful autumn orange background. Get a postcard for the fall holiday.

Idea number 4
Craft apple
For the younger group of kindergarten.
Here is a great apple-themed craft for toddlers who love to draw with their fingers. Each child needs to be given a mold with two colors - yellow and red. And a drawing of an apple printed on a sheet. And now the main thing is to explain to the children that the transition from red to yellow needs to be made smooth - that is, mixed.


Idea number 5
Crafts apples
With blades.
But below we see a volumetric applique on the theme of an apple tree made of colored paper, where each apple has blades. Made in the form of a booklet.

This is very easy to do. Three identical apple figures are cut out. Each of the figures folds in half. And then, first, two figurines of apples folded in half are glued onto the background - with a fold line to each other. And then on these folded halves we put the opened third part of the apple on top - so that it sticks to the two flaps of the lower parts.
Such a tree as in the figure below is best done collectively in kindergarten. That is, it is enough for one child to make one paddle apple. And then each child will attach his apple to the tree.
Using the same technique you can make a children's craft for older children - an apple book. For chic, the top of the apple can be made in the form of a mosaic of wrinkled crepe paper lumps. And add a fluffy wire worm. The worm can be made of colored paper using the pea technique.

If you don't mind colored paper, you can make a lot of blades for such an apple-book.

Idea number 6
Craft apple
from waste material.
Every home has items that must go to the trash can. Such material is called waste - and with our light hand it can become ornamental material. All sorts of old newspapers and magazines, bottles and can lids can become a filling apple. Let's see how this happens.
Here is a children's craft apple made from junk material - glossy magazines and matte newspapers. First, draw the outline of an apple on a sheet of cardboard. Fill the surface of the cardboard around the apple contour with scraps of newspaper - with PVA glue. And then from the magazine we pull out those pieces of pages that match the apple shade in color - all the green, yellow and red places of the magazines. We tear these pieces into pieces of a size suitable for the craft and start tinkering. We stick it as you like. We enjoy the process.


A plastic bottle is also a waste material, suitable for children's crafts. We cut off the bottom bottom part of two bottles. We join these bottoms together to obtain a round transparent capsule. We stuff more red paper napkins or crepe paper into it. Cut out the stalk and leaves from felt or cardboard. It turns out a quick and beautiful craft on the theme of an autumn apple.

Disposable paper plates are also a waste material, ideal for making an apple for children. The plate has a ready-made round shape and all you need to do is paint it red, add a stem-handle and a piece of cardboard. And you can also decorate such an apple with your own hands with a cheerful worm.

Children's craft
from stained glass paints.
You can draw a large apple on paper. Place this drawing inside a transparent office file. Take bright stained-glass paints and first carefully outline the silhouette of the apple with paints along the contour, and then randomly fill the entire space of the apple with lines-streams from a tube of stained glass paint. Put it all to dry. And then after a day, remove it from the file and stick it on a window or mirror.

Crafts on the theme APPLE
From paper strips.
The simplest apple-shaped colored paper craft is made from a long wide rectangle. We fold the strip into a circle and bend it inside its edge, gluing a handle and a leaf between them. We get a simple silhouette of a paper apple. If you make a lot of these silhouettes, you get a whole dish of apples.

In kindergarten, you can give each child an assignment to glue an apple and then the teacher sticks all the apples on a ring made of a strip of cardboard - you get a beautiful autumn wreath on the theme of Apples.

And here's another craft idea for an apple from paper strips. Here we take the toilet paper sleeve as a basis. We cut long strips of the same size from red colored paper. And we wrap them around the sleeve - forming rings that go through the sleeve. This craft is already suitable for the middle and senior groups of kindergarten - there is a lot of painstaking work.
To make it easier not necessary to close strip in the ring. You can make the stripes shorter and simpler stick their ends to the inner edge of the sleeve - along the entire circumference of its upper and lower holes.

And here are some more ideas for voluminous paper apples, where four strips of paper pasted in a cross on a cross create a paunchy volume due to the fact that their edges are tucked inward.

And here is another simple craft, where strips of colored paper are also used - but not on the apples themselves, but on the boxes for apples.

Craft an apple with your own hands.
In the quilling technique.
If you have a quillink kit. Narrow strips of colored paper, then you can make a beautiful openwork apple craft.
We twist the strips of paper on a thin rod, fold and glue these twisted modules into a single puzzle-apple.

You can make such a quilling apple part of the overall art picture. Print the background on a computer and attach an apple to it. Draw a hedgehog and put such an apple with your own hands on the thorns of the animal.

You can decorate a handmade postcard with a paper apple using the quilling technique.

You can make mini-apple crafts for earrings from the narrowest strips. Almost jewelry work with your own hands on the theme of an apple.

An apple can be laid out from the simplest flagellar skturtok. Don't be smart with shapes. And just make round modules of all colors and sizes. And from them to assemble a puzzle apple.

Or the modules can be in the shape of a drop or the shape of an eye. And be the same in size but different in color (as in the photo of the craft below).

And you can also make a beautiful candlestick-box from an openwork apple using the quilling technique, as in the photo below.

By the same principle, you can make a light box just out of paper. Here is a simple master class on this topic below.
Craft apple
In the form of a lamp box.
Below we see the layout and the assembly diagram of the volumetric crafts - the LAMP IN THE FORM OF AN APPLE.

Cut out the silhouette of a cross from thick colored paper - where the horizontal sides are rectangular. And the vertical crossbeams of the cross have the silhouette of an apple. We fold our cross layout along the fold lines. We coat the edges of the rectangles with glue and connect them to the apple sides. We get a box open on top. We decorate it with a handle and a piece of green paper.
You can put a pill candle in such a box (it is very convenient to light a candle at the bottom with a long match or long spaghetti pasta). A small candle of heat will not burn much paper.
And if you want without fire, then you can put an LED garland (New Year's) in the apple box and it will glow there and flicker with lights that will seem red from the colored paper of the apple. Good a night light for a children's room.
Craft apple
In realistic technique
A quick papier mache.
And here is the papier-mâché technique. Where we sculpt an apple with our own hands, as if from paper plasticine. And it turns out like real, alive.
In this technique, you can make apples and mushrooms and cakes just like real ones. My daughter and I made Santa Claus last winter using this recipe. It turned out very nicely.

Here is a detailed step-by-step master class in photos and explanations.
What do we have to do. We take a paper cassette holder from eggs. Better the one that is rough, not too pressed.
Soak it in hot water. We knead it with our hands and tear it into pieces. Can be left overnight.

Next, use a mixer to loosen this soaked paper into a homogeneous mass. I did it without a mixer, just kneading it with my hands, too (children really like to poke their elbows in this luxurious slurry). By intuition, I also put a bit of starch there - a handful, my soul asked. But you can do without it.
And all this thick slurry needs to be squeezed out on a rag (like cottage cheese is squeezed out in the village). They put a rag (or a pillowcase) in a bowl, pour liquid into it, wrap the rag in a tourniquet and press hard with your hands squeezing out moisture. You can put a stick into the tourniquet and twist the lever-stick in your hands, you will tighten the cloth of the rag harder, squeezing out more moisture. You can simply press down on this bundle with a heavy stone and leave it lying in a basin, the moisture will itself move away from the weight.

As a result, we should get a thick mass similar to paper clay. We begin to make our apple from it. We roll a rough ball in our hands. And so that the sides are smooth and not rough, you can roll it in a round bowl.

Next, we dry our ball until it is completely dry and hardened. It turns out to be not very smooth as we would like. Therefore, you can make amends. Spread with PVA glue, cover with shreds of white napkin and again coat with PVA on top - smooth it with your hands. Dry.
We make an apple stalk from wire that has been wrapped with a napkin dipped in PVA glue.
Next, we paint our apple with a special paint-pat. We combine PVA glue, starch and gouache. Dilute to a consistency close to liquid sour cream. Let's give several coatings of such different colors. And with this coating we paint the apple. First, in a yellow-green color. And then, as it dries up, draw red-orange stripes on it with a thin brush.

Crafts Apples
DIY felt.
If you have felt fabric (or fleece), then you can make these sewn apples with your own hands. You can make flat apple slices out of felt in a cut as on the left handicraft below. You can decorate them as a brooch, or make a round autumn wreath out of them. You can make plump apples from two layers of sewn felt, filled with padding polyester.

The joining seam on a sewn felt apple can be BUTTONED (as pictured above) or regular LITTLE (as pictured below).

A pattern for such an apple can be any drawing of a silhouette of their Google.
If you sew several apples and pears, then you can decorate the autumn wreath with your own hands with them.

Craft apple,
embroidered with a cross.
If you already know how to hold a needle in your hands, then you can make an apple craft in the form of cross stitching. Buy a hoop (frame holder), a piece of canvas (mesh fabric) and embroidery threads (floss).

Here are two small patterns for embroidering an apple with a cross on canvas.

DIY apple
Crocheted.
If you know how to crochet, you can make such a round red apple filled with synthipon with your own hands. You can knit a hole in an apple - like a finger on a glove, and then push it inside. And put a knitted worm in this hole.
DIY OWL craft (77 ideas for children).
Good luck with your work.
Olga Klishevskaya, specially for the site


