Table of contents [Show]
A newborn baby is still so small and helpless that it is not able to warm itself up at night, covered by a blanket. How can you help him? How to preserve precious warmth by giving a cozy sound sleep not only to your baby, but also to yourself? Different families get out of this situation different ways, but today we want to talk about a very convenient, and most importantly simple tool - a sleeping bag. You can buy such a simple thing in any children's store, but you can give yourself the pleasure of sewing it yourself. The waiting period for the baby is the optimal time for such a pleasant work. The baby will be warm not only from the comfortable little thing, but also from the caring mother's hands, gently stitching each line.
In anticipation of the birth of a baby, mom needs to prepare everything necessary for him, for example, a sleeping bag. Pros and cons of sleeping bags.
A newborn sleeping bag is far superior to a blanket and here's why:
- thanks to the comfortable location inside the bag, the baby freely turns over in a dream;
- in the version with a blanket, after turning the baby over, it remains undressed, which means that it becomes cold, choosing a sleeping bag, you eliminate this problem - the baby is always covered, which means that the whole family sleeps peacefully;
- feeding can be carried out directly in the bag, so the baby will not experience temperature changes;
- compact version compared to a blanket, which means that it will take up less space when traveling;
- the safety of the structure eliminates the danger that it will be difficult for the baby to breathe if he hides himself with his head, as can happen with a blanket;
- a grown baby up to a year old sleeping bag will prevent getting out of the crib;
- more convenient option for use in a stroller: always securely fixed and very quick to put on.
We list the cons that this product has:
- Diaper change. Check the baby for changing clothes, as well as for the very process of changing the diaper, you need to open the bag. A child, getting out of his cozy place, can take a walk, which means that you will have to calm him down and rock him in order to put him to sleep again.
- Buying a bag is no longer for a newborn baby, but for a slightly older one, there is a danger that he will not be able to get used to the new sleeping conditions.
Buying a sleeping bag in the store or sewing it yourself is the decision of each individual mother. Today you can find a wide variety of materials for products. Thus, it is easy to find the right option for any season.
When choosing a sleeping bag, you should focus on the child's age and the required envelope thickness, it is also important to pay attention to the quality of tailoring and fabric. sleeping bag
When making a choice before buying, be sure to pay attention to the following important points:
- The size. Opt for longer sleeping bags (stock + 10-15 cm in height). It is not worth taking it back to back. Having slightly increased in height, the baby will be uncomfortable in such a sleeping bag, he will not be able to comfortably stretch and stretch his legs. Too large size also does not fit. The baby may just get confused there. When choosing, you need to focus on the following parameters:
- 65 cm - from 0 to 4 months;
- 75 cm - from 4 to 9 months;
- 90 cm - from 9 to 15 months;
- 105 cm - from 15 months and older.
- Material. Pay close attention to the components of the bag - they must be completely non-allergenic! In terms of temperature, there may be such options: from 20˚С - cotton; 17-20˚С - with a small insulation; below 16˚С - insulated; very warm and quilted options are a great choice for walking in spring and autumn. The recommended option for washing such things is an automatic machine at 40 ° C. Please note that the sleeping bag should be light.
- Sleeves. There are a lot of options: envelopes, with sleeves, with detachable and sewn-on cuffs, and others. When buying an envelope with sleeves for a newborn, choose the option with sewn-on edges or having the ability to fasten them - this way it is less likely that the baby will scratch itself in a dream. When planning a purchase for the long term, choose the option with detachable sleeves and the ability to shorten the length by moving the buttons. From birth, the sleeveless option is perfect for children, because in this case the child will have good thermoregulation. Heat does not come out "through the arms", which means that the body will not overheat, which has a beneficial effect on further good health and resistance to colds.
A wide range of sleeping bags allows you to choose an option for every taste, but it is important to monitor the quality of the fabric and tailoring so that the baby is comfortable and safe
- Neck. A prerequisite is that the gap between the neck and the neck should be at least 1.5-2 cm. Avoid tight-fitting options that can rub the skin or interfere with free movement.
- Clasps. For convenience, manufacturers usually use a zipper as a lock. Such a fastener allows you to quickly unfasten and fasten the sleeping bag. Less common options are with Velcro, buttons and buttons. For older babies, they produce options with a zipper that closes from the bottom up, so the child is protected from accidental opening during sleep.
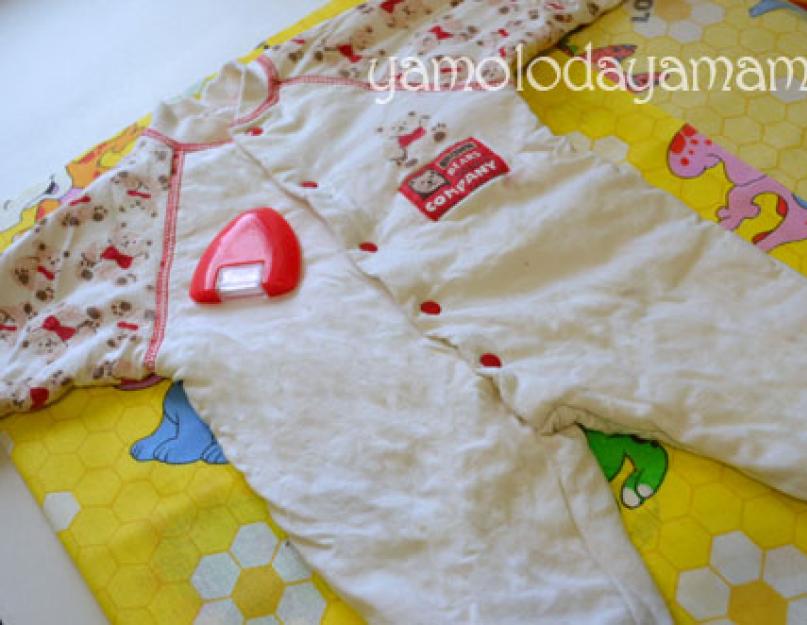
- Embroidery, appliques. They are considered unnecessary elements, as they can provoke chafing of the baby's skin. Perfect option - printed delicate designs on soft fabric. Solid color option would also be appropriate.
If you have filler in your sleeping bag, read the information on how to wash it. Taking care of such things is special.
TOP-7 ready-made sleeping bags
There are a lot of sleeping bag models on sale today. It is not difficult to get confused among such a variety. A number of models are equipped with the ability to clip on handles for carrying babies. From some models, after opening the envelope, you get a rug on which the baby can lie down and play. Colors, materials, styles - manufacturers try to delight mothers and fathers. Let's look at some examples:
- COCOBAG red Castle - Made in France. Its shape really resembles a bag, which has a wide elastic band under the armpits. The pouch has side and bottom seams with zippers, making it easy to put on.
- George's beautiful Sweet Dremas has a nice light blue striped print. There is an opening mechanism familiar to all models of this manufacturer - there is a zipper on the side and bottom, and there are fixing buttons on both shoulders.
- Polish ECO sleeping bags have their own pleasant difference - they have sleeves. Such a sleeping bag will be convenient during a walk. Thanks to the convenient design, the legs and arms of the toddler are always warm and free in movement.
- The Chinese JYQ envelope has a slightly different style: the lower part of the body is "packed" in a pouch, and the upper (starting from the shoulders) is fixed in two halves with Velcro. Made from fleece.
- The SwaddleDesigns muslin sleeping bag is designed for use in a crib, in a room with a temperature of 22-24 ° C. The zipper is located in the middle and can be unfastened from the top or bottom. This zipper design allows you to change the diaper without disturbing the baby.
- The Summer Infant textile envelope is made in the USA. This option will be convenient for both baby and mother. The zipper will allow you to unfasten the sleeping bag immediately around the entire perimeter. The sleeves have a wide cut to provide a little ventilation.
- The CAM SACCOSPASSO sleeping bag is convenient to take with you in the stroller. This will be a good option during the fall / winter season. The cape on the legs is completed with a warm envelope. There are holes around the perimeter for fixing with seat belts. A hood can be formed.
How to sew a sleeping bag with your own hands?
Convenient envelope can be sewn by hand. Please select suitable type fabrics: wool, cotton, jersey, flannel, fleece or something else. The choice of fabric will depend on the season of use. When planning sewing a sleeping bag for the street, buy insulation, holofiber or synthetic winterizer. Sewing is carried out by means of a pattern. Below we will offer you various options manufacturing.
When sewing, it is important to consider the following important points:
- When cutting out the back, make sure that it is solid. The seams will interfere with the baby while sleeping. The front halves are connected with a zipper.
- The sleeveless model requires buttons, Velcro or buttons to be sewn on top.
- When planning to sew an insulated sleeping bag, prepare paired parts for sewing inside a warm lining.
- It is recommended to sew the warmed version for use in a stroller in squares or in another shape so that the lining does not deform during wear.
- It is not necessary to decorate the envelope with decorative elements, but still wanting to decorate the work, avoid decorations on the back, otherwise they will "bite" into the baby's body.
Zip fleece bag
Working with fleece will be very pleasant: the material does not crumble, stretches a little and easily takes the required shape. In the absence of experience in sewing work, you can still easily cope with this business. We sew a model for children of 6 months of age. See below for a master class on making:
- We apply the pattern of the back and front to the fabric, securing it with needles and cutting out the appropriate shapes (front and back of the product in photo 4):
- Now you need to insert the zipper. Fold the front part in half with the right sides together and sew in a straight line from top to bottom, stepping back from the edge about 1-1.5 cm. Cut the resulting "pocket", attach the zipper, as shown in the photo:
- Baste the zipper, then machine stitch along the fabric. Flip the garment right side up and open the center seam. Sew the front and back of the garment inside out. Decorate the armholes and neckline.
The simplest bag with Velcro / buttons
Some people don't like to mess with sewing in a zipper or want to use a lock for some other reason. There is another scheme for making a sleeping bag - a simple and convenient style with Velcro fasteners that are attached to the shoulders.
To work, you need the following materials:
- pattern;
- fabric (fleece or cotton);
- oblique inlay;
- velcro.
The pattern and sewing principle is the same as in the first example, except for the zipper steps. Follow the simple photo instructions:
Knitted sleeping bag
Having no sewing skills, but at the same time skillfully using knitting needles, a mother can knit a bag for her unborn baby. Such cocoons most accurately repeat the shape of the baby's body and are more comfortable compared to synthetic winterizer options. You can knit with woolen or combined (cotton + wool) threads, then the sleeping bag is completely made of natural materials.
For one knitted product a newborn will need about 400 grams of wool. Also prepare buttons or zippers, depending on which pattern you choose to knit. If necessary, buy knitting needles 4, 5, circular knitting needles 3 and 5, as well as an auxiliary knitting needle. We offer you several photo options for knitting patterns:
Loving parents, even before the baby is born, begin to think about the conditions for his comfortable sleep and rest in the nursery. After buying a quality bed, you should properly organize the sleeping place itself. One of the original and very comfortable sleeping accessories is a sleeping bag. How to choose a sleeping bag or sew it yourself, tie it and then use it correctly is described in the article.
Benefits of Newborn Sleeping Bags
Recently, many parents prefer to choose not "classics" - blankets, and sleeping bags for babies. The main advantage of a sleeping bag is the ability to reliably cover a child who constantly opens up and freezes in a dream. And parents cannot be on duty all night at the crib with an infant to straighten the blanket. The bag is especially suitable for restless babies who at night prefer to roll from one corner of the crib to another, throwing off the blanket, which makes the child often wake up and cry. It is for these occasions that newborn sleeping bags were created. Such an accessory will become a real find in the winter or in the off-season, when the heating has not yet been turned on.
Other advantages of a sleeping bag for a child:
- The kid does not open up at night. This is a very significant advantage. Especially in winter period a sleeping bag for newborns becomes a real boon for parents.
- The ability to feed the newborn without removing it from the sleeping bag. If the apartment is cool, the baby can be capricious at the moment of taking him out of the heated bed, and the sleeping bag will relieve him of unpleasant sensations.
- Sleep comfort and coziness - there is no need to tuck the edges in the sleeping bag so that the child is truly warm and sweet to rest. Newly born babies are accustomed to a cramped "cradle" in the mother's womb, so a sleeping bag will come in handy.
- A sleeping bag is safer for newborns than a blanket. The fact is that the child can either pull the blanket over himself or slide under the blanket himself. The result is the same - the child's head is covered. This can make breathing difficult, and the newborn is unable to get out of this position on its own. And when using sleeping bags for newborns, the likelihood of suffocation is much lower.
- A grown-up baby sleeping in a sleeping bag will not be able to climb over the side of the crib on its own.
- It is very convenient to take with you on a trip or trip, while you do not need to worry about the hanging edges of the blanket, which is not always hygienic. At the same time, on any trip, it will be convenient for the child to relax in the conditions to which he is accustomed at home.
Conclusion: A sleeping bag is an important and sometimes irreplaceable accessory that provides a child with excellent sleeping conditions.
Are there any disadvantages to a sleeping bag?
- the sleeping bag is not very comfortable for a newborn. This can especially manifest itself when the child is used to sleeping open, and then suddenly he is placed in an isolated space. However, if the baby sleeps in a sleeping bag from the first days, then such problems, as a rule, do not arise;
- If the sleeping bag is regular, and not with sleeves, then the baby's arms will be uncovered and may freeze. In a warm room, this drawback, of course, is not relevant.
- It is advisable to put the child in the sleeping bag in a diaper, which will not allow the child to wet the sleeping bag.
- Changing a diaper at night without waking up the baby will be very uncomfortable. A sleepy baby needs to be taken out of the bag, undressed, diaper changed, dressed and put into the bag. After such manipulations, many children wake up completely. Only very young children do not have this problem, because they usually only need one diaper for the whole night.
How Do I Pick a Good Sleeping Bag?
Even sleeping accessories have their own characteristics and features, they also have sleeping bags. When choosing, you need to take into account several indicators, which are described below.
- Sleeping bag size
The product must be selected according to the child's height. So, newly born children buy bags 65 cm long, for babies 3-9 months old sleeping bags 70-75 cm are suitable, from 9 months to 1.5 years the size of a sleeping bag should be at least 90 cm.Old children need a sleeping bag of about 100 -110 cm and more.
Sleeping bags are designed for children under 4 years old! There is a risk of confusion in a large model. Therefore, a length of 10-15 cm is allowed more than the growth of the baby from the neck to the foot. In order not to be mistaken with the size, measure the baby's chest circumference and height before buying.
To choose a product for a specific baby's height, it is worth adding 15 cm to the body length from feet to neck, so it is recommended to carefully measure your child before buying.
- Composition
As a rule, sleeping bags are made from hypoallergenic, breathable, natural materials. The lining is usually made from 100% cotton, and the upper is made from polyamide fibers that shape the garment and keep it warm. Taking care of such a sleeping bag is as easy as shelling pears - it is machine washed at a temperature of 40-60 degrees. You should not buy products made from artificial or mixed fabrics.
- Are sleeves needed?
Usually the sleeves are sewn onto sleeping bags intended for newborns. This will help keep the handles warm and protect the baby from accidental injury - scratching the face. If you decide to choose a model with sleeves, then they should not be narrow, because the baby still needs to move. In more expensive sleeping bags, the sleeves even unfasten, which will be convenient at an older child's age and in a warm room. There are models in which the length of the sleeves is regulated.
- Sleeping bag neck
The neck should also be spacious so that the child is not in any way constrained by the fabric. Ideally, a distance of 1.5-2 cm should remain between its neck and the neck of the sleeping bag.
- Back of the bag
To make a newborn or an older child comfortable to sleep, the back of the sleeping bag is chosen smooth, without appliqués, embroidery, otherwise the product will rub delicate skin at night.
- Clasps
In the sleeping bag, as a rule, a zipper is sewn in, which is located right in the center of the product (it is easier to change the baby's clothes this way). For older children who are already actively turning over at night, it is better to buy a sleeping bag with a zipper that unfastens from the bottom up - so that it does not disperse by itself or the child cannot unfasten it himself. On the back, the fasteners are not made so that they do not interfere with the children, but on the shoulders, many products have additional buttons - to adjust for growth.
Sleeping bag with zipper
Sleeping bag with buttons
Features of using a sleeping bag - season and temperature in the room
There are some recommendations for using sleeping bags:
- Lightweight cotton models are usually used when it is warm in the apartment - above 22 degrees.
- Insulated products will come in handy if the temperature drops to 19-22 degrees.
- Warm, quilted sleeping bags are needed if the baby sleeps at temperatures below 19 degrees.
The temperature at which a particular sleeping bag model is used is always indicated on the product label.
What to wear for the baby for the night?
In children with normal thermoregulation, it is not difficult to choose clothes for sleeping. If the thermometer is 22 o C and above, a body with short sleeves or even one diaper will do. The baby is placed in a simple cotton sleeping bag.
If the temperature is approximately 20 o C to 22 o C, wear a long-sleeved bodysuit and pajamas top with a cotton sleeping bag, or just a bodysuit with a warmed version.
And when the thermometer drops to 18 o C or even 16 o C, which is considered the best microclimate for babies, along with high levels of humidity, they use the most insulated sleeping bag and put on a little man, pajamas with panties or sliders along with a bodysuit with a long sleeve ... Basically, you will quickly find out what clothes to wear on the baby so that he does not freeze, but also does not sweat.
Questions
- Why do they sew sleeveless sleeping bags, the child will freeze?
In fact, babies are very susceptible to overheating. Thermoregulation in babies is still being established, and if the baby is hot, heat transfer occurs, which is just carried out through the free handles.
It should be remembered that constant thermal comfort is just as harmful as freezing - the mechanisms of thermoregulation do not "start" properly, and as a result, the child often suffers from ARVI and ARI. If you observe a sleeping baby, you will see that he often sticks his arms out from under the blanket, and this is normal.
So do not be afraid to buy sleeveless models when the temperature is more or less stable in the apartment (house).
- How do you know if your child is very hot?
Hands are not the most accurate reference point, they often feel cold. Touch the baby's tummy or the back of the head, if it is sweaty, hot, it means that it is hot. Uncover the child, change if necessary and give a drink.
- How to know if the temperature in the room is normal?
For these purposes, there are room alcohol or electronic thermometers. Some include indoor humidity readings. If it is less than 50%, you should think about ways to moisturize. The most effective is with a special device, a humidifier. We also read: normal temperature in the room with a newborn baby
- What if the baby slips into the sleeping bag?
If the size is selected, taking into account all the nuances and recommendations, this will never happen. The very narrowing in the chest area, as well as the cutouts for the arms, serve as an obstacle.
- The bag with the "insulation" seems thin. Maybe an extra blanket?
Look not at the thickness of the product, but at the label and the temperature threshold at which it is used. Modern materials retain heat well, despite the fact that they may seem unreliable. As for extra cover, the blanket cannot be used with a sleeping bag!
We also read:Changing covers Summer infant swaddleme (Summer Infant): comfortable swaddling
Do-it-yourself sleeping bag for newborns
Even those moms who are not too familiar with the sewing machine can sew a sleeping bag for newborns with their own with my own hands... To sew a sleeping bag, you need to buy a good one, natural fabric (cotton, wool, knitwear, flannel, etc. It all depends on the temperature in the room and the time of the baby's birth. If you are sewing a sleeping bag for walking outdoors, you can make an interlayer of some kind of insulation, for example, synthetic winterizer or holofiber. case, you better know what a newborn baby needs), and also choose a pattern of the right size. The order of cutting and sewing is as follows:
- Pattern. You can make a suitable pattern if you use a child's clothes for this purpose. The process is quite simple - you need to take sliders or a T-shirt, mark the outline of the clothing on thick paper, then add a little margin for the seams and room for the body. The resulting bag should not squeeze the child in any way. The length of the sleeping bag, as already noted, is calculated based on the growth of the baby from the neck to the feet plus 15 cm. One piece is cut out for the back, and the front part of the bag can be cut out both as a one-piece piece or from several pieces (make an interesting applique).
- Cut the fabrics. To cut the backrest, you need a single piece of fabric so that the seams do not interfere with the child's sleep. It is better to cut the front of the sleeping bag from two parts to sew in a zipper, but the simplest option would also be a one-piece piece of fabric with a zipper at the bottom.
- Sewing. After the pieces of fabric are cut in, they are turned with their front sides inward, grinded, and a zipper is sewn in from the bottom (or in the middle). Velcro or buttons can be sewn on the hangers. To sew a warm sleeping bag, after cutting out the parts, insert one layer of padding polyester between each two pairs, and only then grind the parts together. You can decorate the sleeping bag in any order - using ribbons, stripes, etc.
Master class: do-it-yourself sleeping bag for a newborn
How to tie a sleeping bag?
For women who knit well, it will probably not be difficult to make a knitted sleeping bag for a child. Due to the repetition of the body contours and a pleasant fit, the child's sleep in such a product will be the most comfortable. For knitting, you need to purchase wool, or wool mixed with cotton, that is, completely natural materials.
To knit a sleeping bag, a newborn needs about 500 g of wool, buttons, zipper. The tool that will be needed is 4.5 knitting needles, 3.5 circular knitting needles, auxiliary knitting needle. To make an elastic band, alternate the facial and purl loop... The holes for the buttons are closed in the front row for 2 loops, the same number is recruited from the inside out.
The back of the sleeping bag is knitted by a set of 49 loops on a 5 knitting needle, the knitting technique is the front surface. In each 2nd row, add a loop until 59 loops are reached. If the bag is knitted for a newborn, with a length of 48 cm, the loops for the armhole are reduced to 53 loops. After about 15 cm of such a fabric, 11 loops are closed in the middle, the rest are knitted separately. At the same time, the side loops are also closed to form the shoulder bevel. Loops should be closed about 17 cm from the beginning of the armholes.
The front half of the sleeping bag is made face stitch - dial 69 loops, add side loops in each 2nd row upon reaching 79 loops. The front part of the product can be knitted in any other technique that you like. After 12 rows, the loops are divided, then they are knitted separately, after 48 cm an armhole is made (in the same way as described above).
If the sleeping bag has a hood, sleeves, then they are knitted separately with 4 knitting needles with an elastic band. Further, all parts of the sleeping bag are sewn together, a fastener is sewn in, if necessary, buttons. After finishing work, the finished product must be washed, after which you can use it for its intended purpose!
You can choose and buy sleeping bags in the Obstetrics online store -
Proponents of the practice of sleeping with a baby know that, in addition to the advantages, this concept also has certain disadvantages: after months of being close to parents, it is extremely difficult to "separate" the child. In general, if you are determined that your heir or heiress slept in a separate bed from the very beginning, this is one of the most important things to prepare before you appear in your house. new person... It is not a secret for anyone that small children open up at night and do not cover themselves on their own, so it is the responsibility of the parents to take care of the baby's warm and comfortable sleep. There are many solutions, everyone finds their own "magic wand", but sleeping bag for newborn - in fact, one of the simplest and most effective "twigs". Of course, you can go to the nearest children's store and buy the required accessory, however, it is cheaper and more interesting to do the necessary thing with your own hands.
Sleeping bag for newborns - 5 ideas that you can implement yourself:
1. Simple zippered fleece sleeping bag
Fleece is a very convenient material to work with: its edges practically do not crumble, it stretches slightly and easily takes the desired shape. Even if you have few skills in working with threads, needles and patterns, you will certainly master this project: it is accessible and understandable. Pink color sleeping bag for newborns decorates the product by itself, however, you can easily continue the idea, taking it as a basis and adding your own "comments".
Master class and free pattern
2. Simple sleeping bag with ties or buttons
"Lightning" is good, but not suitable for everyone: someone does not like it, someone does not know how to sew, someone simply does not like the concept. Then you can sew a completely touching and “home” sleeping bag with ties - they look so soulful that it is very difficult to refuse such a project! Almost unrealistic.
Pattern and examples of work
3. Sleeping bag for a newborn with Velcro
If you are a person of speed, if you need to get things done quickly, consider Velcro. At first glance, it may seem that these gizmos deprive a sleeping bag of all possible charm, however, if you wish, you can come up with a very worthy solution - both comfortable and elegant at the same time.
Example of work - detailed photos
4. Rectangular newborn sleeping bag
Down with complicated patterns! Yes, as a matter of fact, down with patterns in general! A sleeping bag for a newborn can also be sewn from a regular rectangular cut of suitable fabric. Of course, you will need to pay attention to some details, however, in general, the work is much simpler than standard options. And by the way, such things look no worse!
Master Class
5. Sleeping bag for a newborn in the form of an envelope
This option is definitely the easiest to use. Of course, he also has his drawbacks, however, one big advantage cannot be taken away from him: put the child in - and you're done. Minimum body movements, maximum benefit.
Video tutorial
Discussion of the article
All parents want to provide their newborn baby better conditions and comfort. Various things help them in this, one of which is a sleeping bag for newborns.
pros
- The use of the bag will ensure that the baby stays in a comfortable environment during sleep. The crumb will not open, and the discarded blanket will not cause the baby to freeze.
- Mom can feed the baby right in the sleeping bag. She does not need to remove the baby from the heated bed, which will cause the baby to freeze during the night feeding.
- Inside the sleeping bag, the baby is cozy and comfortable, because the baby is used to the cramped conditions of being in the mother's womb.
- The fabric, “hugging” from all sides, pleasant to the touch, gives the baby not only warmth and comfort, but also safety. In a baby sleeping bag, the baby will sleep on its back (this position is considered the best for a newborn's sleep), and there will be no dangerous objects near the face. Parents may not worry that the baby is entangled in a blanket or thrown over his head.
- When the baby is a little older, sleeping in the sleeping bag will be an obstacle to getting out of the crib.
- It is convenient to take a sleeping bag with you on a long trip. In it, during the trip, the child can sleep in the same conditions to which he is used to at home.
A sleeping bag will create a baby comfortable conditions for sleep and wakefulness Cons
- The baby should only be placed in the sleeping bag in a waterproof diaper.
- Changing a diaper sleeping in a baby sleeping bag will not work quickly. While the mother checks the condition of the diaper and changes it, the baby can finally wake up and play out.
- Some babies do not want to sleep in such a bag, especially if the baby slept immediately after birth in other conditions, to which it has already become accustomed.
Tips for choosing
When buying a sleeping bag for a newborn baby, you should take into account some of the features of such products in order to choose the best model for the baby.
The size
The sleeping bag should be suitable for the child's height. Newborns are bought products up to 65 cm in size, babies 4-9 months sleep in a 75 cm bag, a 90 cm model is used for 9-month-old babies and up to 15 months of age, and older babies buy or sew a sleeping bag of 105 cm or more.
Usually, the length of the bag is chosen so that it exceeds the child's height by 10-15 cm (the height from the feet to the neck is taken into account). So for a successful purchase, you must definitely measure your baby.
Consider the growth of your baby when choosing a sleeping bag Composition
Choose a product for your child made of natural, breathable and hypoallergenic material. As a rule, the lining in baby sleeping bags is 100% cotton. Also, the composition is important for the care of the sleeping bag. Your best bet is to buy a machine-washable bag.
Choose only natural materials for your baby Sleeves
Many sleeping bags for newborns have sleeves, but there are also sleeveless models. If the selected sleeping bag has sleeves, they should be wide so as not to interfere with the baby's arms. On some bags, the sleeves may come unfastened. There are also products with adjustable sleeves.
Sleeping bag with sleeves will keep your baby warm on cool nights Neck
It should not squeeze the child's body. Choose a bag in which the neck fits the baby loosely, and the gap between this part and the baby's neck will be about one and a half centimeters.
Back
The bottom of the sleeping bag should be smooth and without any finishing (decorations, patterns) so that the baby does not experience discomfort during sleep.
Clasps
In most sleeping bags for newborns, the zipper is located in the middle so that it is easy for the baby to change clothes. In models for older children, the fastener is sewn in such a way that the zipper needs to be unzipped from the bottom up (this will prevent accidental opening at night).
In addition, many baby sleeping bags have rivets on their shoulders. In some models, they can change position, adjusting the sleeping bag to the baby's height. As a rule, there are no fasteners on the back.
When should you use it?
The use of a sleeping bag for sleeping with a newborn and older children is influenced by the time of year, as well as the temperature in the room.
If the product is a light cotton sleeping bag, then the baby can sleep in it at room temperature + 22 ° C.
At a lower temperature (from 19 to 22 ° C), the crumb is placed in an insulated bag model.
There are also products used at room temperatures below + 19 ° C.
Refer to the sleeping bag label for the temperature range for the purchased model.
Sleeping bags are available for both the hot season and the cool period. How to sew with your own hands?
To make a homemade sleeping bag for a baby, you need to choose a suitable pattern and buy high-quality fabric (knitwear, cotton or other natural material).
Patterns
The most in a simple way to build a sleeping bag pattern for a child will use the clothes that the child wears. Paper is applied to the T-shirt or sliders and the contours of the clothes are marked, then a few centimeters are added on each side so that the product does not squeeze the child and there is enough fabric for the seams. The length of the bag is noted depending on the height of the baby, adding 15-20 cm to the distance from the shoulders to the feet.
For the back, one piece is cut out, and the front part of the bag can be cut out in the form of a one-piece piece or from several pieces (make an interesting applique).
Sewing process
The cut layers of fabric are sewn with the right sides to each other. A zipper is sewn into the lower part of the product, and the fasteners on the shoulders can be represented by buttons or Velcro. If the model is warm, insert a synthetic winterizer inside. The front part can be decorated with ribbons, appliqué and other decorative elements at will.
How to knit?
If the mother does not know how to sew, but has been knitting for a long time, she can make a sleeping bag for the baby with her own hands, knitting it with knitting needles. Such bags are more convenient than padding polyester ones, and follow the contours of the baby's body. In addition, they are completely natural, since wool is usually used for knitting.
To knit a sleeping bag for a baby, purchase about 500 g of wool and, depending on the design of the product, a few buttons or a zipper. Prepare knitting needles 4 and 5, circular 3.5, and auxiliary knitting needle for work. For elastic, knit the front and back loops alternately, for the holes for the buttons in the front row, close two loops, and on the wrong side, cast on the same number of loops.
For the back of the newborn bag cast 49 sts on 5 and knit, adding one stitch in every second row to 59 sts. After 48 cm, start decreasing the loops for the armholes to 53 loops, and after another 16 cm, close 11 loops in the middle, and knit the rest separately. Close the side loops at the same time to create shoulder bevels. All loops should be closed 17 cm from the line of the beginning of the armholes.
For the front, cast on 69 stitches, knit in stitch or using your desired pattern. Add up to 79 stitches in every second row along the side stitch. After 12 rows, divide the loops and knit separately, 48 cm from the first row, make an armhole, as on the back of the product. As with the back, bind off the middle 10 sts and also bind off the side stitches in every second row.
Knit the sleeves and hood with an elastic band 4. Gather the product, sew in the zipper and sew the sleeves and hood to the back and front with circular knitting needles, making 1 hole for the button on each side. Close the loops and sew on the buttons - the knitted sleeping bag is ready.
In order for a newborn's sleep to be sweet and healthy, very little is needed. Parents make the bed with love, choose toys ... Someone even sews. And since we are talking about needlework, we also suggest taking care of a cozy pajamas, more precisely, a sleeping bag for a newborn - it can also be sewn without difficulty according to our master class.
Why sew a sleeping bag for a newborn?
The advantages of using a sleeping bag for a newborn is its free cut that does not restrict the movement of the legs, and the stitch floors of the model do not allow the bag to open up in a dream, which means that the baby freezes. This option is suitable for the summer, and for the winter you can sew a similar model, but from a warm fabric (for example, fleece) or insulated with padding polyester or silicone.
In this case, the fabric for the product must be taken from cotton, without synthetic impurities, not rough and high-quality dyed.
We sew a sleeping bag for a newborn: a master class
How to make a sleeping bag pattern for a baby? You will not literally need it - instead, we advise you to take ready-made rompers or overalls that fit or are slightly large for the child.
So, in order to cut the product, fold the fabric in half, straighten all the folds and creases. On top, put the existing ready-made sliders and circle them with chalk, stepping back from the edge by 7-8 centimeters (there is no need to indent along the edge of the strap and armhole).

Cut out the details; on the front, reduce the strap length by 3-4 centimeters.


Treat the armhole and shoulder straps with a bias tape, having previously fixed it with tailor's pins.


The front of the product can be decorated satin ribbon in the form of a bow. Lay the front part face up on the table, apply tape, baste and stitch it. Then sew a bow in the center.


Two halves of the future product are ready; you can start assembling the sleeping bag for your newborn. Fold the back and in front of the right sides inward, secure the edges with pins or sweep.
Stitch one centimeter from the edge. Neaten the cut. Turn out the future product. Punch the loops on the straps and sew on the buttons.


A comfortable cotton pajamas bag for your baby is ready. As you can see, it is quite easy to sew such a cute and simple sleeping bag for a newborn!
By the way, it is not a shame to give such a little thing to a friend who is expecting a child or has already become a mother. After all, a gift made with your own hands, especially for such an occasion, will not leave anyone indifferent. The name of the child or his initials can be embroidered on the ribbon. In any case, the baby and his mother will be very happy with your gift, and most importantly, the attention. And, undoubtedly, your sleeping bag for a newborn will not lie on the far shelf, but will be used all the time until the baby grows out of it.
nastay specially for the site I am a young mother
2013,. All rights reserved. In the case of full or partial use of site materials, an active link to the source is required.
The smallest
The length of the envelope pattern is 80 cm, from which it is clear that a 50-cm newborn is likely to drown in it. An envelope, so to speak, for growth. But, in my opinion, this envelope is intended specifically for small babies, therefore, do not be discouraged if you want to sew a thing for a child at the right time, but take a scale less than 5 cm.
FLEECE ENVELOPE
Can but to sew the envelope not from fleece, but, for example, from terry cloth or fromcalicowith padding made of synthetic winterizer.
You will need:
Fleece fabric 80 cm long and 140-150 cm wide
Details:
1 - base;
2 - front part of the cap;
3 - the front of the pants.
Operating procedure:
Draw the pattern to scale. Cut out the details of the envelope without seam allowances. Cut out the front part of the cap (part No. 2, see drawing of the cap) with an allowance for the lapel. Stitch the details in accordance with the drawing and drawing (you can make the seams there). Connect the corners of the top of the already sewn cap to each other and fix with a thread manually. Cut into narrow strips for the brush from the remnants of the fabric. Collect the strips in a brush and bandagethem in the middle. Sew the tassel by hand to the cap. Seams can be made with an overlock, or you can sew a bias tape over all the edges of the envelope.
COVER FOR CHILD CAR SEAT (cradles)
You will need:
Fleece fabric in size: (chair length + 26 cm) X (chair width + 26 cm); elastic tape or bias tape, elastic
Operating procedure:
Draw a pattern in accordance with the dimensions of your chair, where AB \u003d chair width + 26 cm, BD \u003d chair length + 26 cm. Find the place of the opening for the child's head by experience. To do this, place the child in a chair and determine the distance from the top of the back of the chair to the head with a measuring tape, then measure this distance on the pattern with an increase of 13 cm and draw a circle of the required diameter. Cut the blanket out of the fleece. Treat the cut of the hole with a bias tape or elastic tape. Treat the cut of the bedspread with a hem for later threading the elastic into it (leave 2 cm of the unstitched area in the hem). Slip elastic into the hem. Adjust the tension of the elastic by placing the blanket over the chair.
15.11.2002
The smallest
177 $ per baby blanket - isn't it expensive ?! I don’t know how convenient it is in practice, but theoretically this blanket can perform several functions: an envelope, a sleeping bag and just a blanket. Well, let's save some money ?!
BLANKET-transformer
Photo 2 shows a transforming blanket sewn by me for my baby. Inside, for warming, a lamb skin in a white duvet cover.
You will need:
cotton fabric 180 cm long with a width of 140-150 cm, synthetic winterizer (size depends on the number of layers, when calculating, use the size of the blanket pattern), 50 cm of elastic, 1 meter of bias tape and two zippers: detachable 50-55 cm long and regular 20-25 cm.
Details:
blanket - 2 parts;
pocket - 2 parts;
Operating procedure:
Draw a pocket pattern. Cut out the details of the blanket and pocket from the fabric with a 1-1.5 cm seam allowance, as well as a padding polyester layer. Fold the details of the "pocket" with the right side and sew along the side where it will later beelastic.
Turn it out, iron the seam and sew from the sewing edge at a distance of 1.5-2 cm. Insert the elastic into the resulting drawstring, fix it with pins at a length of 45 cm. Sew a "pocket" to the front of one piece of the quilt according to the pattern drawing.
Sweep the details of the blanket with padding polyesterlightningin the indicated places between the front sides of the blanket parts. Sew around the edge of the blanket, leaving a few centimeters unstitched. Turn the blanket inside out, sew the unstitched section on your hands with a blind stitch. Iron the edges of the blanket.
How to use:
Place the blanket "pocket" down. Close the split zipper halfway. Turn out the "pocket" thus closing the zipper. Now you can put the child in the "envelope". Close the zipper to the desired level. Close the top zipper, thus forming a cap on the child's head.
transformer blanket: Top - sewing, fleece inside, insulation - 2 layers of padding polyester.
SLEEPING BAG
For a newborn, a rounded shape of a bag with fasteners on the shoulders and a zipper along the side seam is suitable, which will make it easier to take the baby out and put it in the bag.
For kids olderyou can make a rectangular shape and sew a zipper in the middle of the front of the bag.
I offer a pattern for the smallest kids (up to about 4 months).
You will need:
cotton fabric, synthetic winterizer, bias tape, 90 cm long zipper and 2 buttons.
Details:
1 - before;
2 - back;
3 - bag.
Operating procedure:
Draw a sleeping bag pattern. Cut out the details of the bag from the fabric in a double, and from the padding polyester in a single copy with allowances for the seams of 1-1.5 cm. Cut out the top of the breast and back without an allowance.
Sweep the upper fabric pieces with similar padding polyester pieces. Gather the top of detail No. 3 up to 34 cm. Stitch the details of the "bag" with the "breast" and "back". Stitch the front of the bag with the back one at a timeside seam(before the start of rounding).
Baste the open zipper to the front of the bag top. Stitch the inner fabrics in the same way. Now, fold the inside of the bag over to the outside tops and sew along the hem from armhole to armhole. Turn over and iron the edge of the bag.
Sweep the upper sections of the chest and back (armholes, shoulder straps, neckline) and sew them with a bias tape. Sew loops on the front straps. Sew buttons to the back straps. The sleeping bag is ready. Decorate the breast of the bag with embroidery or applique if desired.
24.11.2002
Fig. 1 Sleeping bag
http: // bulav -ka .narod .ru / atel .files / model .files / detki / det 001.htm #
You will need:
Cotton fabric 150 cm wide with stripes and polka dots, 0.65 m long. Sintepon 150 cm wide, 0.65 m long.Elastic band 3 cm wide. 0.60 m. Rubber band 0.5 cm wide, 1 long , 40 m.
Seam and hem allowances:
I recommend 1.5 cm seam allowance. However, first cut open the bag parts that will be quilted into the cage with large allowances (5cm). After stitching the part, measure again and cut off the allowances up to 1.5 cm.Cut without allowances along the upper edge, 6 cm of facing are included in the length of the part.
Cut: (pic 2)
Fig 2 Fabric cutting
Detail of a bag 140 cm long, 55 cm wide in striped and polka dot fabric. 2 straps 55 cm long, 9 cm wide, finished 4.5 cm wide in striped fabric, do not forget about the seam allowances. From a padding polyester, cut out a rectangle equal to the details of the bag. Fold the striped part, the synthetic winterizer and the polka dot part and then sweep it with large basting stitches in a circle and in vertical rows.
Check stitch:
From thick paper or even better from fine sandpaper (it does not slip), make a pattern 1.00 m long and 5 cm wide. The length of this pattern depends on the longest stitch line. On fabric parts, mark the first line of the stitching line with basting stitches or tailor's chalk and sew along the marked line. For the rest of the stitching lines, place the pattern along the seam and sew exactly along the edge of the pattern. Stitch in the same direction if possible.
Sewing technique:
From the top edge of the quilted part of the bag, measure down 6 cm and mark with stitches a fold line for the drawstring under the elastic. Fold both parts of the bag face to face, sew on the sides, while on one side above the fold line, leave a 3 cm hole in the seam for threading the rubber band. Neaten seam allowances and overcast top edge.
For a drawstring under an elastic band, wrap a 6 cm wide facing inward, stitch at a distance of 4 cm from the top edge.
Fold the straps along the length with the right side inward and sew long sections. Unscrew the straps, iron the edges and stitch at a distance of 1 cm and 1.8 cm from the edges. Elastic tape 0.5 cm wide, cut into 4 pieces 35 cm each. Use a small safety pin to thread the elastic band between the stitching lines and into the straps. At the ends of the straps, sew the ends of the elastic bands horizontally. Neaten the ends of the straps.
Stitch the straps at a distance of 11 cm from the middle from the inside into the seam of the stitching of the drawstring to the front and back sides of the sleeping bag.
Use a large safety pin to thread the elastic band 3 cm wide into the drawstring and sew the ends of the elastic. Sew the hole in the side seam by hand.The patterns are taken from the indicated sites. The photo of the blue transforming blanket is mine. Sewn by me according to this pattern. Inside there is a lamb skin in a duvet cover, attached to the blanket with Velcro.
Who needs to strip off the patterns.
Does your child take off the blanket while sleeping? Does the baby wake himself up with pens? In this case, a sleeping bag will be a good help. It is suitable for both a newborn and an older child. Sewing a children's sleeping bag with your own hands is not at all difficult. In this article we offer patterns and sewing instructions.
Advantages and disadvantages of a baby sleeping bag: reviews
After studying the experience of many mothers who have used sleeping bags for babies, you can understand in advance if you need a sleeping bag.
- Keeps the baby warm as the baby does not unwrap during sleep.
- Helps the smallest children fall asleep faster and better, especially if the sleeping bag model allows you to fix the handles. Thus, it replaces the traditional swaddling, being much easier to use.
- Safer than a regular blanket, because it does not cover the baby's head.
- The baby can be fed at night without getting out of the sleeping bag.
- It is convenient for a walk, as it can be quickly put on and does not slip in the stroller.
- Takes up less space when folded compared to a blanket, so it is convenient when traveling.
- If the baby wet the sleeping bag, pee, then the product does not dry so quickly, unlike a diaper or blanket.
- Changing a baby's diaper can be problematic as you have to get your baby out of the bag. Although there are models in which it is more convenient to do this.
Requirements for a sleeping bag for a child
It is very important that the product is made from natural or hypoallergenic fabrics, especially if it is used at home and comes into contact with baby's skin. The sleeping bag must be suitable for the child's size. On some models, the legs and arms can move freely. In others, the handles are comfortably fixed. Check that the sleeping bag is suitable for the ambient temperature: the child should not overheat, this is no less harmful than hypothermia. The clasp must be secure, not scratching or pinching the baby's skin.
Varieties of sleeping bags
- An envelope bag, for example, for discharge from a maternity hospital. Convenient for walking. Among these models there are transformers, which turn into overalls as the child grows.
- Cocoon is a knitted bag that fits snugly and fixes the child's handles. Great for newborns, replaces the diaper, promotes faster falling asleep and sound sleep, can grow with the baby.
Bag to keep baby's hands free. It is suitable for older children who do not wake themselves up by throwing themselves up. A sleeved sleeping bag is a warmer version of such a product.
Children's sleeping bags for sleeping may differ in the type of closure: zipper, Velcro, buttons, buttons, ties. What should you choose?
The zipper is convenient to use, it can be quickly and easily zipped and unzipped. She is silent, does not wake up the child. Securely fixes the sleeping bag so that the baby does not unbutton. There are also disadvantages. It is rather difficult to sew on a zipper if there is no experience. It can break, seize the fabric, so you need to choose a quality mechanism. There is a risk that the zipper could pinch the baby's skin - protection must be provided.
Velcro is easy to sew on, even an inexperienced seamstress can handle it. Easy to fasten and unfasten, allow you to adjust the volume of the sleeping bag and use it for growth. However, when unbuttoned, they make a sharp sound, which can wake a sensitive infant. The hard part of the Velcro can scratch your baby's delicate skin, you need to be careful.
The buttons are accessible, reliable, safe, and also allow you to adjust the size of the product. The disadvantages are that they are not applicable to all models of sleeping bags. For example, they cannot be used on a cocoon.
Buttons combine the advantages of a zipper and velcro, one "but" - they are difficult to attach to the product, you need special equipment. Simple sewing ones are not so beautiful and reliable.
Baby sleeping bag patterns for sleeping
It is not at all necessary to spend money to buy a finished product. Sewing a children's sleeping bag with your own hands is not difficult at all. First you need to decide on the model and fabric.
To build a pattern for a sleeping bag with clasps on the shoulders, you can use the baby's existing clothes: a blouse, sliders, overalls. Attach them to the paper, add 15-20 cm to the length of the legs and draw a rectangle for the bottom. And add 5-7 cm to the top width for freedom of movement. The most difficult parts to cut out - the neckline and armholes - should be cut over the child's clothes.
You can also use ready-made templates and sizes.

The pattern of the cocoon bag is different from the model with clasps, but it is also not difficult to build it. You can circle the baby's pants by adding 10-20 cm to their length and 5-10 cm to the width. This is necessary for the baby's comfort. On the sides, draw rectangles of the same width as the previous part, and equal in height to the length from the knees to the child's shoulders. This is shown in the pattern below. If you want to make a bag with a hood, then the rectangles on top must be connected in a large semicircle so that the child's head fits into it.

Instructions for sewing an insulated baby sleeping bag with a zipper
Principles of creation different models similar. The differences will consist, first of all, in the presence or absence of a lining. And also in the method of sewing on the fastener. A lined product is more difficult to manufacture, but more comfortable to wear.

To sew a baby sleeping bag for sleeping you will need:
- Cotton fabric for the top and lining.
- Rolled synthetic winterizer or other insulation (for example, batting).
- Cotton bias tape.
- Zipper closure. The length will depend on the child's age: 50 cm - for 9-12 months, 60 cm - for 1.5-2 years old, 70 cm - for 3-4 years, 80 cm - for 5-6 years.
- Buttons (you can use Velcro or buttons).
- Pins, threads, scissors.
Sequencing:
- First, draw your pattern on paper. You should get a one-piece back and two front parts.
- Transfer the pattern from paper to fabric - outer, lining and insulation. Do it as shown in the picture. The printed fabric is the outside of the bag, the light green material is the lining, the brown material is the insulation. Do not forget to add seam allowances: to the side seams - 2 cm each, to all others - 1 cm each. Draw a cut line for the zipper on the front part of the lining. For clarity, it is indicated on the pattern.

- Sew the bias tape along the remaining open edges: neckline, armholes and back cutout. She will also fasten all three bags together.

- Attach the buttons or buttons to the hanger, grabbing all three layers of fabric.
The baby sleeping bag for sleeping is ready!
Judging by the reviews, this handy item has helped many mothers to improve their babies' sleep. Try it too!
The sleeping bag for the child is a variant of the envelope and allows you to go for a walk with the child, providing him with maximum comfort. The article provides a pattern for the simplest sleeping bag, but you can add a warmer lining to it (initially increasing the size of the sleeping bag itself by an average of 1-2 cm if necessary) or decorate with beautiful details.
You can choose a thin fabric, and if you want to immediately make the envelope warmer and more wintery, give preference, for example, to a chintz with a sintepon lining.
To make such a sleeping bag, you need 1.1 m of fabric 1.2-1.4 m wide or 2.1 m 90 cm wide.
Necessary measurements, cm:
Neck girth 24 (12)
Bust 46 (23)
Sleeping bag length 70
The drawing starts from a vertical line on which a length of 70 cm is laid
1-2 \u003d 70 cm;
1-3 \u003d 2-4 \u003d% of chest measurement (23 cm) minus 1 \u003d 22 cm.
From point 2 to the left, lay the length of segment 1-3, equal to 22 cm.From point 3, continue horizontal line, on which 22 cm is laid (segment 3-5). From point 5, a perpendicular 70 cm long is lowered (segment 5-6). Points 6 and 4 are connected. A perpendicular is lowered from point 3. From point 1 to the left, lay half the line of the neckline of the back of the bag. This is 1/3 measurements of half the neck circumference plus 2 cm and minus 6 cm (point 7).
From point 1 on the line of the middle of the back, 1/2 of the width of the neck is laid (segment 1-7), i.e. 3 cm (point 8). From point 7, draw a line of shoulder length equal to 10.5 cm (point 9). On the lateral line (auxiliary), lay 6.5 cm from point 3 (point 10). From point 9, the shoulder line is underestimated by 1 cm. The width of the front neckline is set aside from point 5 - this is 1/3 of the measurement of half the neck circumference plus 2 cm, i.e. 6 cm (point 11). On the line of the middle of the front, the depth of the neck is laid in front - this is 1/3 of the measurements of half the girth of the neck plus 2 cm, i.e. 6 cm (point 12). Segment 11-13 - shoulder length equal to 10.5 cm.
From point 13, the shoulder line is underestimated by 1 cm. From point 6, the bottom line is lengthened by 8 cm, the end of the obtained segment is connected to point 12. From points 2 and 4, the line of the middle of the back and the auxiliary side line are lengthened by 8 cm.
To build the hood from point 5, lengthen the auxiliary line of the middle of the front by 25 cm (point 14). From point 14 lay the width of the hood equal to 17 cm (point 15). A perpendicular is lowered from point 15 and point 16 is set at a distance of 4 cm from point 13. From point 16 to the left, 3 cm are laid (point 17).
Points 17 and 11 are connected. From point 11, 3 cm are laid and the depth of the dart is 2.5 cm. From the point of the middle of the dart, a vertical line is laid up 7.5 cm. From point 14, the line of the upper cut is lengthened by 2 cm (point 18). Points 18 and 12 are connected. From point 18 down 2 cm - the outer line of the hood.
When cutting, line the middle of the back to the fold of the fabric. For allowances from 1 cm to 1.5 cm, depending on the fabric. Source: "Clothes for children" RIGA "RIA" Moscow TKO "AST" 1993
A source
Does the baby reveal itself in a dream? Waking up tangled up in a blanket? You just need a sleeping bag. Until recently, they did not even hear about this thing, but today it is simply indispensable for a calm sleep of a baby.
Finding it in the store is quite difficult, and it costs a lot. Try to sew a sleeping bag with your own hands, even a beginner can do it, using the detailed guide.
Consider the main points for making a sleeping bag.
- The envelope should last some time, so we make the pattern more than the child.
- The most convenient option is sleeveless, with a detachable shelf.
- Install a zipper on the side. So it is more convenient to put the baby in a sleeping bag.
- The choice of color and texture at your discretion. We use only natural fabrics for manufacturing.
- For the front and lining, we cut out parts of the same size.
We prepare materials for work.
- The cloth ( the best way 100% cotton);
- Sintepon;
- Lightning;
- Slanting binding;
- Buttons.
If everything you need is ready, we can start manufacturing.
- We make a pattern. We cut it out in the form of a bell. The width of the shelf is equal to the girth of the child's chest, the length of the shelf is the distance from the shoulder to the waist. The length of the bag is equal to the height of the child, so it will be as comfortable for him as possible. The bottom should be as free as possible and not hamper the baby's movement during sleep.
- There is a lock on the front of the sleeping envelope, do not forget about this when cutting out the parts.
- We transfer the pattern to the material with an allowance of 1-2 cm. All the details, except for the padding polyester and the shelf, are cut out in 2 copies for the front and back sides. We cut out the synthetic winterizer only for the bag
- We sew the details of the lining of the bag with padding polyester. We fold the inner part from the front side and sew it up to the connection line with the shelf. We turn out the details of the bag and iron the edge.
- We sharpen the details of the shelf (sides, straps and neck). Turn out and align the edges.
- We connect the shelf and the bottom.
- We stitch the front of the sleeping envelope from the back, along the side seam on one side. Sew on the open zipper from the other edge. Turn out and iron all the edges.
- We sweep the loops on the front straps. We sew buttons to the straps of the back.
- If you are making an envelope for a baby, it is better to make all the seams external, and for beauty, process them with an oblique inlay.
- The main work has been done. Now you can start decorating. The sleeping bag can be decorated with decorative appliques or embroidery, here everything is within your imagination.
Such a sleeping bag can be sewn for any season, experimenting with the texture of fabrics and filler. Good sleep is the key to health. Be healthy.


